

Handmade Halloween decor can look polished, intentional, and far more expensive than the materials used to create it. These DIY Halloween decorations focus on precise construction, refined color palettes, realistic finishes, and clean details that help home projects move beyond the typical craft-store appearance.
You will learn how to create textured artwork, sculptural objects, architectural accents, table details, soft furnishings, and decorative lighting with practical materials and approachable techniques. Each project includes useful guidance on preparation, assembly, stability, and finishing. In my experience, careful edges and restrained metallic highlights contribute more to a premium result than complicated supplies. Whether you are a confident beginner or a regular crafter, these ideas will help you create distinctive seasonal pieces worth displaying again.
Table of Contents
Finish Sample Board
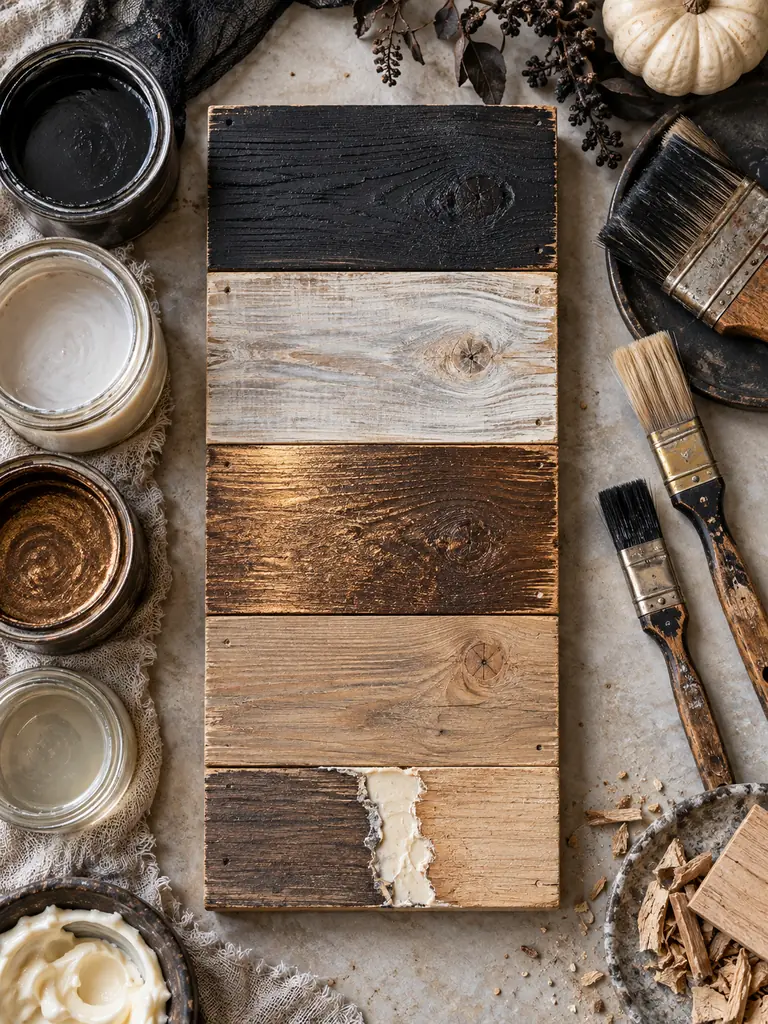
A small test board can prevent expensive mistakes before they reach the final project. Divide a piece of scrap wood or heavy card into labeled sections, then apply each paint, metallic wax, adhesive, and protective finish exactly as you plan to use it.
Allow every sample to cure fully before checking color, sheen, flexibility, and adhesion under daylight and warm evening light. In my experience, finishes often appear different after drying, especially on porous materials. Keep the board nearby while completing your DIY Halloween decorations so every handmade piece maintains a consistent, polished appearance.
Apply the same careful testing outdoors with these Weather-ready Outdoor Halloween Projects designed for porches, railings, doors, and sheltered entrance areas.
Limewashed Moon Canvas
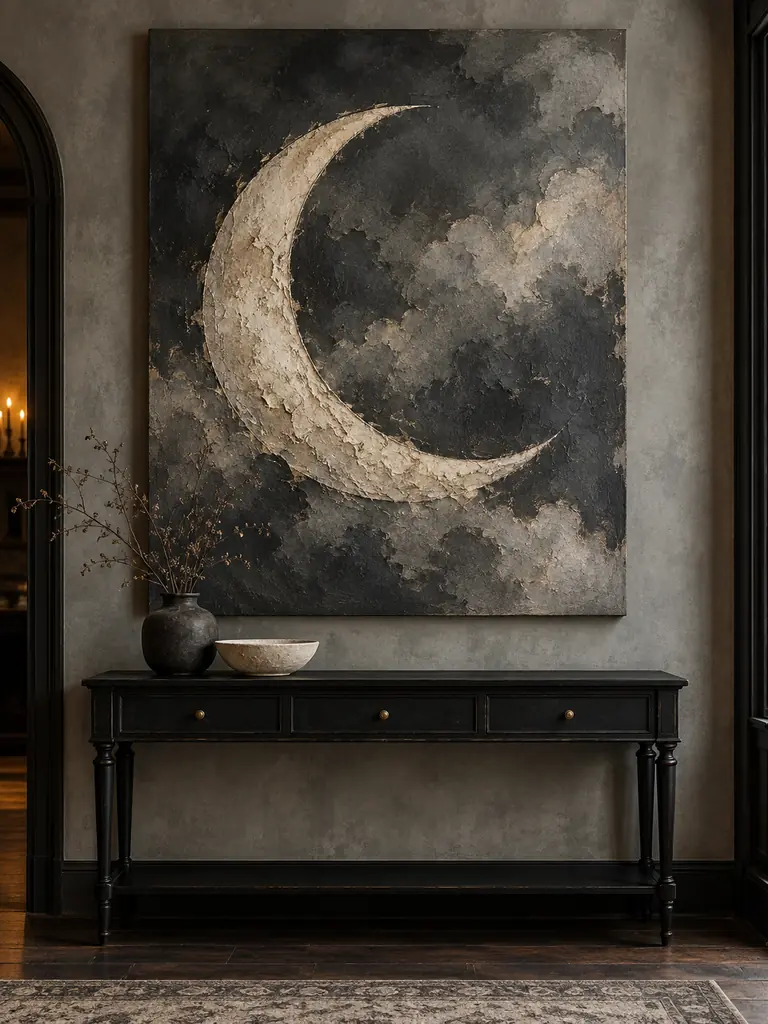
- Sketch a large crescent lightly with chalk so unwanted guide marks remain easy to remove.
- Build the background with thin charcoal and cloudy gray washes rather than one flat coat.
- Apply bone-colored paint unevenly across the moon to suggest natural surface variation.
- Blend edges with a dry brush while each layer remains slightly damp.
- Seal the finished canvas only after testing the protective coating on spare material.
Layered washes create depth that solid paint cannot reproduce, helping inexpensive canvas resemble aged decorative artwork. Keep the palette restrained and leave portions of the base visible between strokes. Hang the completed piece where side lighting can reveal its texture without producing glare across the painted surface.
Fluted Display Plinths
Quick Tip:
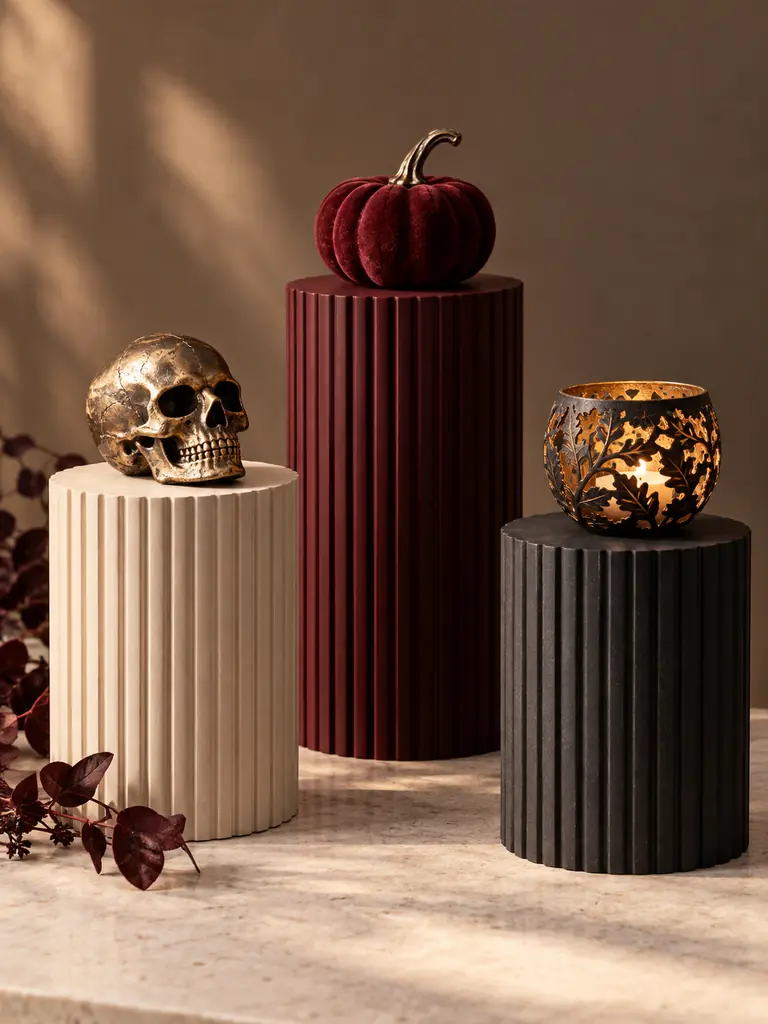
Use sturdy mailing tubes or construction cylinders with level ends, then attach circular tops that extend only slightly beyond the base. Test each pedestal with a heavier object than the intended decoration before painting it.
Vertical ridges give simple forms an architectural finish while matte paint helps conceal inexpensive materials. Space narrow wood strips or flexible molding evenly around the cylinder, fill visible joins, and sand rough edges before applying primer. Reserve the completed plinths for lightweight pumpkins, ornaments, or artwork rather than fragile valuables.
Embossed Moth Plaques
BEFORE: Flat painted insects can appear printed or unfinished, especially when displayed on small plain panels. Thick decorative details applied without a guide may also look uneven.
AFTER: Raised moth forms create visible dimension beneath an aged-metal finish. Matching panel sizes, centered placement, and softly darkened edges make the set feel intentionally designed.
Dimensional medium works best in thin controlled layers, so allow each section to dry before building additional height. Apply matte black paint first, then brush pewter or bronze wax only across raised areas. The resulting contrast highlights the wings while keeping the plaques restrained enough for a coordinated wall arrangement.
Embossed Moth Plaques
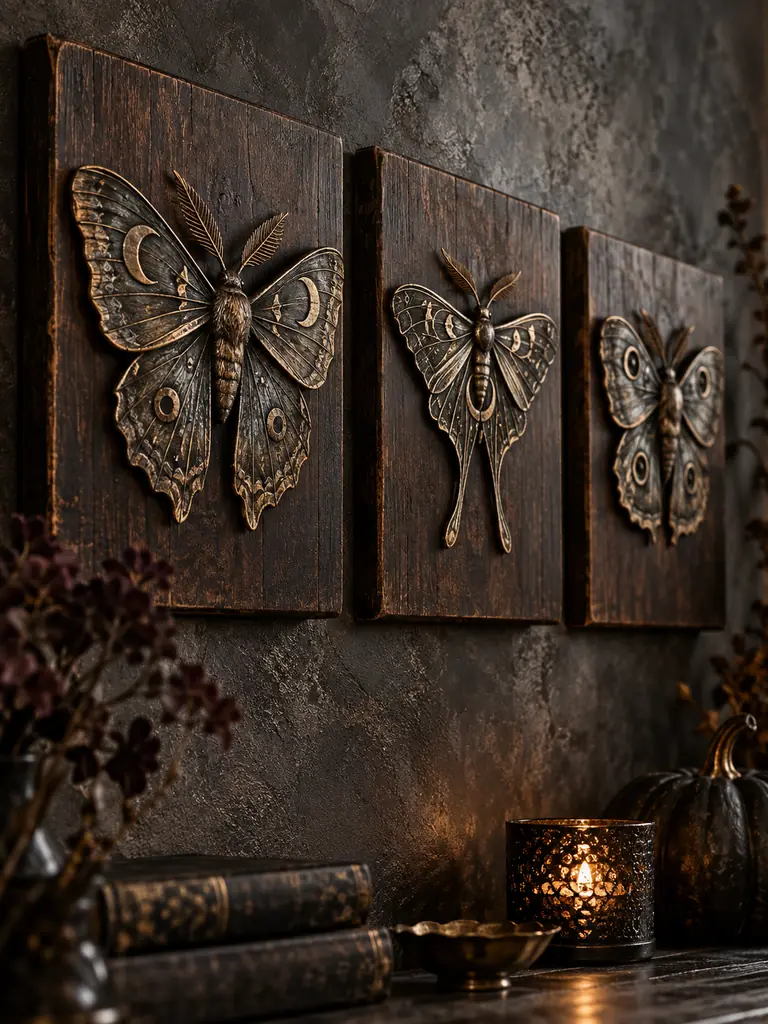
BEFORE: Flat painted insects can appear printed or unfinished, especially when displayed on small plain panels. Thick decorative details applied without a guide may also look uneven.
AFTER: Raised moth forms create visible dimension beneath an aged-metal finish. Matching panel sizes, centered placement, and softly darkened edges make the set feel intentionally designed.
Dimensional medium works best in thin controlled layers, so allow each section to dry before building additional height. Apply matte black paint first, then brush pewter or bronze wax only across raised areas. The resulting contrast highlights the wings while keeping the plaques restrained enough for a coordinated wall arrangement.
Bronze Hand Sculpture

- Choose a stable hand mold or shape a lightweight form over a secure internal support.
- Smooth seams and surface dents before applying a primer suitable for the base material.
- Cover the form with matte dark brown paint and allow it to dry completely.
- Brush bronze pigment lightly across raised knuckles, fingertips, and edges.
- Seal the surface and attach the sculpture to a weighted base.
Layered color makes the hand appear aged rather than freshly spray-painted. Keep darker paint inside creases and use metallic highlights sparingly where natural handling would create wear. Position the finished sculpture on a console or shelf where it cannot be mistaken for a support, handle, or functional object.
Pleated Paper Rosettes
| Detail | Thin Craft Paper | Heavy Art Paper |
|---|---|---|
| Fold definition | Soft and easily crushed | Crisp and structured |
| Hanging stability | May curl over time | Holds its shape longer |
| Center finish | Often needs extra support | Accepts layered centers neatly |
| Best use | Short party display | Refined seasonal wall grouping |
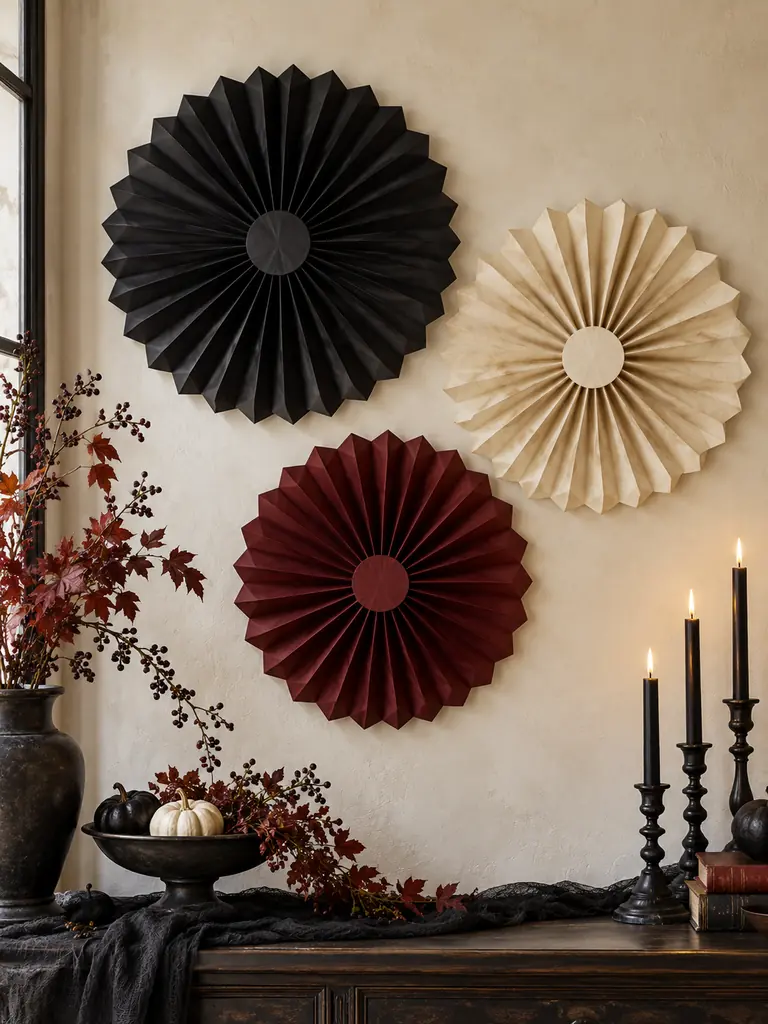
Precise folds and concealed joins determine whether paper rosettes look polished or improvised. Score equal intervals before folding, join the ends from behind, and cover the center with a clean circular insert. Limit the display to three related sizes so black, parchment, and oxblood remain visually balanced.
For more approachable projects using colorful paper and familiar household items, explore these Simple Halloween Decor Ideas designed for quick seasonal styling.
Black Rope Pumpkins
DO
- Select a firm pumpkin form that will not collapse under tension.
- Begin wrapping at the base and keep each rope row tightly aligned.
- Conceal the final rope end beneath a separate stem detail.
- Use matte cotton rope for a softer, more refined surface.
DON’T
- Wrap fresh pumpkins that may soften or decay.
- Leave hot glue strings visible between the rope rows.
- Stretch the material so tightly that the form becomes distorted.
- Place finished pieces beside flames or active heat sources.
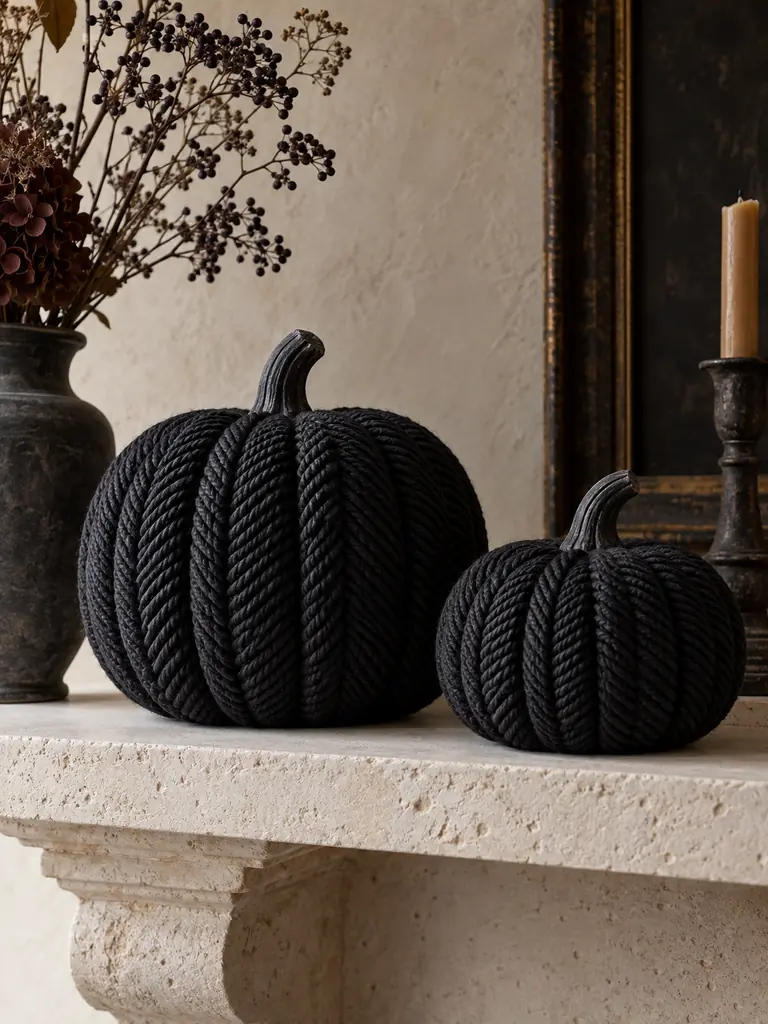
Rope adds consistent texture that catches side lighting without the shine associated with plastic decorations. Work in short sections, pressing each row into position before the adhesive cools. A small group of two differently sized pumpkins usually appears more considered than several identical forms covering an entire table.
Continue the refined seasonal theme with these Expensive-looking Halloween Home Decor ideas featuring controlled colors, rich textures, and carefully styled displays.
Gothic Window Panel
Cost: Moderate, depending on the translucent insert
Time: One afternoon plus drying time
Skill Level: Confident beginner
Best For: Covered windows, blank walls, or temporary event backdrops
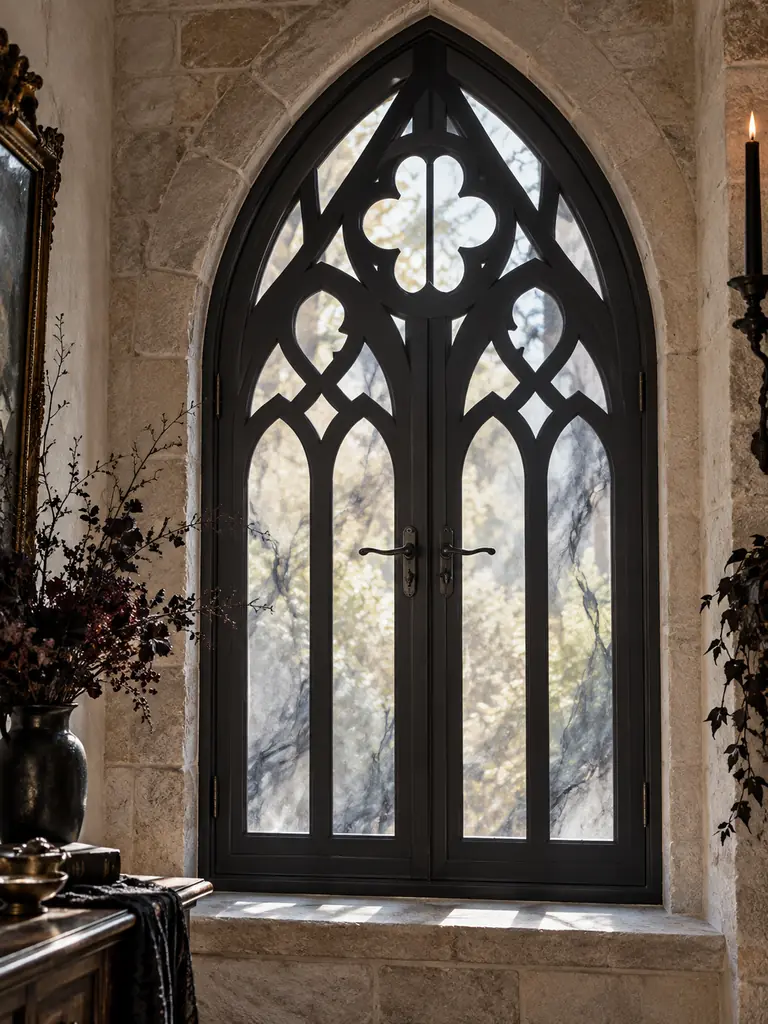
A pointed-arch panel introduces the look of custom architecture without permanently altering the window. Cut the frame from rigid lightweight board, reinforce narrow areas, and attach the translucent insert from behind. Mount it with hardware rated for the combined weight, keeping locks, handles, ventilation, and emergency access completely clear.
Use the same architectural approach around your fireplace with these Halloween Mantel Styling Ideas designed for a polished, upscale seasonal display.
Beaded Spider Rings
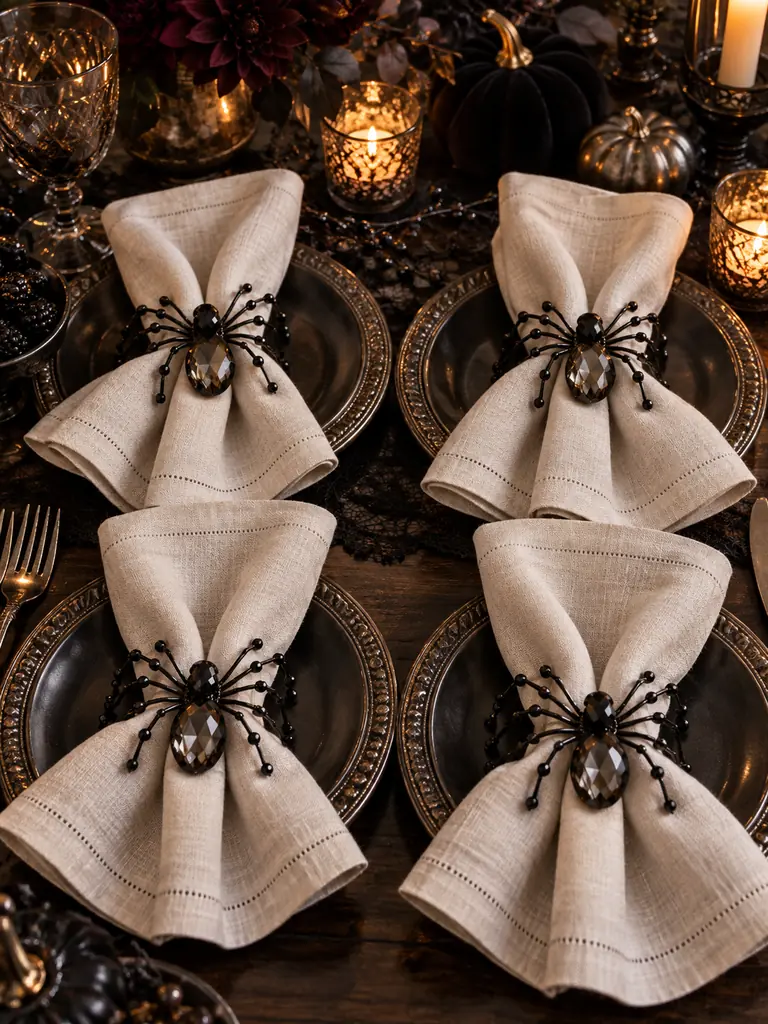
Delicate beadwork can suggest a spider without turning the dining table into a novelty display. Shape a continuous wire base around a sizing cylinder, then form four balanced leg pairs from shorter pieces. Select faceted black beads and one smoky glass center bead for controlled sparkle.
Tuck every wire end inward and test the ring against fabric before placing it around a napkin. The finished piece should slide on without catching threads or feeling sharp. Create matching proportions across the set, but vary one bead detail slightly so the handmade character remains visible and intentional.
Use the finished napkin rings inside a complete setting with these Elegant Halloween Table Decor Ideas designed for comfortable dining and striking presentation.
Tassel Moon Mobile

- Cut several crescent shapes from lightweight material and finish both sides cleanly.
- Make compact tassels with evenly trimmed ends in black, oxblood, and parchment.
- Arrange every piece on a flat surface before attaching it to the frame.
- Balance the mobile from its center point and adjust each cord gradually.
- Hang it beyond normal reach, away from fans, heaters, and open flames.
A mobile looks refined when its movement remains gentle and its hanging cords appear orderly. Use clear line or matching dark thread, secure every knot, and inspect the frame for bending before installation. Keep the arrangement compact enough that crescents and tassels never strike nearby walls, lights, or furniture.
Checkerboard Urn Finish

Quick Tip:
Wrap a paper grid around the planter before drawing any paint lines. Adjust the square dimensions where the vessel narrows so the pattern remains visually balanced rather than forcing perfectly equal blocks onto a curved surface.
Measured spacing is what makes a hand-painted checkerboard appear deliberate. Prime the planter, apply the lighter base color, and mark every dark square with low-tack tape before painting. Remove the tape while the final coat is slightly soft, correct uneven edges with a small brush, then seal the surface appropriately.
Vellum Moon Lantern
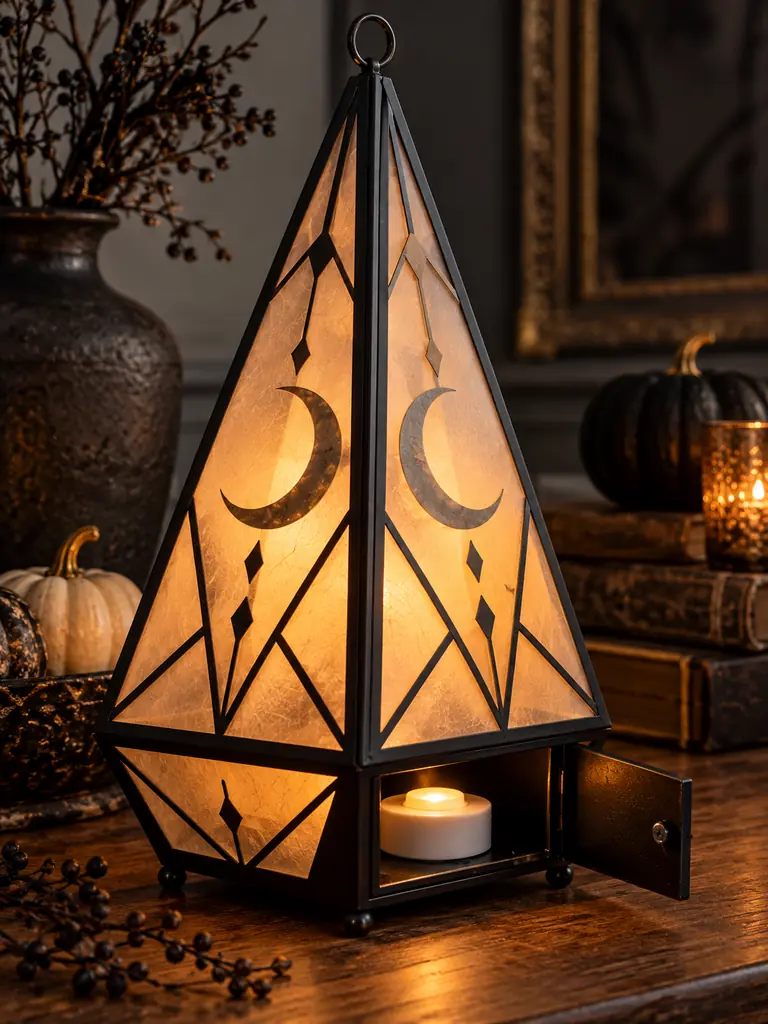
BEFORE: Thin paper is wrapped around an exposed light or placed inside a weak frame, creating uneven illumination and unnecessary heat or fire risk. Loose edges also make the project appear unfinished.
AFTER: Translucent vellum panels sit inside a rigid geometric structure with clean corners. A cool battery light remains enclosed in a separate accessible compartment.
A well-built lantern depends more on structure than ornament. Reinforce the base, conceal adhesive along interior seams, and create a removable panel for the battery compartment. Use only a cool LED unit intended for enclosed decorative use, then monitor the lantern during its first extended lighting test.
Scalloped Shelf Valance
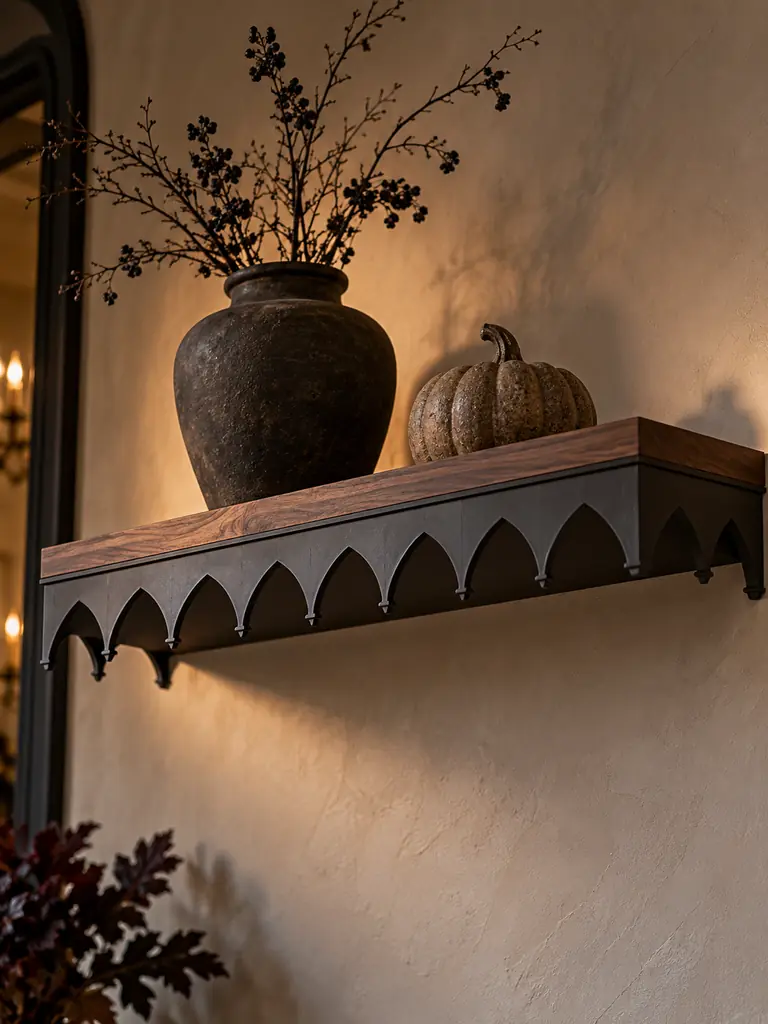
- Measure the visible shelf width and check the clearance beneath it.
- Draw one gothic curve template, then repeat it across a lightweight strip.
- Cut each scallop carefully and sand or seal every exposed edge.
- Paint the front, back, and underside for a complete finish.
- Attach the valance with removable fixings suited to the shelf material.
Repeated curves add a custom furniture detail without placing more objects on the shelf itself. Keep the strip shallow enough to preserve headroom, lighting, and access to anything stored below. Before installation, view the painted valance from standing and seated positions to confirm that no unfinished edge remains visible.
Stitched Crescent Cushion
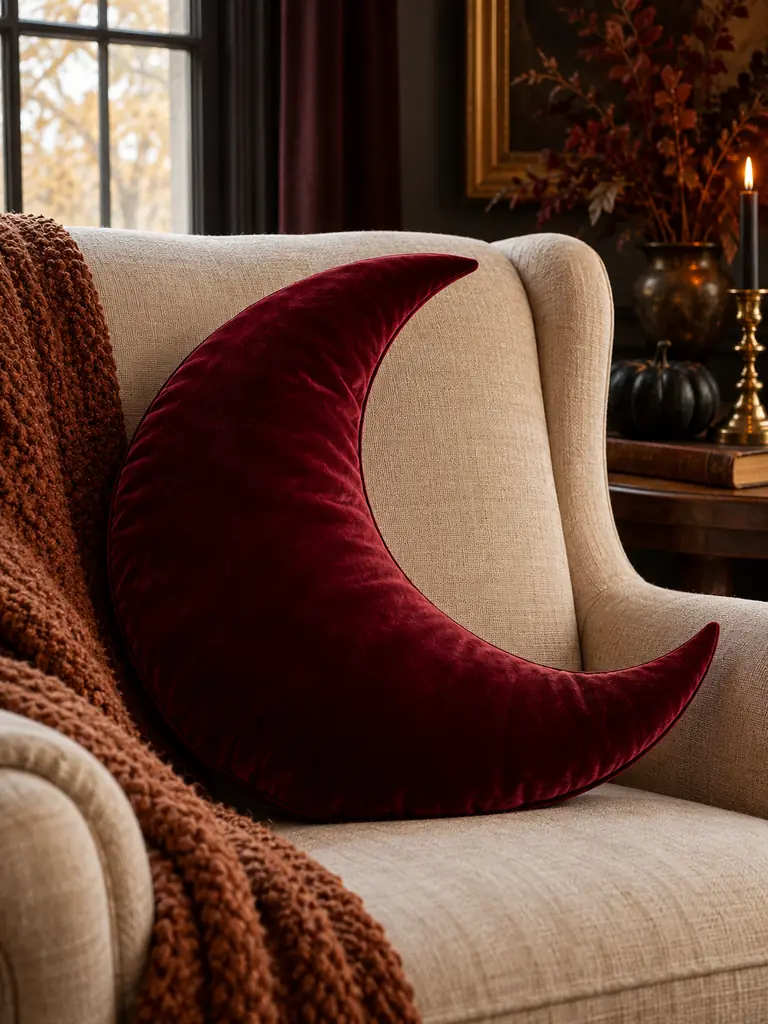
| Detail | Loose Decorative Shape | Structured Crescent Cushion |
|---|---|---|
| Fabric choice | Thin material may wrinkle | Heavy fabric holds the outline |
| Filling | Uneven clumps distort curves | Small portions create firm support |
| Seam finish | Exposed stitches look casual | Concealed closure appears tailored |
| Best placement | Temporary party chair | Sofa, bench, or reading corner |
A crescent cushion feels more polished when both points remain defined and the inner curve stays smooth. Clip curved seam allowances before turning the cover, then add filling gradually from each end toward the center. Hand-close the opening with small hidden stitches and inspect the shape from every angle before styling it.
Leather Leaf Spray
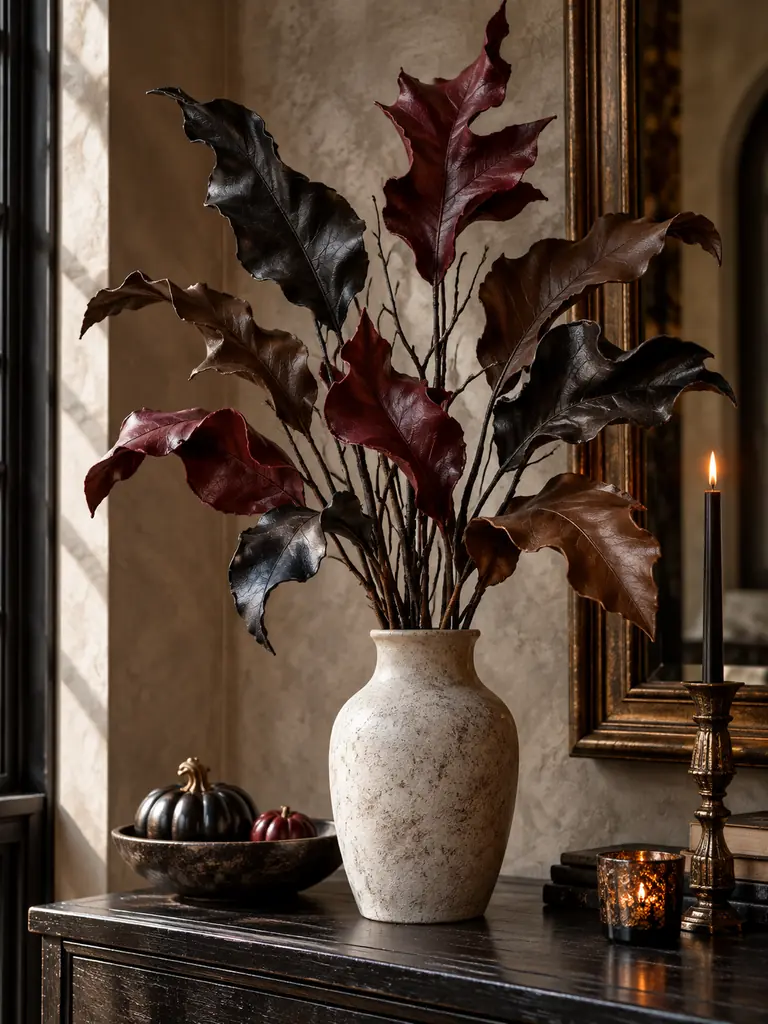
DO
- Use faux leather thin enough to cut and shape safely.
- Make two or three leaf sizes from reusable templates.
- Attach each leaf firmly to wrapped floral wire.
- Arrange the stems before placing them inside the vessel.
DON’T
- Apply direct flame or uncontrolled heat to the material.
- Leave sharp wire ends exposed beneath the leaves.
- Crowd the branch with identical shapes at equal intervals.
- Place the finished spray where children can pull it down.
Faux leather provides rich color and a subtle sheen that ordinary paper cannot easily imitate. Warm pieces only according to the manufacturer’s guidance, curve them gently, and vary their direction along each stem. A narrow arrangement in oxblood, espresso, or muted black creates lasting seasonal texture without dried-leaf debris.
Marbled Serving Board
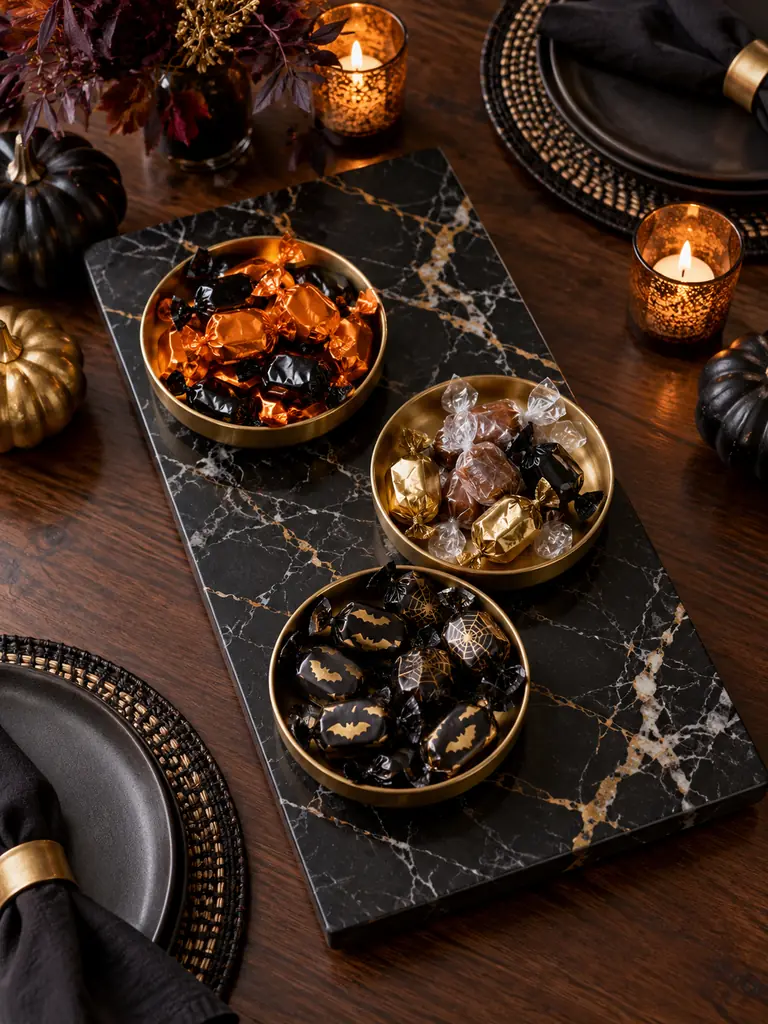
Cost: Low to moderate, depending on the board and coating
Time: About one hour plus full curing time
Skill Level: Intermediate finish work
Use: Displaying individually wrapped treats only
Dark veining can give a plain board the appearance of stone, but decorative coatings should never contact unwrapped food unless specifically certified for that purpose. Paint only a board reserved for display, follow every curing instruction, and place wrapped sweets inside removable dishes rather than directly on the finished surface.
Miniature Easel Gallery

Small matching easels give inexpensive artwork the visual importance of a planned exhibition. Cut each support from the same material, use one template for consistent angles, and build a rear leg that opens far enough to prevent tipping. Sand every edge before applying the chosen finish.
Display three original prints in related colors but different compositions, leaving space between each easel. Keep the artwork slightly varied in height by changing the easel dimensions rather than stacking unstable objects underneath. This compact gallery can decorate a console, desk, or mantel while remaining easy to relocate.
For more creative projects made with accessible supplies, browse these Cheap Halloween Decorations that produce impressive results without stretching the budget.
Edge and Join Inspection

- View every project in daylight to locate glue residue, rough cuts, dents, and uneven paint.
- Turn each piece around and finish any back or underside visible during normal use.
- Test bases, hanging points, seams, and hardware with gentle controlled pressure.
- Touch up minor flaws with the original materials rather than introducing a mismatched finish.
- Remove exposed wires, adhesive strings, pencil marks, and temporary supports.
Careful inspection is what separates a convincing handmade object from a rushed craft. In my experience, photographing each piece from several angles reveals flaws that are easy to overlook in person. Complete repairs before styling the decorations, then test their stability again in the exact location where they will be displayed.
Practice these finishing checks on inexpensive supplies with these Budget Halloween Decor Projects, which use clean joins, matte paint, and controlled details to make simple store finds look more polished.
Conclusion
High-end handmade decor comes from careful preparation, balanced proportions, and patiently finished details rather than costly materials. These DIY Halloween decorations show how paint layers, texture, precise folds, concealed joins, and thoughtful placement can produce a refined seasonal result. Start with one project that matches your current skills, test every material, and allow finishes to cure properly. I have seen simple projects become display-worthy after one final inspection corrected rough edges and visible adhesive. Save this collection on Pinterest, try your favorite design, and share the article with a friend who enjoys sophisticated seasonal crafting.