

A memorable Halloween porch needs more than decorations that look appealing for one afternoon. These DIY Outdoor Halloween Decorations combine strong visual ideas with weather-aware materials, secure installation, safe placement, and practical storage so your handmade projects can remain attractive throughout the season.
Inside, you will find distinctive projects for doors, railings, porch posts, planters, lights, drainage areas, and sheltered overhead spaces. Each idea explains how to protect useful access, reduce wind movement, manage moisture, and preserve clear walking routes. In my experience, outdoor projects last longer when testing and anchoring are planned before painting begins. Whether your porch is compact or spacious, these ideas will help you create a creative entrance that feels welcoming, original, and thoughtfully constructed.
Table of Contents
Outdoor Finish Test Tiles
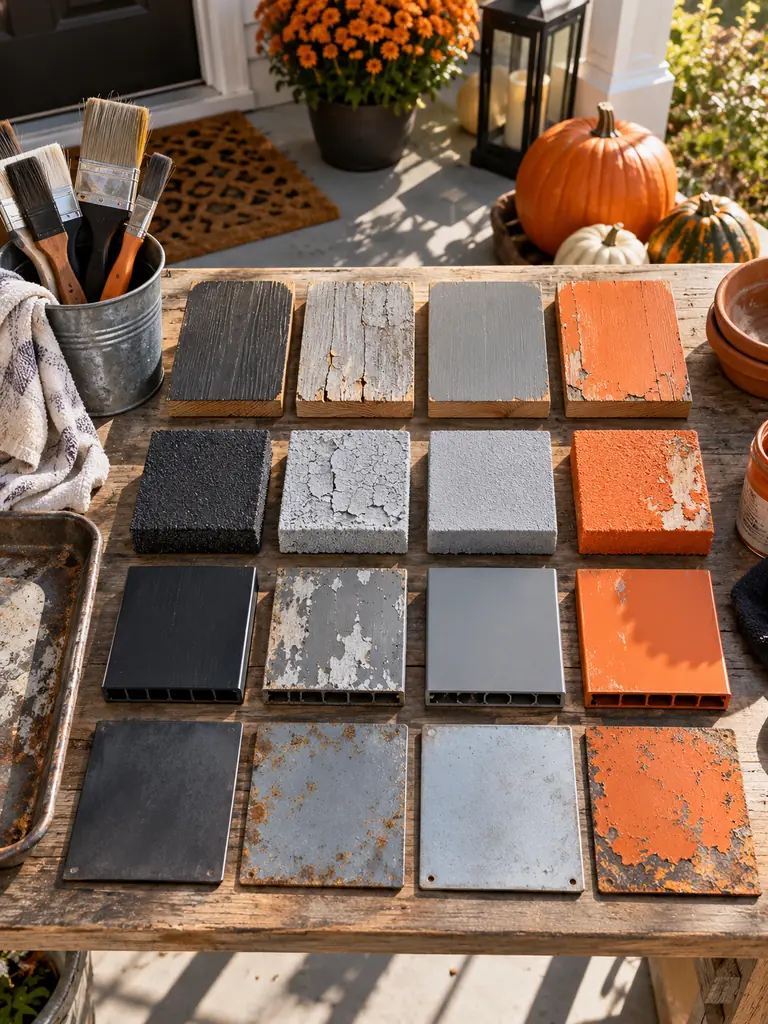
Outdoor projects often fail because materials are judged indoors rather than under real porch conditions. Prepare several small tiles from the same wood, foam, wire, or plastic planned for the final pieces. Apply different primers, paints, adhesives, and sealers, then label the backs clearly.
Place the samples in a sheltered outdoor spot for several days and inspect them after sun, dew, and temperature changes. In my experience, this simple test exposes peeling, soft adhesive, and color fading early. Keep the strongest combination recorded for future DIY outdoor Halloween decorations and seasonal repairs.
For more polished handmade projects focused on clean construction and refined finishes, explore these High-end DIY Halloween Decorations for seasonal indoor displays.
Plywood Cat Sentinels
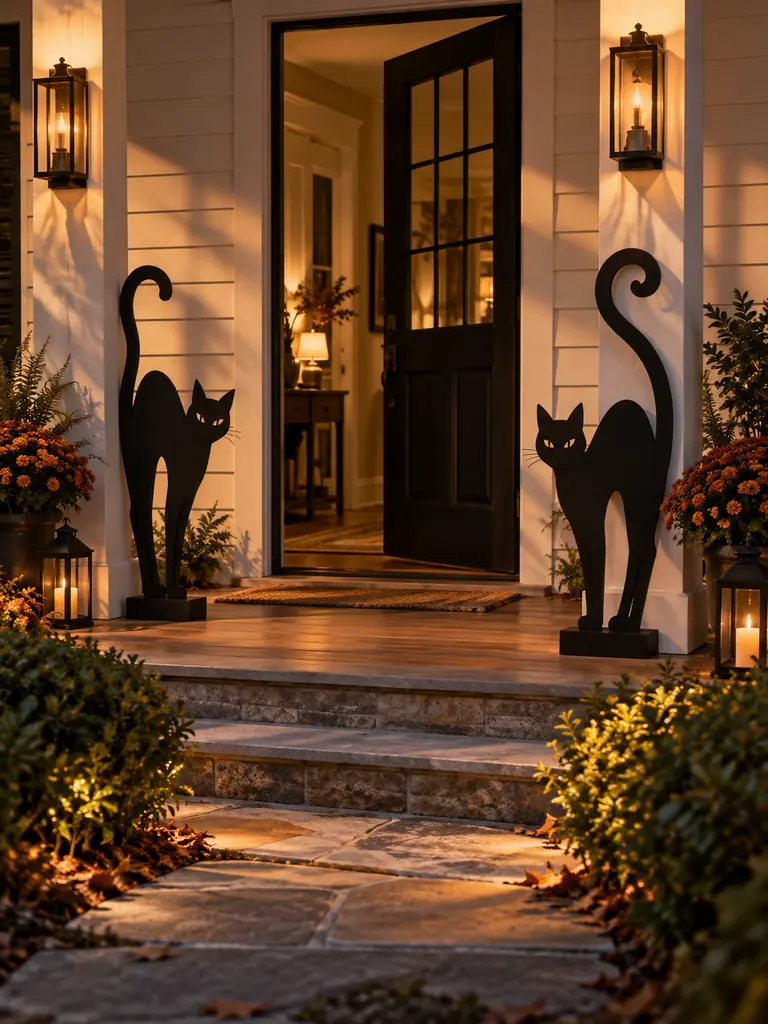
- Draw two cat silhouettes with different ear, tail, and back positions for a less manufactured appearance.
- Transfer the outlines onto exterior-grade plywood and cut them with appropriate eye and hand protection.
- Sand every edge before applying outdoor primer and matte black exterior paint.
- Attach each figure to a broad base or concealed ground support suited to the porch surface.
- Keep the silhouettes outside door swings, handrails, and normal walking routes.
Slim cat figures create strong outlines during daylight and become dramatic shapes beneath porch lighting after sunset. Face them slightly toward the guest approach rather than placing them completely flat against a wall. Inspect the bases after windy weather, and touch up exposed plywood quickly before moisture reaches the inner layers.
Complete the entrance with these Front Porch Halloween Decorating Ideas featuring coordinated displays for doors, steps, railings, windows, and guest pathways.
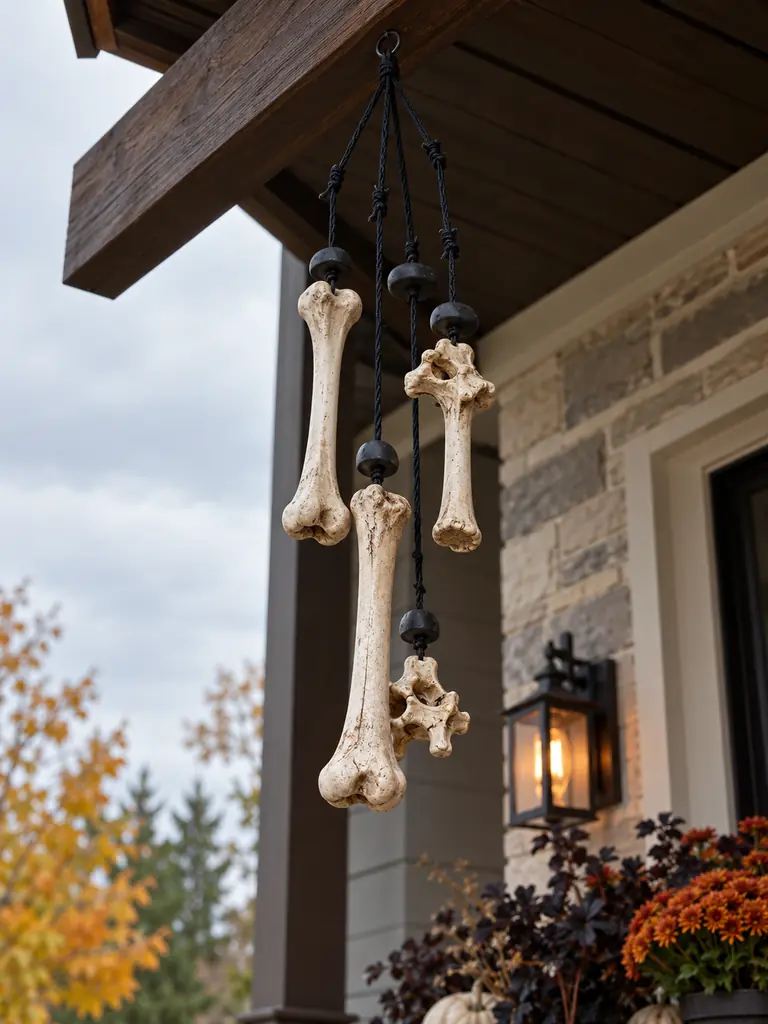
Bone Chime Cluster
Quick Tip:
Choose lightweight faux bones and tap them together before assembly to check the sound. Use short outdoor cords and soft spacers so the finished cluster produces a gentle movement instead of loud, repetitive knocking.
A controlled chime introduces motion without relying on electrical lighting or fragile hanging pieces. Seal painted surfaces, secure every knot, and suspend the cluster from a hook rated for outdoor use. Keep it away from doors, windows, and neighboring homes where repeated sound could become disruptive during windy nights.
Stacked Pumpkin Topiary
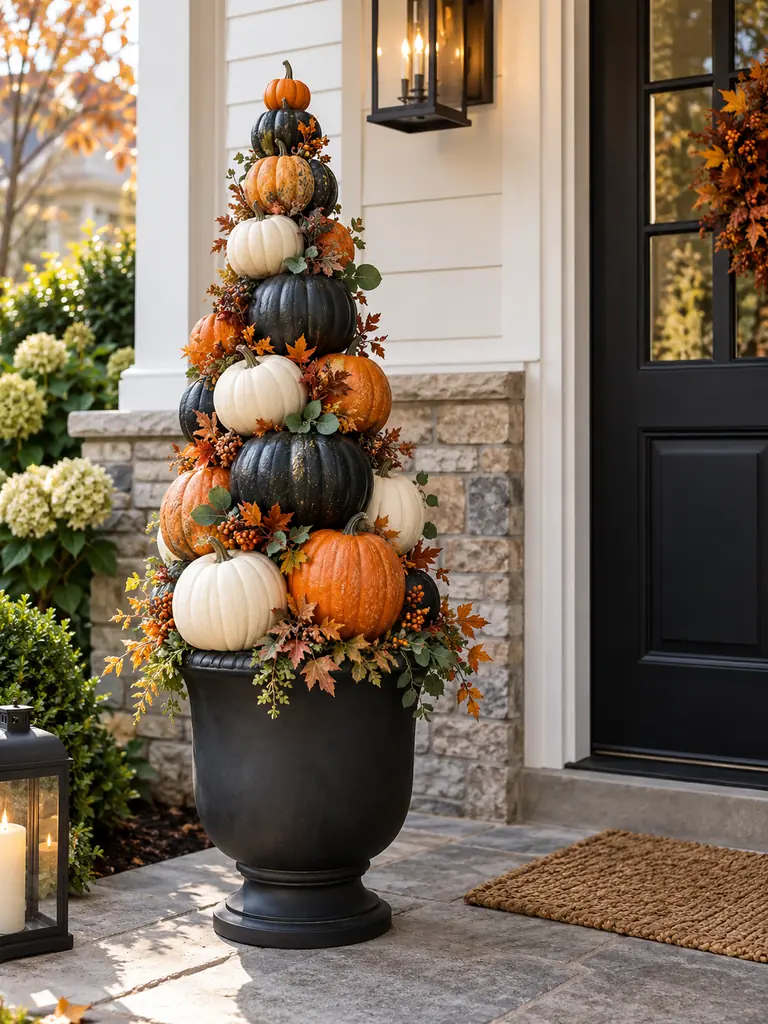
BEFORE: Several lightweight pumpkins occupy a wide section of the porch and shift independently during windy weather. Similar sizes placed together create a low, visually flat arrangement.
AFTER: Pumpkins rise around one concealed central support, progressing from a broad base to a smaller top. The compact structure gains height while leaving more walking space available.
A topiary needs internal support rather than adhesive alone. Use a wide weighted container, a rigid center rod, and secure connections appropriate for the pumpkin material. Rotate the faces and stems slightly as the tower rises, then test the completed structure outdoors before placing it near the entrance.
Skull Moss Planter
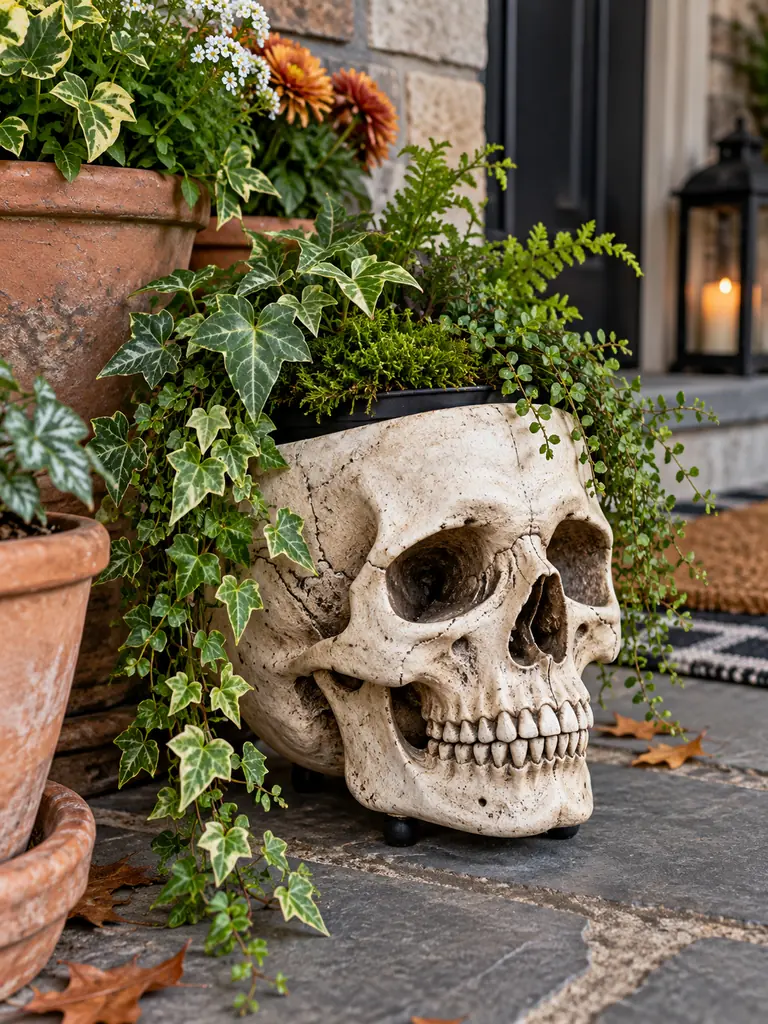
- Choose a hollow skull container with enough depth for a removable inner pot.
- Add discreet drainage openings only if the outer material can be drilled safely.
- Place the plant inside a waterproof liner or fitted nursery pot.
- Cover visible gaps with preserved moss or outdoor-safe artificial greenery.
- Raise the planter slightly so water cannot collect beneath it.
Greenery softens the skull shape and helps the display feel integrated with existing porch plants. Use faux foliage where light, temperature, or watering conditions are unsuitable for living plants. Keep preserved moss sheltered from direct rain, and remove the inner pot before watering to protect the decorative container.
Monster Door Teeth
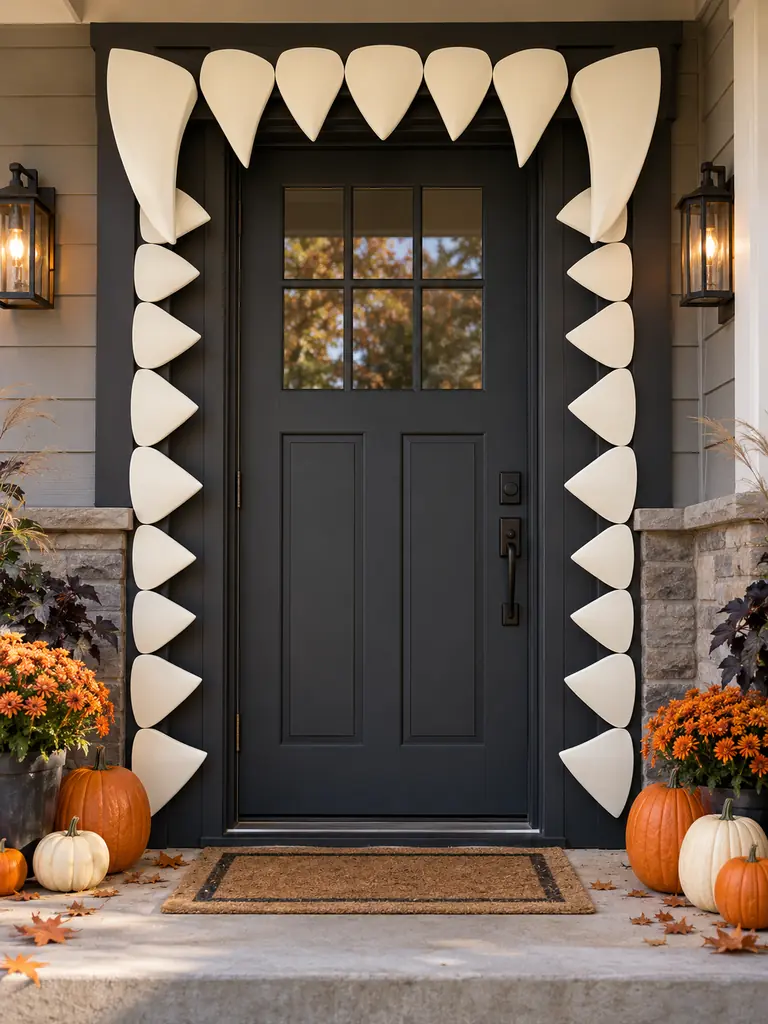
| Detail | Indoor Craft Foam | Exterior Foam Board |
|---|---|---|
| Moisture resistance | Warps easily | Handles sheltered exposure better |
| Edge strength | Tears under movement | Maintains a cleaner tooth shape |
| Attachment | Light removable tape | Outdoor-rated removable fasteners |
| Best use | Short indoor display | Covered porch doorway |
Oversized teeth create a playful entrance with fewer pieces than a fully decorated door. Mount them on the surrounding frame, not on weather seals, hinges, locks, or moving edges. Open the door completely after installation and view the arrangement from both directions to confirm that nothing catches or blocks access.
For more ways to make your front door the spooky focal point, explore these Halloween front door decor ideas featuring bats, wreaths, ghosts, gothic florals, and eerie accents.
Coffin Parcel Marker
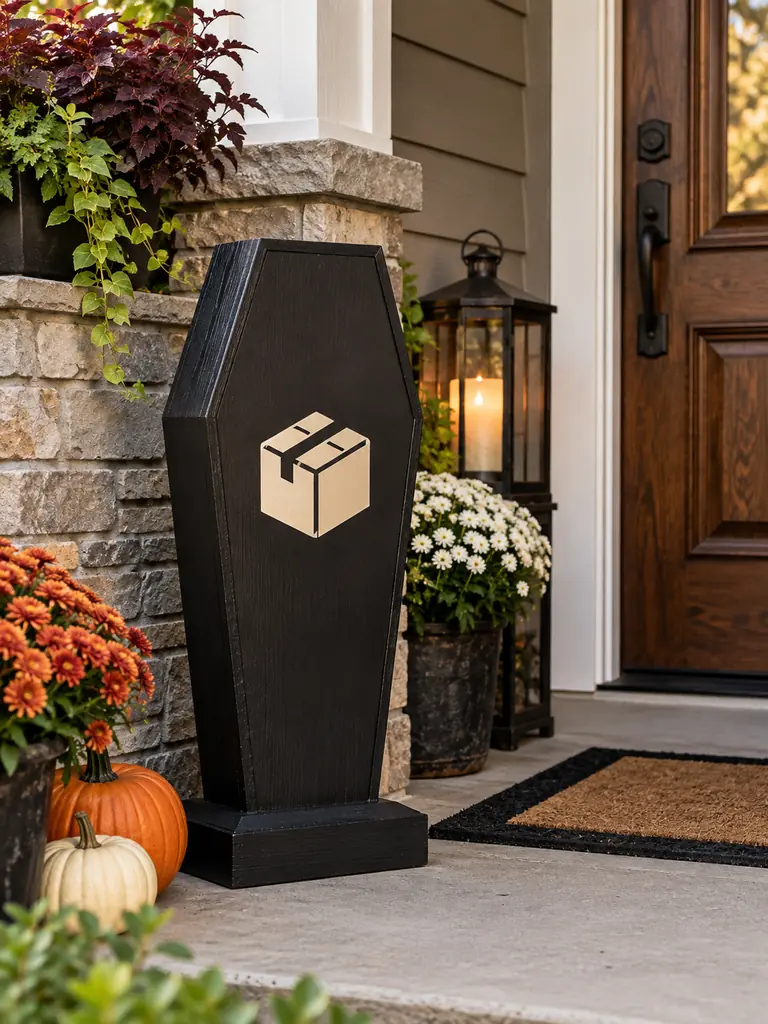
DO
- Keep the sign narrow enough to sit beside the delivery area.
- Use clear wording that delivery workers can understand immediately.
- Finish every surface with exterior primer, paint, and sealer.
- Secure the base without drilling into rented property.
DON’T
- Place the marker in front of the door or house number.
- Make it resemble an official warning or restricted-access sign.
- Attach it to mailboxes, utility equipment, or delivery lockers.
- Leave sharp corners or protruding hardware exposed.
A coffin silhouette gives the parcel area seasonal character while still serving a practical purpose. Use high-contrast lettering, keep the message brief, and position the marker where it can be seen from the normal approach. Test the placement with an actual package to ensure the sign does not reduce usable space.
Chicken Wire Specter
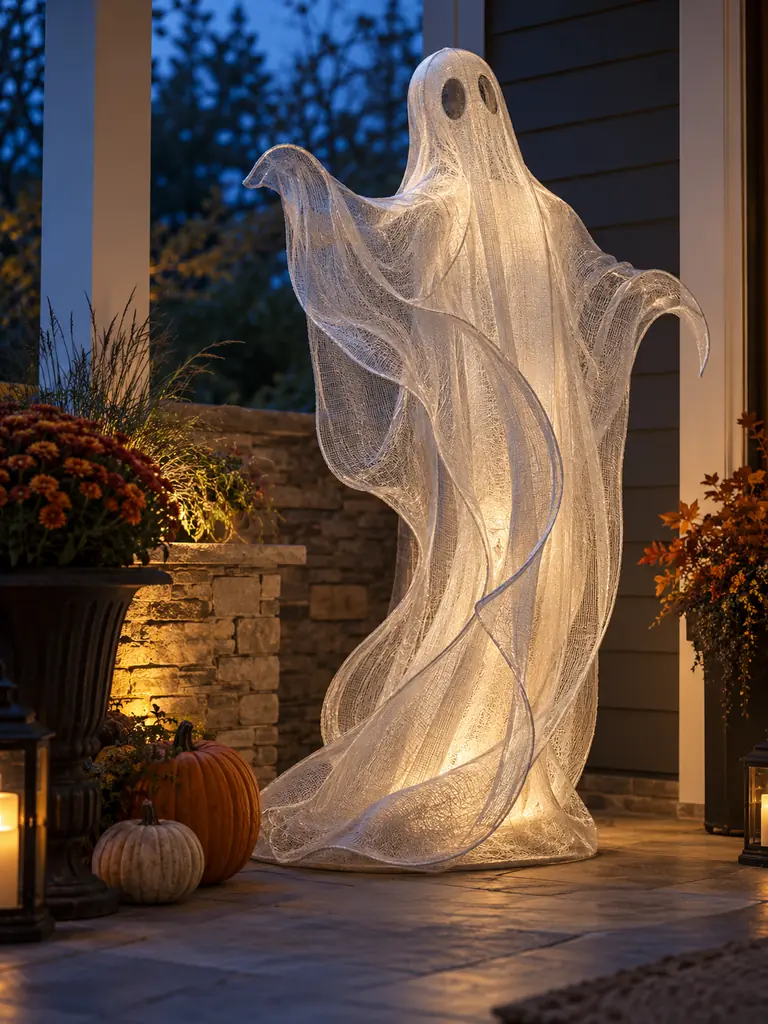
Cost: Moderate, depending on mesh and base materials
Time: Two to three hours
Skill Level: Intermediate with protective gloves required
Best For: Sheltered porch corners away from regular foot traffic
Wire mesh can create an airy figure that appears almost transparent after dark. Fold cut edges inward, cover every exposed point, and secure the form to a wide weighted base. Add only a light outdoor fabric layer so wind can pass through rather than pushing against a solid surface.
Stenciled Welcome Mat
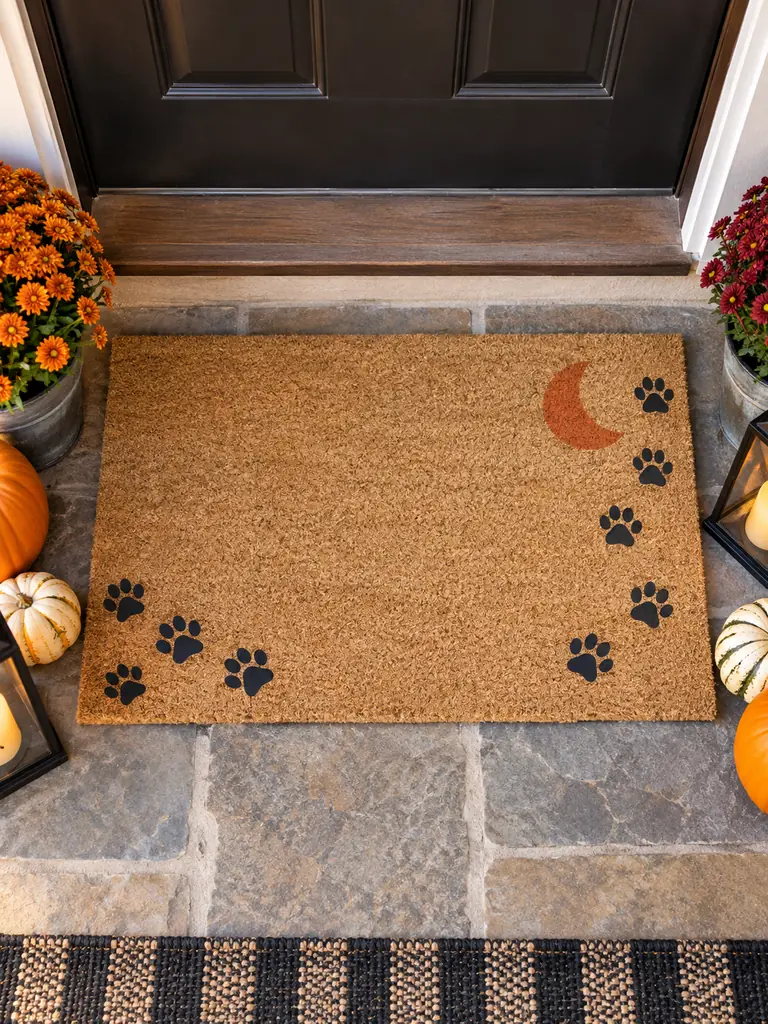
A custom stencil gives a plain coir mat a cleaner identity than scattered paint or crowded lettering. Draft the design on paper first, leaving wide gaps between shapes so the rough fibers do not blur narrow details. Fix the stencil firmly, then apply exterior paint with a dry stippling motion.
Allow the mat to cure flat in a ventilated, protected area before testing it outdoors. Keep the central standing zone mostly open, and avoid thick coatings that could create stiff raised patches. Place the finished mat on a dry, level landing where its edges cannot curl into the doorway.
For more creative seasonal projects made with accessible supplies, browse these Cheap Halloween Decorations that deliver impressive results on a limited budget.
Gargoyle Downspout Guard
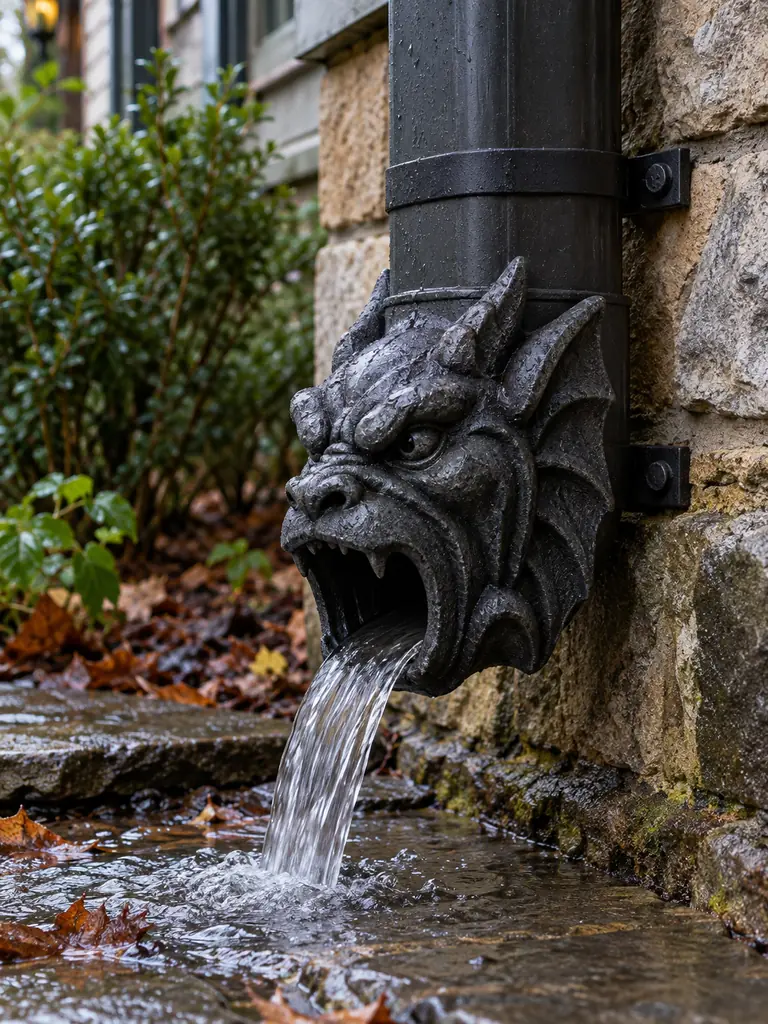
- Measure the downspout width and locate joints, screws, and drainage openings before designing the face.
- Build the gargoyle from lightweight weather-resistant material with an open back.
- Create removable side straps that hold the piece without puncturing the metal.
- Keep the bottom outlet completely clear for rainwater and debris.
- Remove the decoration before cleaning, repairing, or inspecting the drainage system.
A gargoyle face turns an overlooked utility feature into part of the porch theme without interrupting its purpose. Shape the mouth around the downspout rather than across the outlet, and test water flow after installation. Check the straps after storms because shifting material can rub paint or trap moisture against metal.
Umbrella Web Canopy
Quick Tip:
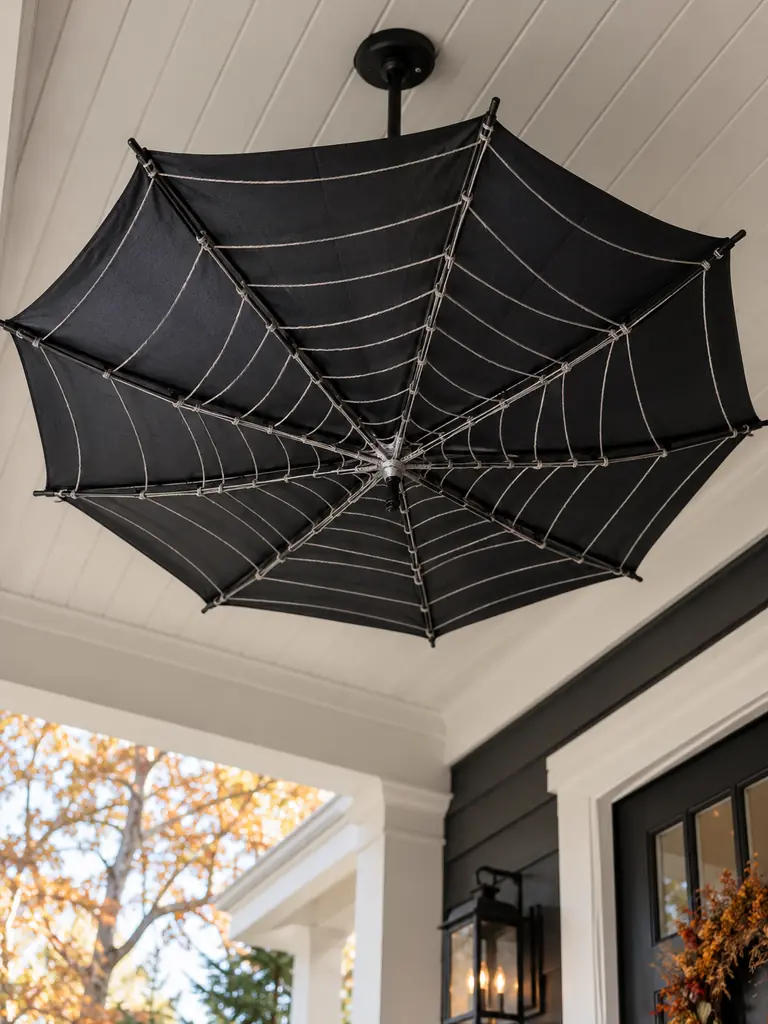
Use only an umbrella with a reliable locking mechanism and an undamaged frame. Secure weather-safe cord to the ribs while the umbrella is open on the ground, then mount the completed canopy from a rated support.
An inverted black umbrella creates a clear web structure without stretching material across the entire porch ceiling. Keep it high enough for safe clearance but below fans, wiring, and light fixtures. Remove it before strong wind or heavy rain, since even a secured umbrella can catch moving air like a sail.
Raven Nest Basket
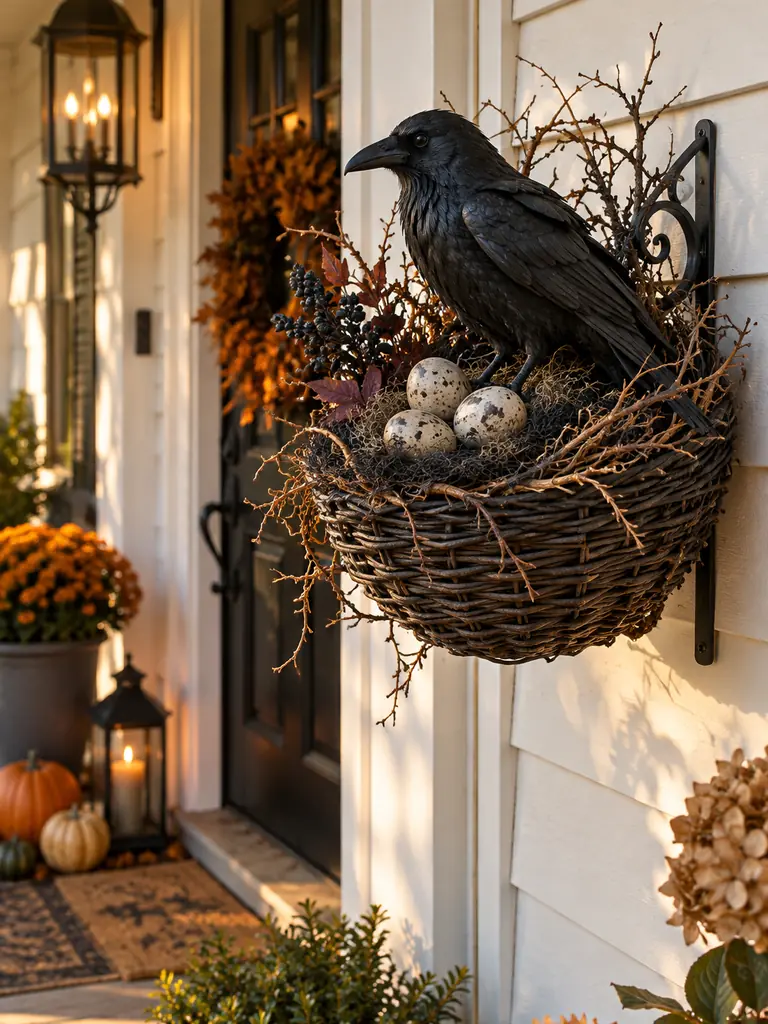
BEFORE: A loose bundle of twigs, fibers, and bird figures sits on a ledge where wind can scatter individual pieces. The arrangement looks disconnected and requires frequent resetting.
AFTER: Sealed twigs and dark fibers form a compact nest inside a firmly mounted basket. One lightweight raven and a few faux eggs create a clear focal point without overcrowding it.
A basket gives the nest a defined boundary and provides several points for secure attachment. Fasten every component individually, conceal ties beneath the fibers, and maintain drainage through the base. Position the display below eye level where guests can notice the details without passing directly beneath loose decorative material.
Witch Boot Planters
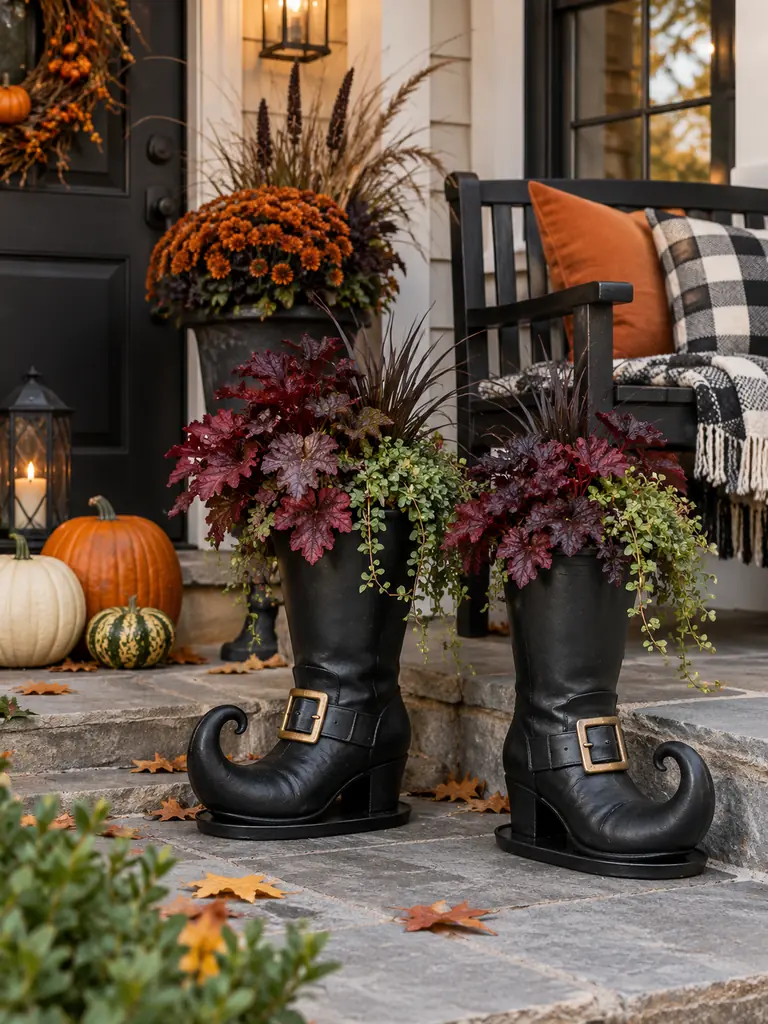
- Build or select weather-resistant boot forms wide enough to remain upright.
- Create drainage holes in the outer shell where the material safely allows them.
- Insert small nursery pots rather than filling decorative boots directly with soil.
- Add discreet weight around the inner pot without blocking drainage.
- Position the pair outside the door swing and normal walking path.
Boot planters combine recognizable Halloween character with practical seasonal greenery. Choose compact plants that suit the porch light and local temperature, then remove each nursery pot for watering and maintenance. Matching the boot color to existing hardware or planters helps the handmade pair feel connected to the entrance rather than randomly placed.
Porch Sconce Wings
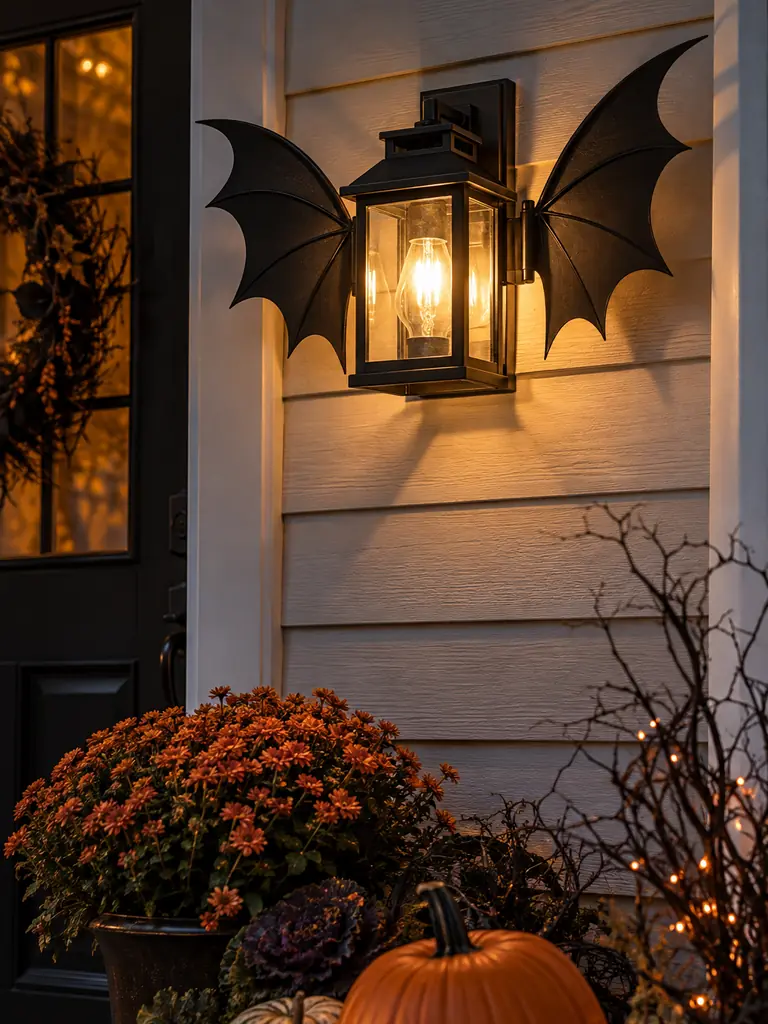
| Detail | Full Fixture Cover | Removable Side Wings |
|---|---|---|
| Light output | Often reduced | Center glass stays uncovered |
| Ventilation | May trap heat | Required openings remain clear |
| Sensor access | Can be obstructed | Motion sensor remains exposed |
| Removal | Requires handling the fixture | Panels detach independently |
Bat-inspired side panels can change the sconce silhouette while preserving its essential function. Use lightweight exterior material and attach it only where the fixture manufacturer permits accessories nearby. Maintain generous space around bulbs, glass, sensors, vents, and wiring, and remove the panels immediately if they shift or become warm.
Crated Creature Windows
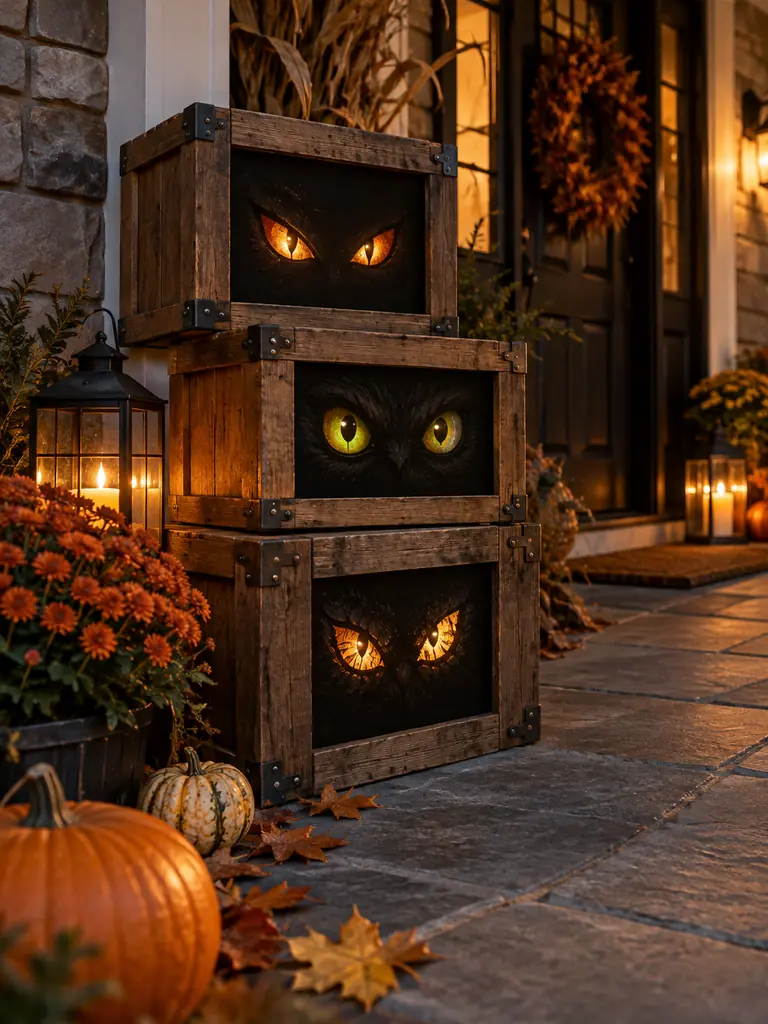
DO
- Use sturdy exterior-rated crates with smooth, sealed edges.
- Paint eyes on removable interior panels rather than directly inside openings.
- Connect stacked crates mechanically and weight the lowest unit.
- Keep the total height below nearby rails and switches.
DON’T
- Stack damaged crates or rely only on glue.
- Leave open cavities where water can collect.
- Place the structure in front of windows or utility access.
- Add loose pieces that can blow into the walkway.
Dark interiors make painted eyes appear hidden within the crate openings, producing a strong effect with few details. Vary the eye shapes but repeat the same two colors across every panel. Angle the stack slightly toward the guest approach, then inspect its connections after rain, cleaning, or accidental contact.
Hanging Chain Orb
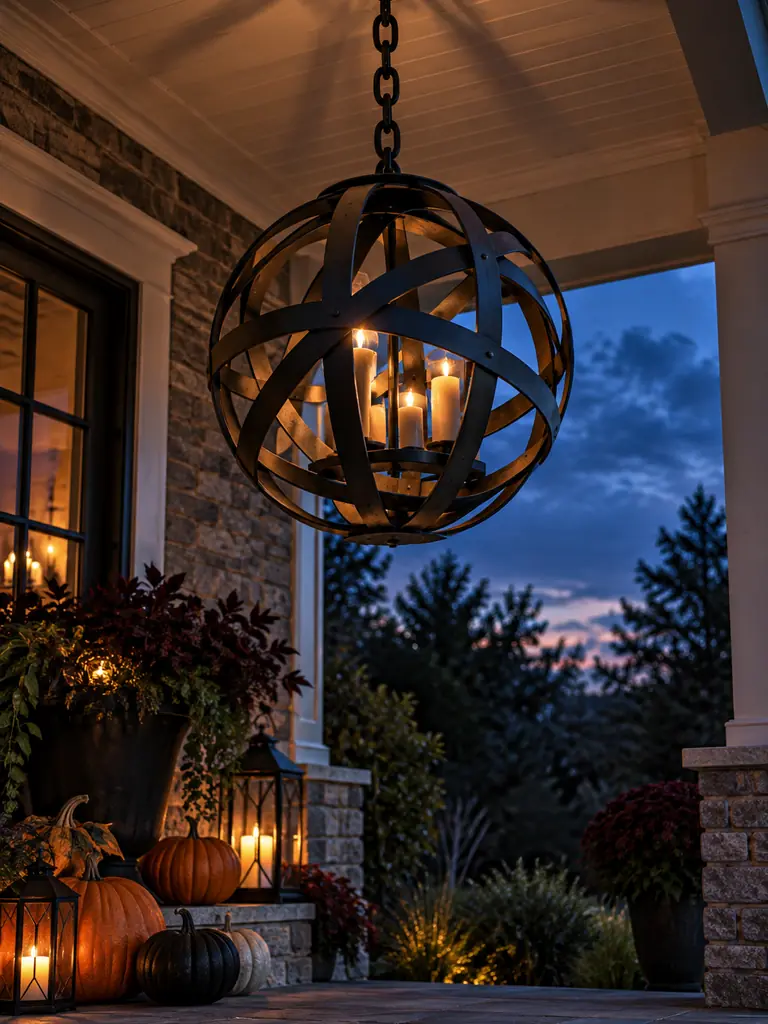
Cost: Low to moderate
Time: About one hour plus paint drying
Skill Level: Confident beginner
Best Location: A sheltered porch corner with verified overhead support
An open orb creates volume without behaving like a solid wind-catching decoration. Join flexible strips at evenly spaced points, smooth every connection, and use lightweight plastic chain for the visual effect. Suspend it from a rated hook, maintain overhead clearance, and remove it whenever strong wind is forecast.
Rail Shadow Cutouts
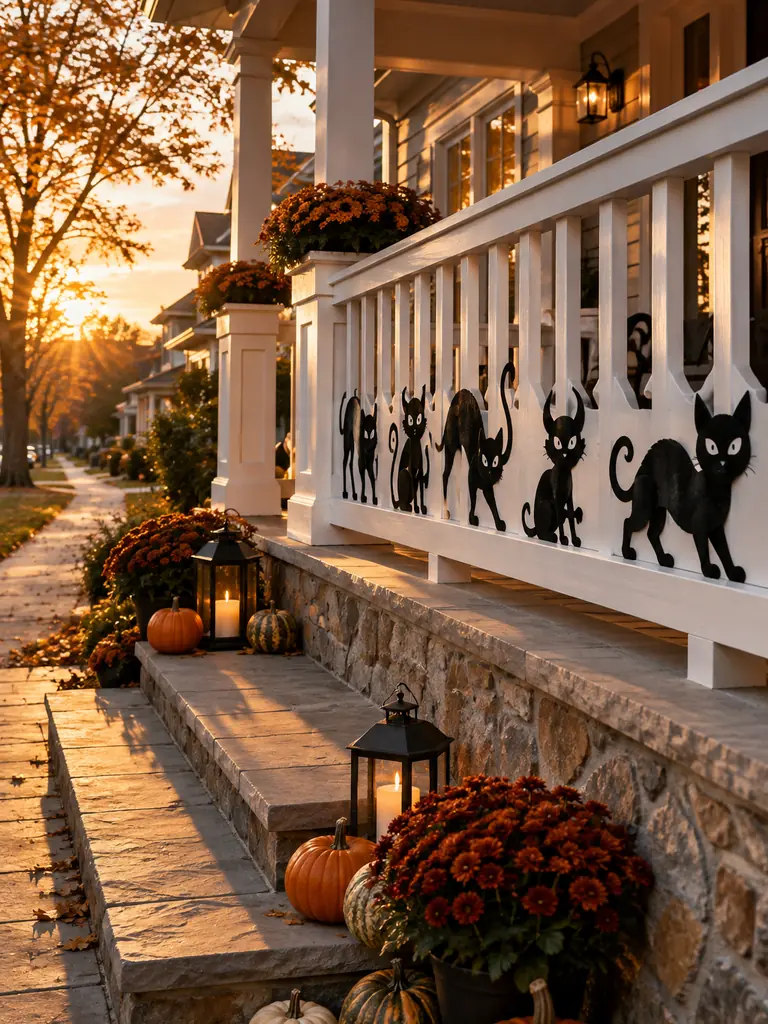
Flat silhouettes can give porch railings a dramatic second layer without wrapping fabric or ribbon around the handhold. Cut several related creature shapes from thin exterior-grade board, seal every edge, and paint both sides matte black so unfinished material never faces the street or porch.
Mount the figures below the top rail with removable outdoor hardware, maintaining the required spacing between balusters. Repeat one creature in varied poses rather than mixing unrelated designs. View the installation from the sidewalk and landing, then remove any cutout that obscures steps, lighting, or the view through the railing.
Rain-Shedding Display Feet
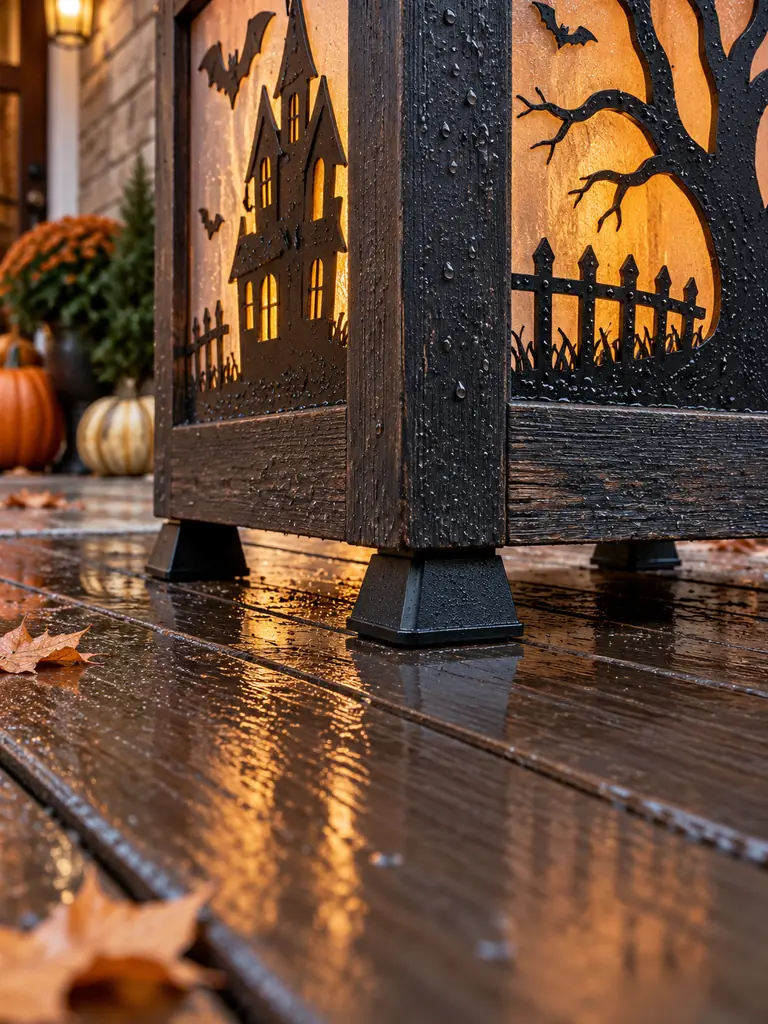
- Cut four identical blocks from moisture-resistant material rated for exterior use.
- Bevel the upper edges so water runs away instead of collecting around the decoration.
- Add nonslip pads underneath when the porch floor is smooth.
- Attach the feet securely and seal every cut surface.
- Test the raised piece for rocking before final placement.
Small feet protect handmade displays from damp flooring while allowing air and runoff to pass underneath. Keep the lift subtle so the decoration does not become top-heavy or create a visible obstacle. After heavy rain, check for trapped leaves, standing water, softened material, and loose fasteners before resetting the display.
Flat-Pack Storage Plan
Quick Tip:
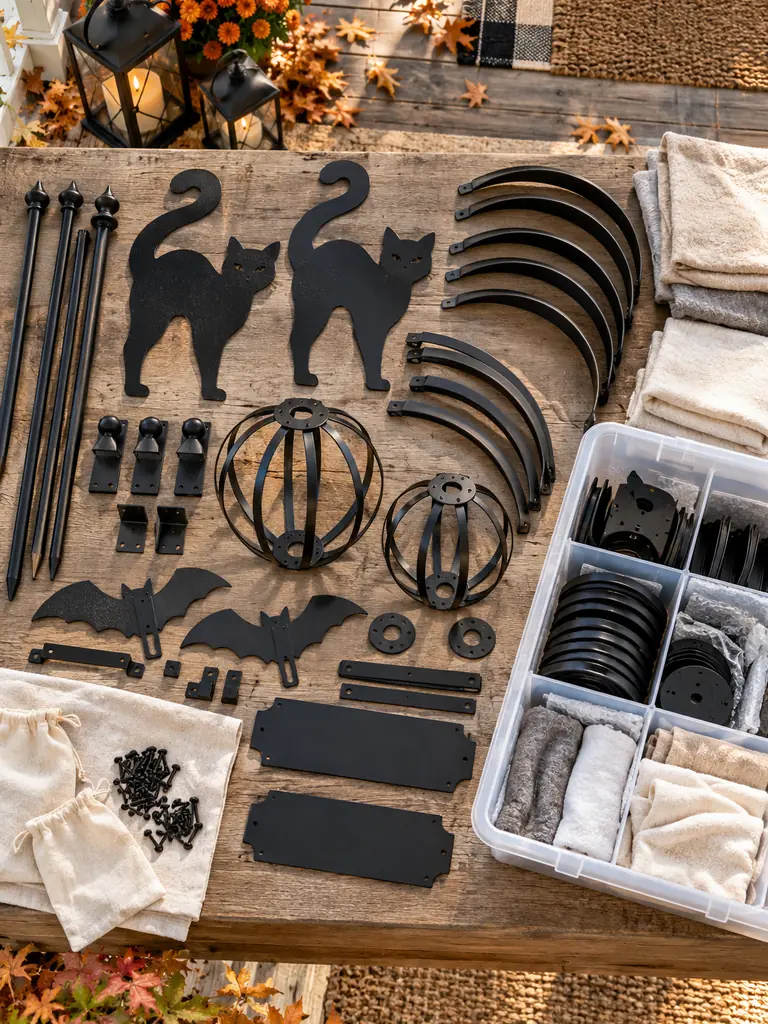
Photograph each completed project before dismantling it, then place matching letters or numbers on every removable connection. Keep the assembly photo and a short hardware list inside the same storage container.
Storage planning protects the time invested in handmade outdoor decorations. Dry every component completely, clean away soil and debris, and separate painted surfaces with acid-free tissue or soft cloth. Store fasteners inside labeled pouches attached to their matching project, keeping delicate shapes flat and heavy pieces at the bottom.
Conclusion
A striking front porch can still remain safe, weather-aware, and practical for everyday use. These DIY Outdoor Halloween Decorations show how sturdy materials, secure supports, proper drainage, and controlled placement can turn handmade projects into reliable seasonal displays. Begin with one design that suits your porch conditions, test its finish outdoors, and inspect it after changing weather. I have seen simple projects last for several seasons when drying and storage receive the same attention as construction. Save this post on Pinterest, try your favorite project, and share it with someone planning a creative Halloween entrance.