

A studio can feel crowded surprisingly fast when sleeping, cooking, working, and relaxing all happen within the same open space. These Studio Apartment Storage Ideas help you use overlooked walls, furniture, corners, and vertical areas without filling your home with bulky storage units.
You will find practical solutions for the bed area, living zone, kitchen, entryway, closet, bathroom, and laundry space. Each idea focuses on making belongings easier to access while protecting valuable floor space and keeping visible clutter under control. In my experience, studio organization works best when storage fits naturally into existing furniture and daily routines. A few carefully chosen solutions can create more breathing room without requiring a larger apartment.
Table of Contents
Platform Bed Drawers
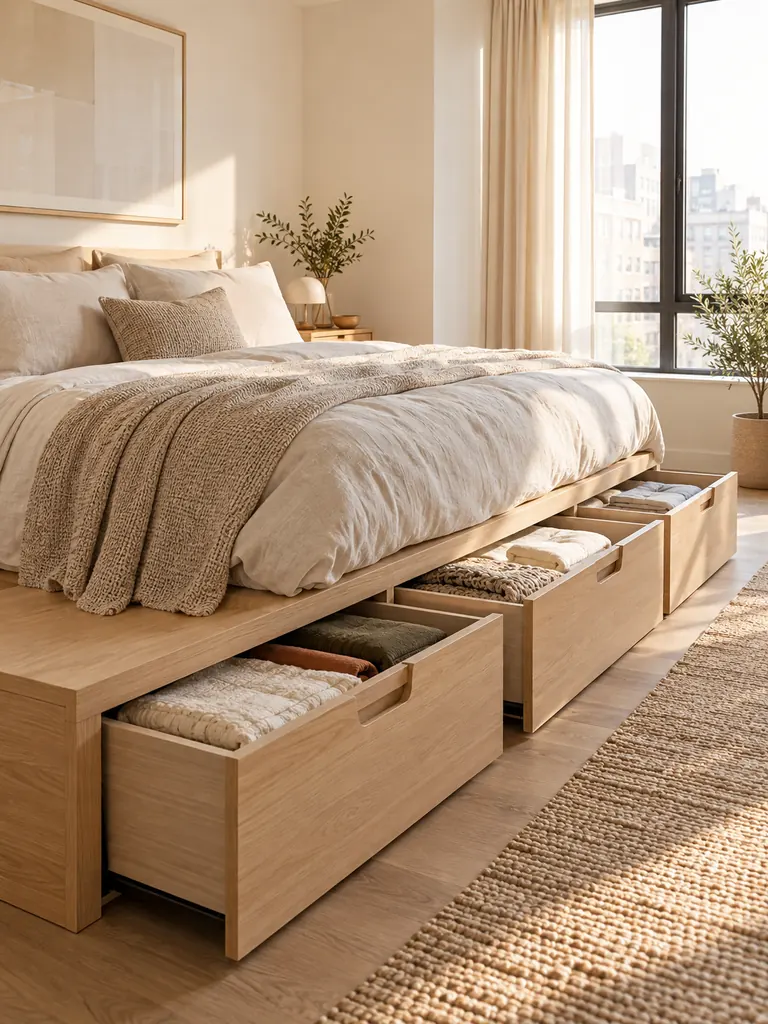
A bed already occupies valuable floor area, so making that footprint work harder is one of the smartest storage moves in a studio. Deep built-in drawers can hold extra bedding, off-season clothes, shoes, or bulky sweaters without introducing another cabinet into the sleeping zone.
Measure drawer clearance before choosing the bed, especially if it sits near a wall or other furniture. In my experience, wide drawers work best when items are divided into simple categories rather than packed loosely. Leave enough open floor space to pull every drawer out completely and access the contents comfortably.
For more ways to organize the sleeping area without crowding the room, explore these small bedroom storage ideas for using hidden, vertical, and overlooked spaces more effectively.
Sofa Side Pocket
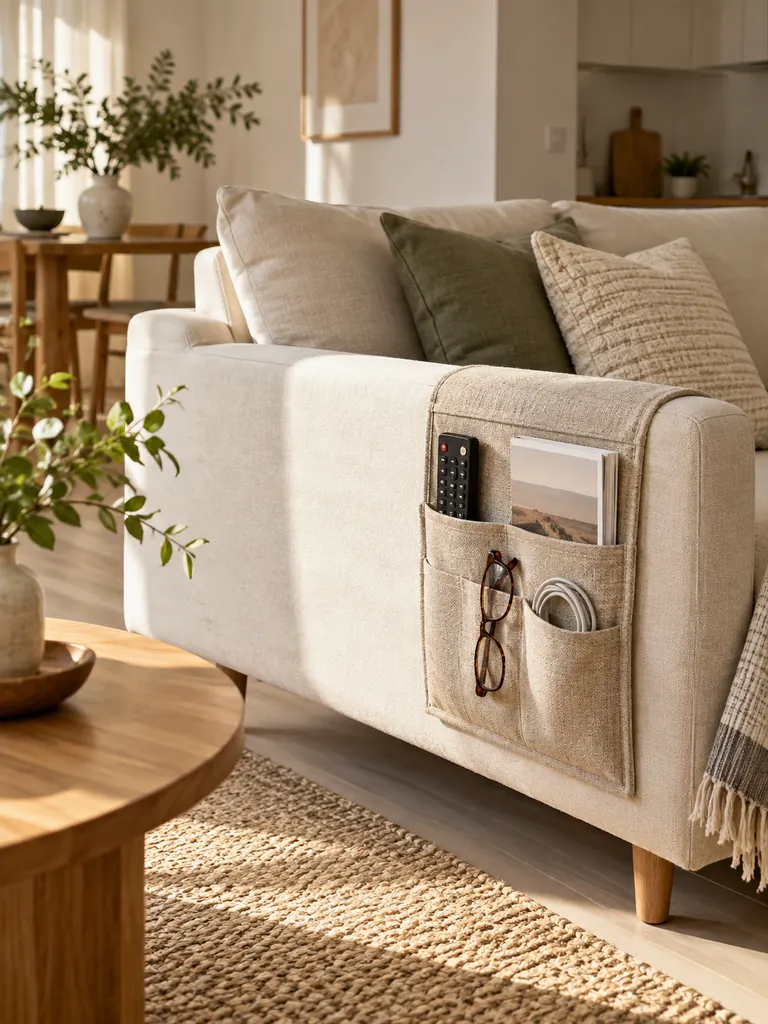
- Choose a structured fabric organizer that fits securely over the sofa arm or along its side.
- Use separate pockets for remotes, magazines, chargers, and reading glasses.
- Keep bulky belongings elsewhere so the organizer stays flat against the sofa.
- Match the fabric with the upholstery to reduce visual clutter.
- Check that pockets do not interfere with reclining or removable cushions.
A sofa-side pocket keeps small everyday belongings within reach without requiring another table or cabinet. It works especially well beside a sofa that sits close to a wall or walkway. Limit each pocket to one category so it remains useful rather than becoming another place where miscellaneous clutter collects.
Room Divider Shelves
Quick Tip:
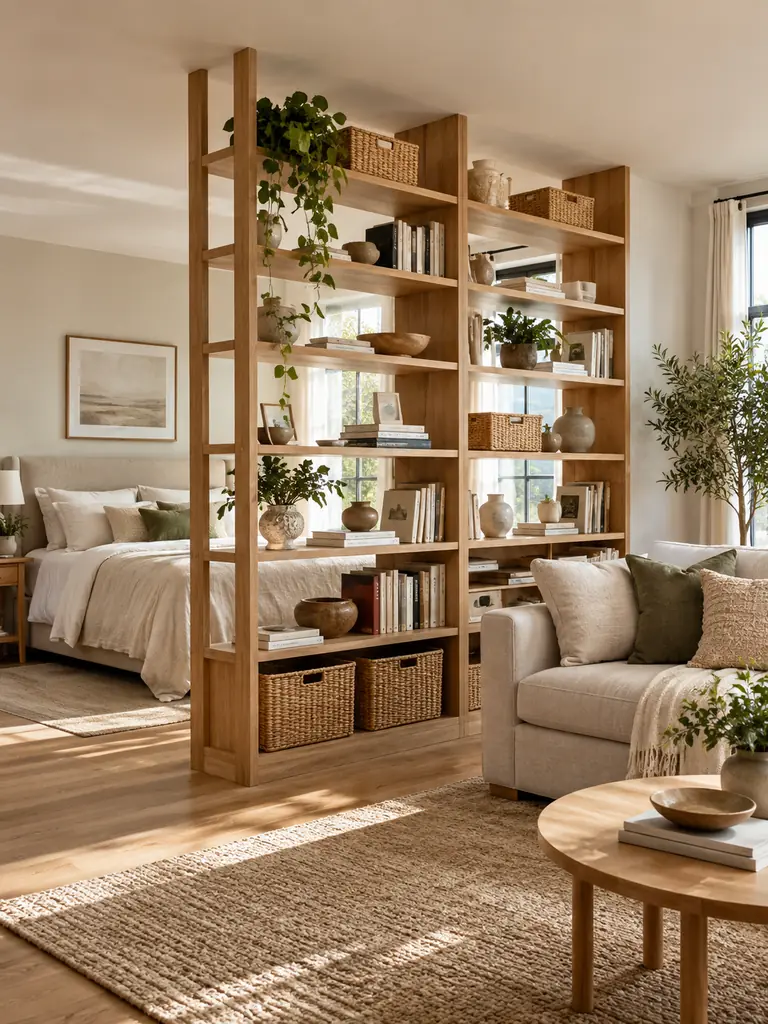
Keep at least one-third of the shelving visually open instead of filling every compartment. Use closed baskets on lower shelves for private clutter and lighter decorative pieces higher up so the divider does not become a heavy visual wall.
Open shelving can separate sleeping and living zones while providing storage from the same footprint. Position the unit where it defines the bed without blocking the strongest source of daylight. For renters, choose a stable freestanding design and follow the manufacturer’s safety guidance for securing tall furniture where required.
Window Bench Storage
BEFORE:
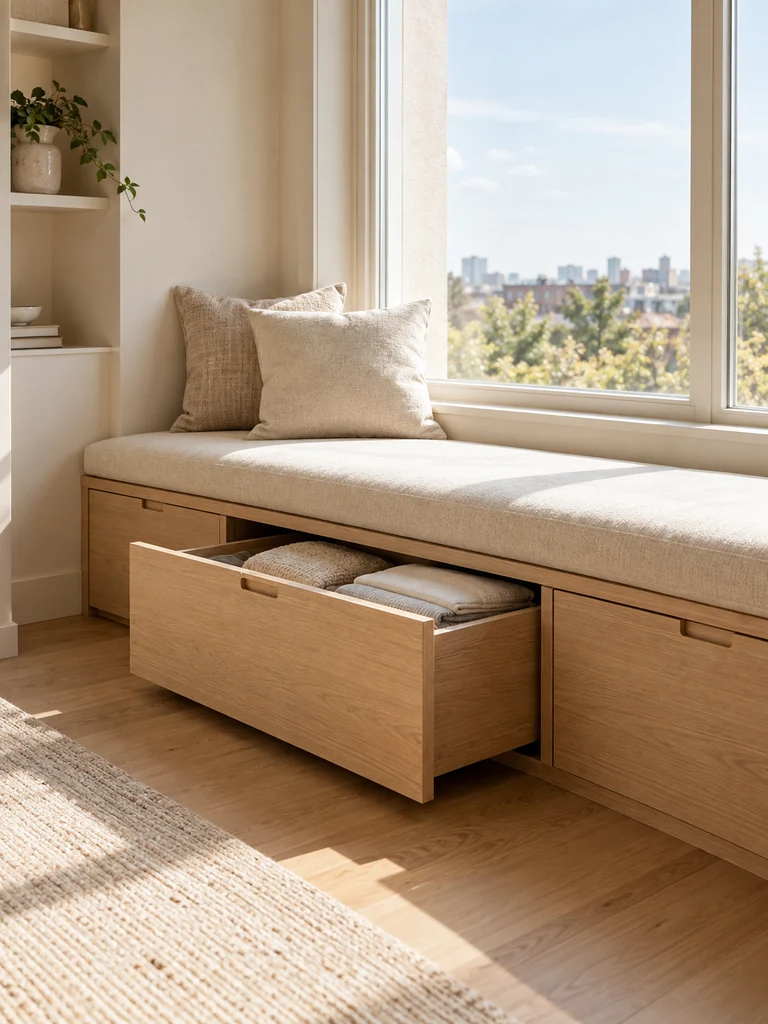
The area beneath a studio window often sits empty or collects random baskets, plants, and loose belongings. Adding several small containers can make the floor feel busier while leaving valuable space poorly organized.
AFTER:
A fitted storage bench turns the same footprint into seating and concealed organization. Cushions create a comfortable reading spot while drawers or lift-up compartments keep bulky items out of sight.
Choose a bench that stays below the window frame and does not block vents, radiators, or curtain movement. Deep compartments work especially well for spare bedding, towels, bags, and seasonal textiles. I’ve noticed that concealed storage feels most useful in studios because fewer visible belongings make the entire room appear calmer.
Floating Media Cabinet

- Measure the TV wall and mark a comfortable cabinet height before drilling or mounting anything.
- Choose a shallow wall-mounted unit with closed doors or drawers to hide cables, controllers, and electronics.
- Route cords through dedicated openings instead of allowing them to hang beneath the cabinet.
- Keep the floor underneath completely open rather than filling it with extra baskets.
- Leave part of the cabinet surface clear to prevent the media wall from becoming another clutter zone.
Lifting media storage off the floor creates a stronger sense of openness, especially when the living area shares space with the bed and dining zone. Closed compartments hide small electronics and accessories, while the visible flooring underneath makes the room feel less crowded. Always use mounting hardware suitable for your wall type.
Ceiling-High Shelving

| Detail | Low Shelving | Ceiling-High Shelving |
|---|---|---|
| Storage capacity | Limited vertical use | Uses upper wall space |
| Floor footprint | Takes floor space | Similar footprint, more capacity |
| Best storage | Everyday items | Daily and seasonal items |
| Visual effect | Can feel wider | Draws the eye upward |
Tall shelving makes overlooked vertical space useful without requiring another wide piece of furniture. Keep frequently used belongings between waist and eye level, then reserve upper shelves for lightweight seasonal items in labeled containers. In a studio, matching bins and some intentionally empty shelf space help prevent tall storage from looking visually overwhelming.
Entryway Shoe Drawers
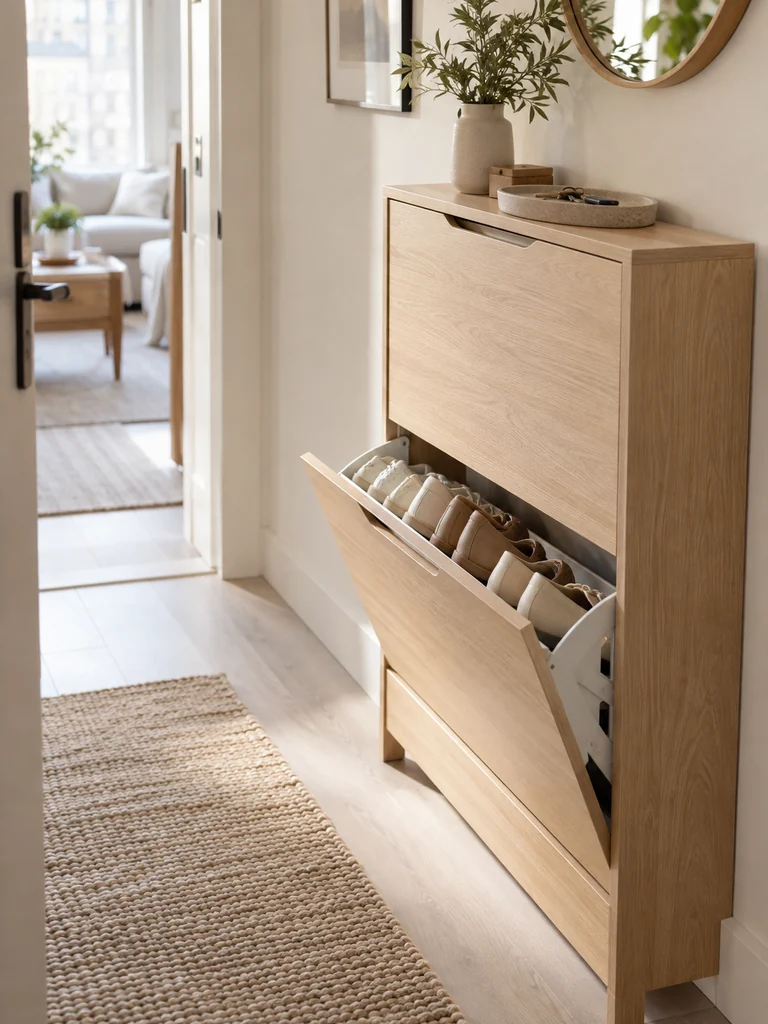
DO:
- Choose a shallow cabinet that allows the entry door to open fully.
- Assign one drawer or compartment to each shoe category.
- Keep everyday pairs at the easiest height to reach.
- Measure your largest shoes before choosing drawer depth.
DON’T:
- Store wet shoes inside closed drawers.
- Allow extra pairs to accumulate on the floor.
- Choose deep furniture that narrows the walkway.
- Cover nearby switches, outlets, or vents.
A slim shoe cabinet can turn a messy entrance into a defined storage zone without consuming much floor area. Tilt-out compartments are especially useful in narrow studios. Keep only frequently worn pairs near the door and move seasonal footwear elsewhere so the cabinet stays functional rather than becoming another overfilled storage spot.
Wall-Mounted Drop Zone
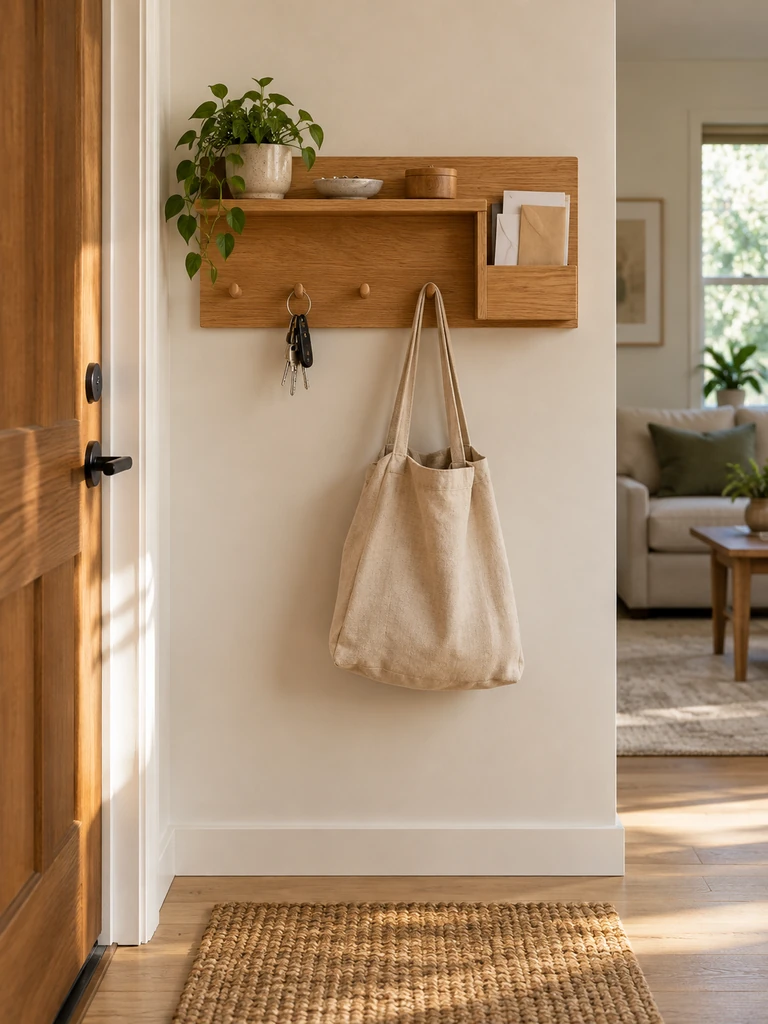
Cost: Low to Moderate
Difficulty: Beginner
Best For: Keys, mail, bags, and sunglasses
Works In: Entry walls and narrow passages
Small belongings create surprising amounts of visual clutter when they land on kitchen counters, tables, or the bed. A compact wall organizer with hooks, a shallow shelf, and a mail pocket gives these essentials one predictable home. Position it near the entrance at an easy reaching height without obstructing the walkway.
Over-Door Storage Shelf
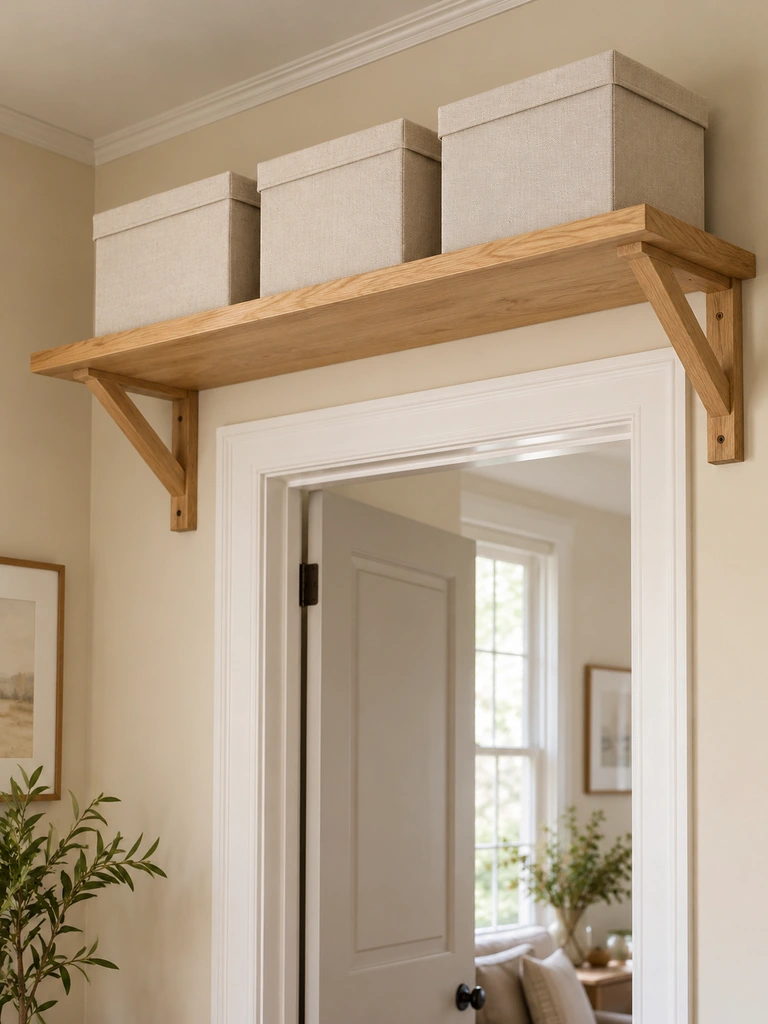
The wall above a doorway is easy to overlook because it sits outside normal eye level, yet it can hold belongings you do not need every day. A sturdy shelf installed above the frame works well for lightweight storage boxes, spare linens, or occasional accessories while preserving valuable floor and cabinet space.
Keep containers consistent in size and clearly labeled so you can identify contents without repeatedly taking everything down. Store lighter items here and avoid anything fragile or frequently needed. Before installation, confirm the wall construction, door clearance, and appropriate mounting hardware so the shelf remains secure and practical.
Dining Bench Drawers
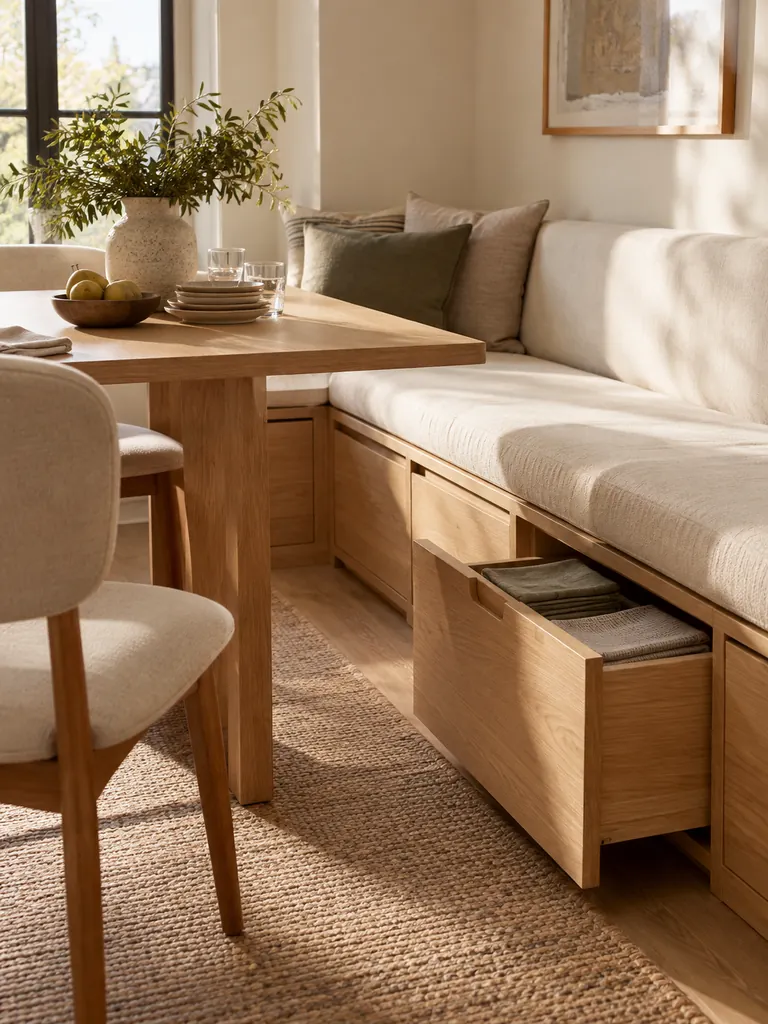
- Choose a compact bench that slides neatly beneath or alongside the dining table when not in use.
- Use deep drawers for placemats, table linens, serving pieces, or less frequently used kitchen accessories.
- Add simple dividers so smaller items do not shift into one messy pile.
- Keep drawer handles low profile to avoid catching clothes as people pass.
- Measure the surrounding clearance so drawers can open completely.
Dining furniture can earn its footprint by handling storage as well as seating. In a studio, that extra function reduces the need for another cabinet nearby. Keep everyday dining supplies inside rather than unrelated belongings, making the drawers easier to maintain and useful during meals.
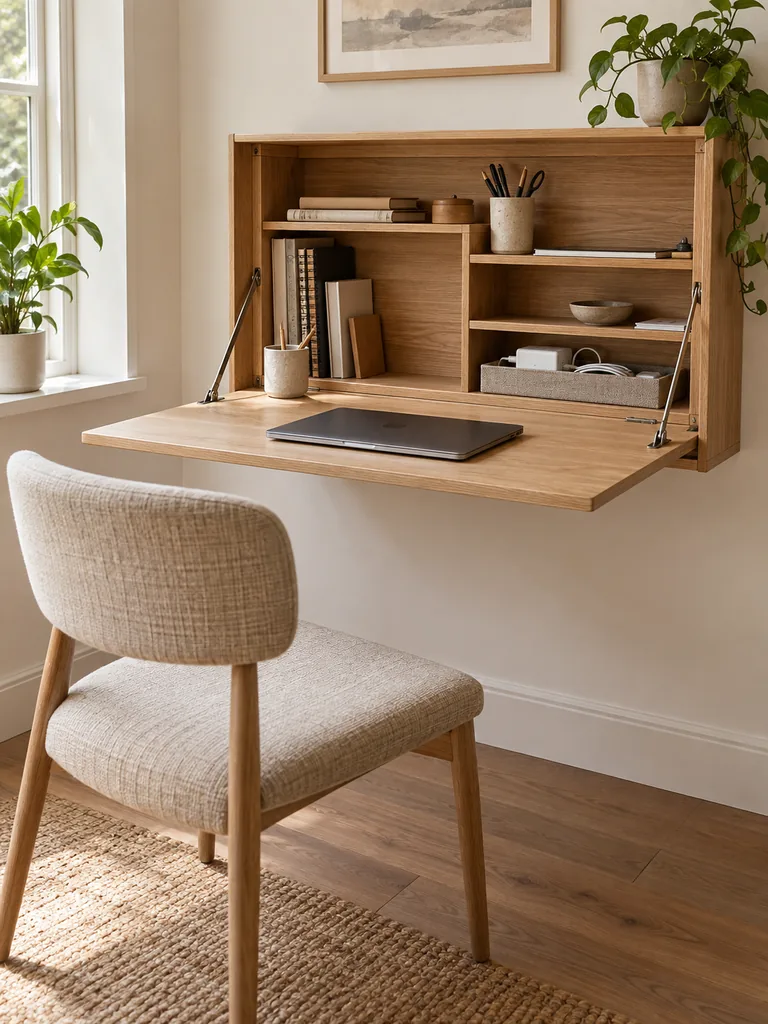
Fold-Down Desk Storage
Quick Tip:
Choose a wall desk with shallow internal compartments rather than a simple folding tabletop. Before mounting it, check how far the desk projects when open and make sure a chair can still move comfortably behind it.
Working from a studio becomes easier when office supplies disappear after the laptop closes. Built-in pockets can organize notebooks, chargers, pens, and documents without requiring a separate desk cabinet. Mount the unit at a comfortable working height using hardware appropriate for the wall, then keep only genuine work essentials inside.
Kitchen Toe-Kick Drawers

BEFORE:
The recessed strip beneath kitchen cabinets remains unused while flat trays, baking sheets, and occasional kitchen accessories compete for space inside regular cupboards. Adding another freestanding cart may make an already compact kitchen feel tighter.
AFTER:
Purpose-built toe-kick drawers convert that low cavity into discreet storage. Flat or infrequently used items stay organized while counters and visible floor areas remain unchanged.
This solution works best when cabinet construction and available depth are assessed professionally before modification. Use the drawers for lightweight, low-profile belongings rather than heavy cookware. In a compact studio kitchen, reclaiming otherwise wasted space can improve storage capacity without adding another visible unit or interfering with everyday movement.
For more ways to make a compact cooking area work harder, explore these small kitchen storage ideas for organizing cabinets, walls, narrow gaps, and other overlooked spaces.
Cabinet End Shelves
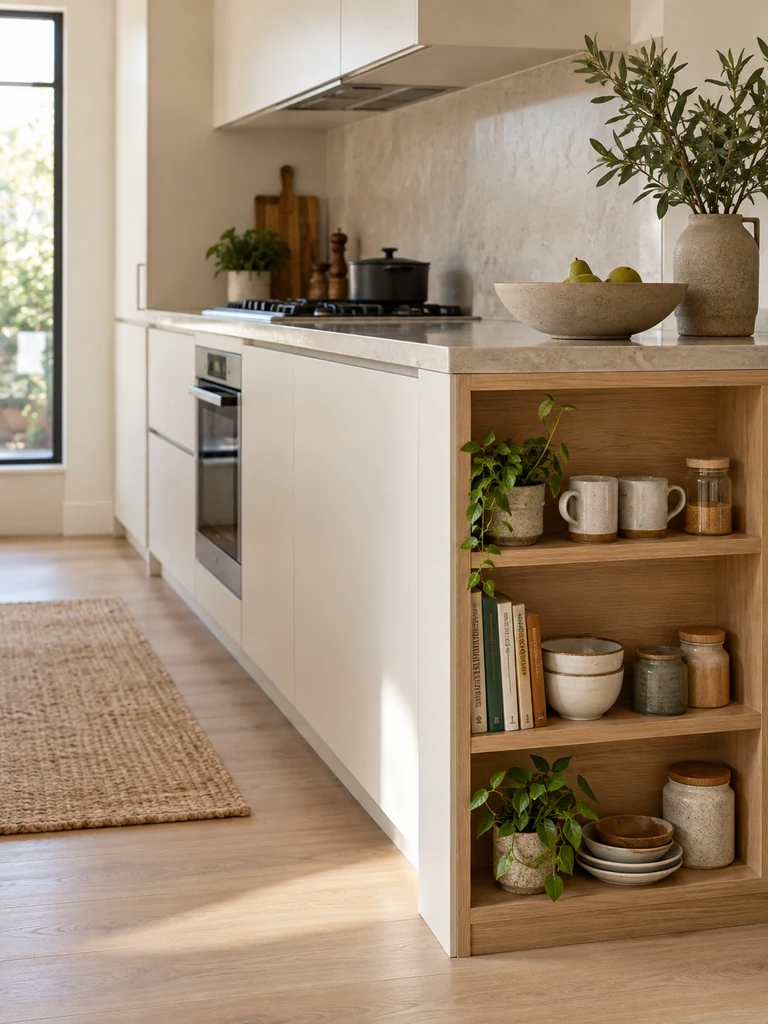
- Measure the exposed cabinet side and nearby walking clearance before choosing shelf depth.
- Install two or three shallow shelves rather than one deep unit that projects into the room.
- Place frequently used items such as mugs, small jars, or cookbooks within comfortable reach.
- Keep heavier pieces on the lowest shelf and lighter objects higher up.
An exposed cabinet end can provide useful storage without taking another section of floor space. I’ve seen this work especially well where a kitchen meets a living or dining zone. Keep the arrangement restrained and practical, since overcrowded open shelves can quickly make a compact studio feel visually busier.
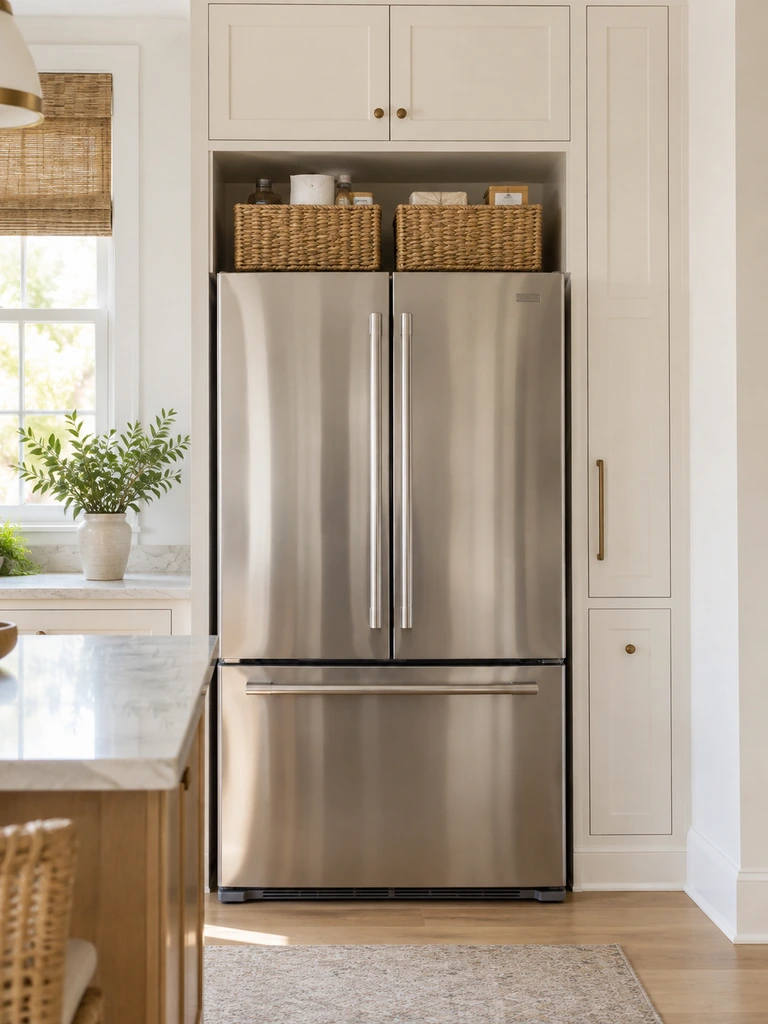
Fridge Top Baskets
| Detail | Loose Storage | Matching Baskets |
|---|---|---|
| Appearance | Visually scattered | Neat and contained |
| Access | Items shift around | Categories stay together |
| Best use | Random extras | Lightweight backstock |
| Maintenance | Harder to clean | Easier to remove |
The top of a refrigerator can handle occasional lightweight storage when the appliance manufacturer allows adequate ventilation and clearance. Use matching baskets for paper goods or other suitable items rather than loose packages. Keep containers easy to lift, avoid heavy objects, and never block vents or required airflow around the appliance.
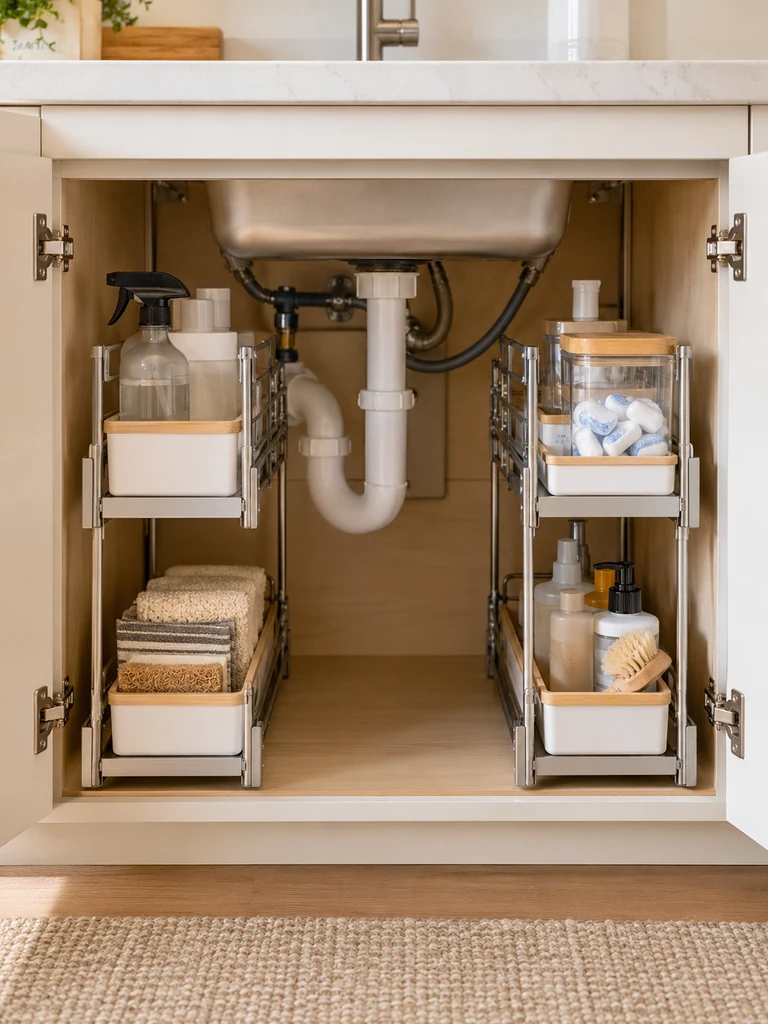
Sink Cabinet Pull-Out
DO:
- Measure around pipes, valves, and disposal components first.
- Choose narrow pull-outs that clear existing plumbing.
- Group cleaning products by everyday use.
- Use washable trays to catch minor drips.
DON’T:
- Block access to shutoff valves.
- Pack products tightly around plumbing.
- Store incompatible household chemicals together.
- Ignore signs of moisture or leaks.
Pull-out organizers make the back of a deep sink cabinet easier to reach without forcing you to unload everything first. Separate cleaning cloths, dishwasher supplies, and suitable household products into defined zones. Before installation, preserve clear access to plumbing so routine checks and emergency shutoffs remain simple.
Closet Floor Drawers
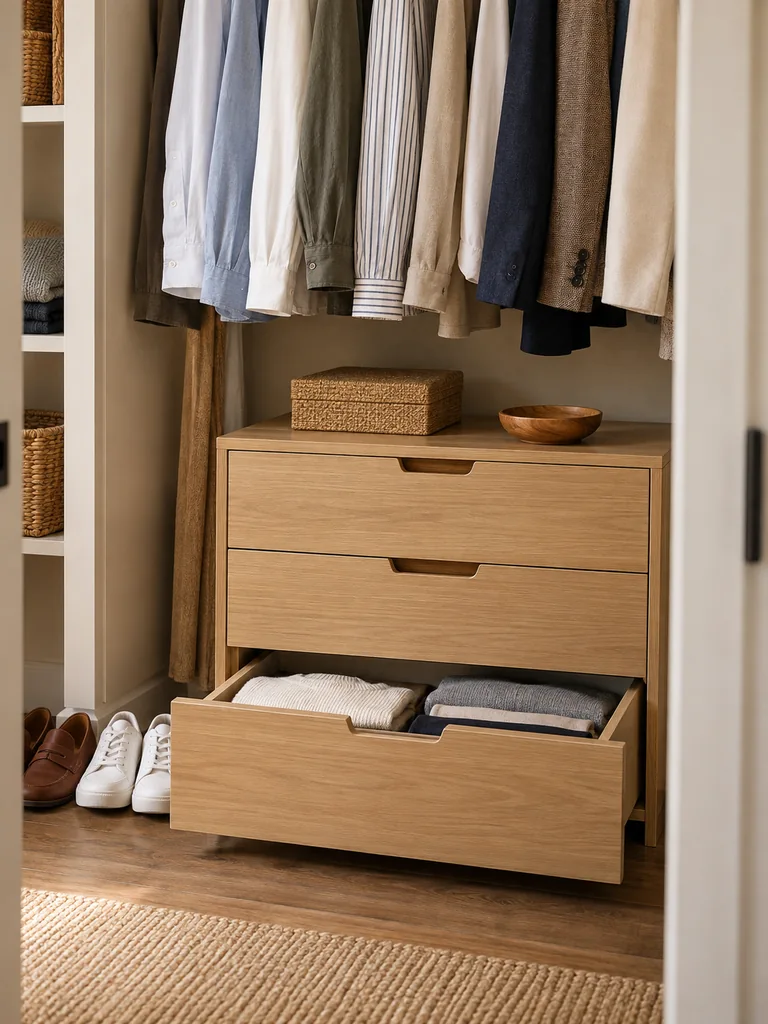
Cost: Low to Moderate
Difficulty: Beginner
Best For: Folded clothes, accessories, and shoes
Result: More usable storage beneath hanging clothes
The floor below short hanging garments often becomes a pile of shoes, bags, or loose boxes. Compact drawer units can turn that neglected area into organized storage without changing the closet itself. Measure the space beneath shirts and jackets first, then leave enough clearance so hanging clothes do not drag across the drawers.
Wardrobe Top Bins

The space above a wardrobe can hold belongings that matter but do not need daily access. Lightweight matching bins work well for seasonal textiles, spare linens, travel accessories, or rarely used clothing. Keeping containers identical in shape also reduces the patchy, crowded appearance that open storage can create in a studio.
Choose lidded bins that fit completely on the wardrobe top without overhanging the edges. Add simple front-facing labels so you know what is inside before bringing a container down. I’ve noticed that upper storage stays organized longer when each bin has one clear category rather than becoming a home for random extras.
Bedside Wall Cubby
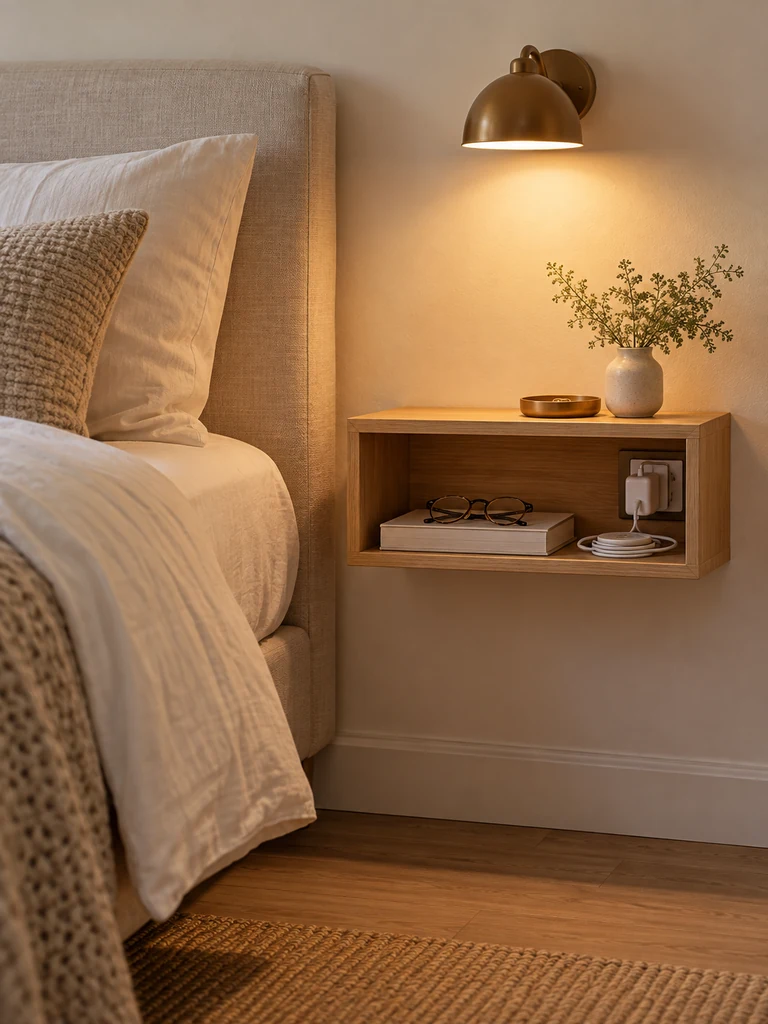
- Mount a shallow cubby beside the bed instead of squeezing in a full nightstand.
- Include one small compartment for a book, glasses, or charging accessories.
- Keep the top clear enough for a compact lamp or other daily essential.
- Choose rounded edges where the cubby sits close to the sleeping area.
- Route charging cables neatly so they do not hang across the bed or floor.
A wall cubby provides the function of a bedside table while preserving visible floor space underneath. That open area can make the sleeping zone feel less boxed in. Keep the cubby shallow and limit what stays inside, since a small bedside station works best when it holds only nighttime essentials.
Bathroom Mirror Storage

Quick Tip:
Choose a mirrored cabinet with shallow adjustable shelves so toiletries remain visible instead of disappearing behind one another. Before installation, check wall construction, nearby lighting, electrical points, and the clearance required to open the mirrored door comfortably.
A mirror already needs wall space, so combining it with concealed storage makes that surface work twice as hard. Use the cabinet for daily skincare, grooming supplies, and suitable toiletries while keeping the sink area clear. Group smaller products in compact containers to prevent shelves from becoming crowded with loose bottles.
Laundry Wall Cabinet
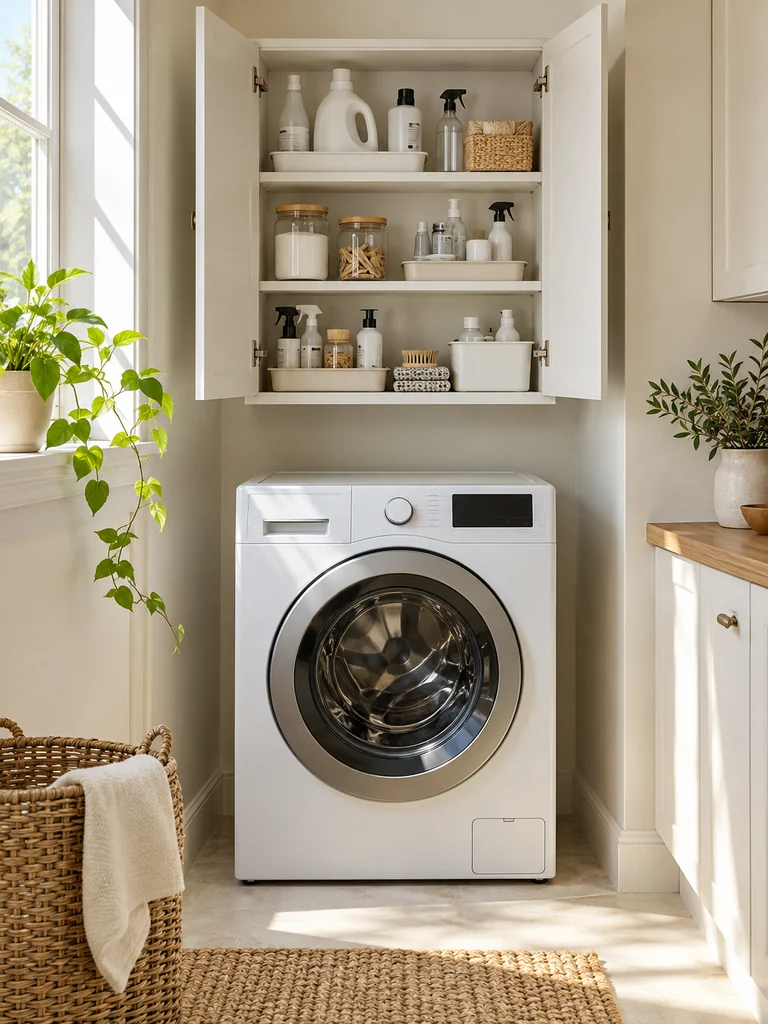
BEFORE:
Detergent, stain products, clothespins, and cleaning supplies collect on top of the washer or nearby surfaces. The laundry corner begins to look cluttered even when it occupies only a small part of the studio.
AFTER:
A shallow wall cabinet moves those supplies upward and behind closed doors. The washer top stays clear, while frequently used products remain together and easy to reach.
Measure the wall and appliance clearance carefully before adding cabinetry above a laundry area. Store products upright in small trays to contain minor spills, and follow appliance guidance for ventilation and access. Closed storage is particularly helpful in open studios where the laundry zone may remain visible from the main living area.
Hidden Corner Cabinet

- Identify an unused corner that does not interfere with doors, windows, or walking routes.
- Measure both adjoining walls and the available floor depth.
- Choose a narrow corner cabinet with closed doors or drawers rather than deep open shelving.
- Assign the interior to one category, such as linens, hobby supplies, or household extras.
- Keep the cabinet top mostly clear to reduce visual weight.
Corners can provide meaningful storage without pushing another wide unit along the main walls. A closed design keeps irregular belongings out of sight and helps the studio maintain a calmer appearance. Choose proportions that match nearby furniture so the cabinet feels integrated rather than squeezed into leftover space.
For more ways to organize a compact home without filling it with bulky furniture, explore these small apartment storage ideas for making better use of walls, furniture, and overlooked areas.
Conclusion
Living in a studio does not mean every available corner needs another storage unit. The most effective Studio Apartment Storage Ideas make existing surfaces, furniture, walls, and overlooked gaps work harder while keeping the room comfortable and easy to navigate.
I’ve noticed that even one thoughtful change, such as adding concealed bed drawers or using an empty wall, can make daily organization noticeably easier. Choose one or two ideas that solve your biggest clutter problems first, then build from there. Save this post on Pinterest for later, try your favorite solutions, and share it with someone who could use more space at home.