
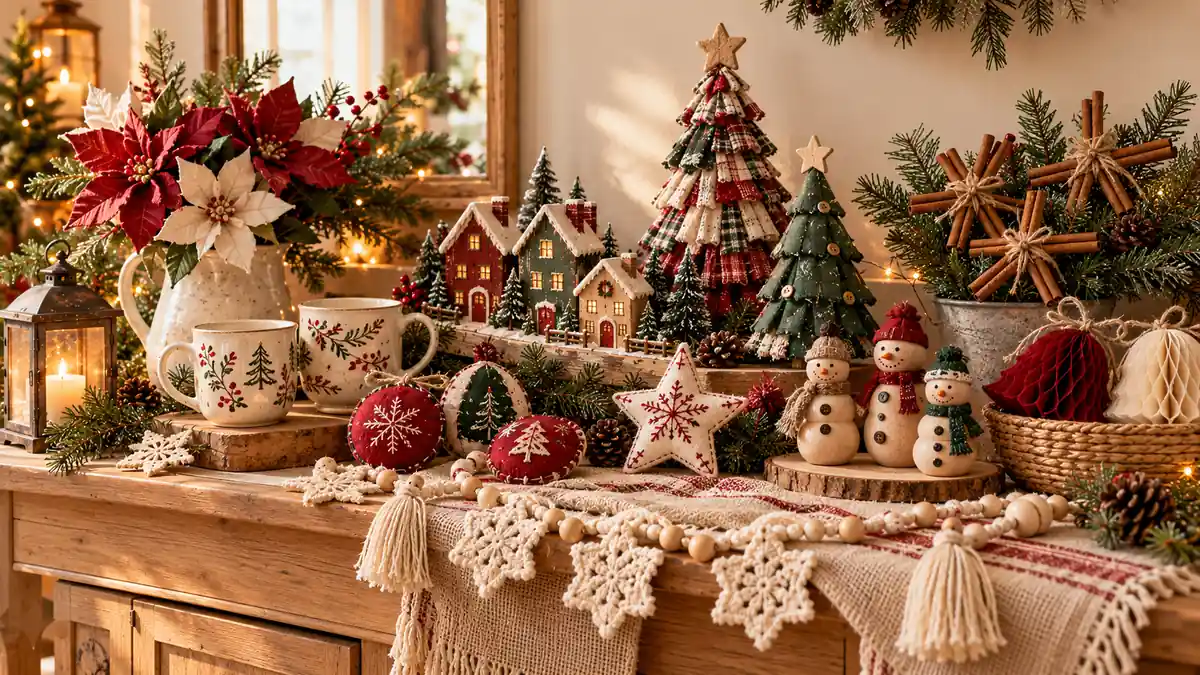
Christmas decorating feels even more special when your home reflects your own creativity. You don’t need expensive store-bought decorations to create a warm, festive atmosphere. With these DIY Christmas Decor Ideas, you can turn simple materials, leftover fabric, wooden beads, paper, and natural accents into charming handmade pieces that make your home feel uniquely yours.
Whether you’re decorating a small apartment, refreshing your Christmas mantel, or adding personal touches to your holiday table, these 23 ideas offer inspiration for different styles and skill levels. Some projects are quick enough for an afternoon, while others let you enjoy a slower, more creative weekend. I’ve found that repeating a few colors and natural textures can make handmade decorations look beautifully coordinated. From rustic wooden houses to delicate paper poinsettias, you’ll discover practical ways to create a cozy Christmas atmosphere without stretching your budget.
Table of Contents
Hand-Painted Wooden Houses
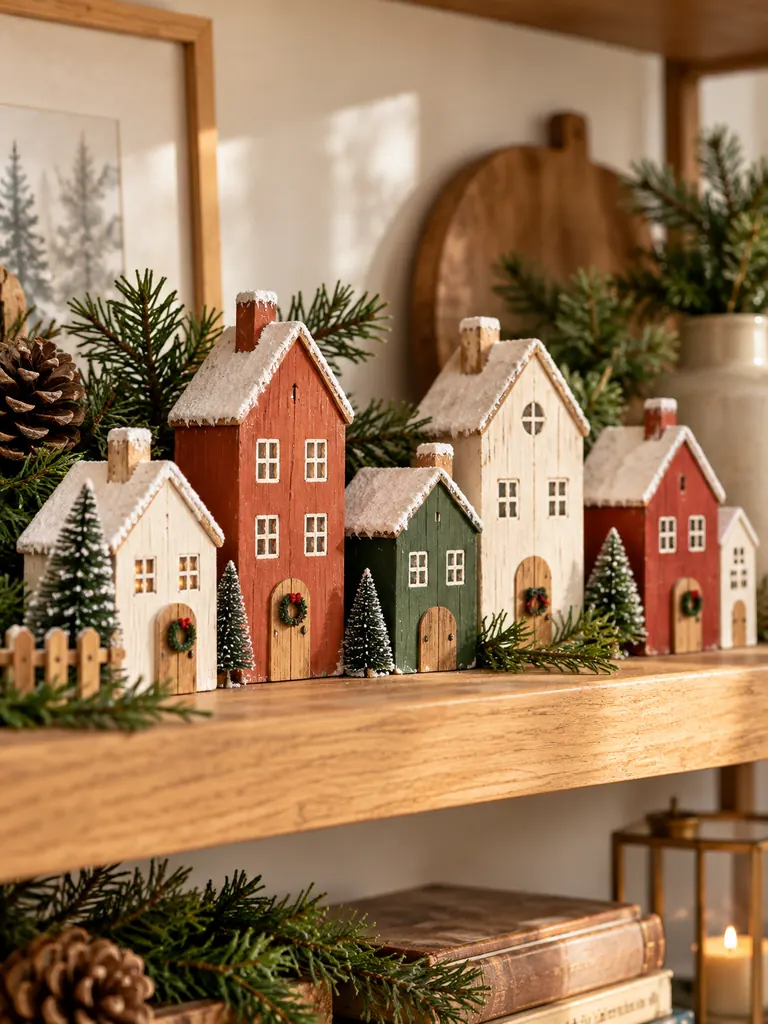
Hand-painted wooden houses bring a cozy village-inspired look to Christmas shelves, mantels, and windowsills. Start with unfinished wooden house shapes or small wooden blocks, then sand the surfaces lightly before painting. Warm ivory, muted brown, forest green, and cranberry red create a traditional Christmas palette that feels inviting without looking overly bright.
Use a fine brush to add tiny windows, doors, snowy rooftops, and simple wreath details. For a slightly aged finish, gently sand a few edges after the paint dries. Arrange several houses at different heights, adding small evergreen branches or battery-operated fairy lights nearby for a charming seasonal display.
Fabric Scrap Christmas Trees

Fabric scrap Christmas trees are a clever way to turn leftover cotton, linen, or plaid fabric into festive decorations. Cut your fabric into small strips or triangular pieces, then layer them around a cone-shaped base made from cardboard, foam, or another suitable craft material.
- Choose complementary fabrics in cream, red, green, and neutral plaid.
- Mix subtle patterns with plain fabrics to keep the design balanced.
- Secure each piece with craft glue or small pins, depending on the base.
- Add a wooden bead, fabric bow, or simple star to finish the top.
These handmade trees work beautifully on coffee tables, bookshelves, and holiday centerpieces. Create several in different sizes for a coordinated display, or use one as a small accent in a bedroom or entryway.
Handmade Cinnamon Stick Stars

Handmade cinnamon stick stars add natural texture and a subtle seasonal scent to Christmas decorating. Arrange five cinnamon sticks into a star shape, overlapping the ends, and secure the joints with craft twine or a suitable adhesive. Keep the binding neat so the rustic materials remain the main visual feature.
Quick Tip: Use cinnamon sticks of similar length to create a balanced star. If you plan to hang the decoration, attach a small loop of twine at one point and check that the joints are secure before displaying it.
Decorate the stars with tiny sprigs of faux greenery, a small fabric bow, or a few wooden beads. Hang them on a Christmas tree, attach them to gift packages, or arrange several in a shallow bowl for a simple natural centerpiece. Keep them away from open flames and direct heat.
Crochet Christmas Garland

A crochet Christmas garland adds a soft, handmade touch to mantels, shelves, and stair railings. Small crocheted stars, hearts, trees, or snowflakes can be connected with yarn to create a decorative strand that suits your home’s style.
Before: A bare mantel or shelf can feel unfinished when surrounded by otherwise festive decorations. Shiny plastic garlands may also look out of place in a room styled with natural wood, linen, and other cozy textures.
After: A handmade crochet garland introduces gentle texture and a more personal feel. Cream yarn creates a soft neutral look, while forest green and cranberry red add traditional seasonal color.
Choose a yarn that holds its shape, and keep the spacing between motifs consistent. Use removable hooks or discreet ties to secure the finished garland without damaging the surface. Store it carefully after the holidays so the motifs remain neat for next Christmas.
DIY Paper Honeycomb Bells

Paper honeycomb bells are lightweight decorations that bring dimension to Christmas trees, windows, and hanging displays. You can make them using folded paper, a bell-shaped template, and adhesive suitable for paper crafts.
- Prepare the template: Draw or print a symmetrical bell shape and cut several identical paper pieces.
- Fold the pieces: Fold each shape carefully down the center to create an even crease.
- Attach the layers: Apply small lines of glue according to your chosen honeycomb pattern, alternating the glued areas to create the expanding structure.
- Form the bell: Join the first and last layers, then gently open the decoration into a rounded bell shape.
- Add a hanger: Attach thread or ribbon before displaying the finished piece.
Use cream, kraft brown, muted red, or forest green paper for a warm handmade look. Vary the sizes to create a coordinated hanging arrangement, and keep paper decorations away from candles and other heat sources.
Hand-Stamped Gift Wrap

Hand-stamped gift wrap turns ordinary kraft paper into a coordinated part of your Christmas decor. Instead of purchasing several patterned wrapping papers, use plain paper and create a repeating design with simple craft stamps.
| Wrapping Style | Stamp Design | Best Color Combination |
|---|---|---|
| Rustic | Small evergreen branches | Forest green on kraft paper |
| Traditional | Stars and tiny dots | Cranberry red on cream |
| Minimalist | Simple geometric shapes | Charcoal on warm ivory |
| Natural | Leaves and berries | Muted green and soft red |
Use washable or permanent craft ink according to the paper and stamp materials, and test the design on a scrap piece first. Leave enough space between impressions so the pattern looks intentional rather than crowded. Finish each package with cotton twine, a handmade tag, or a small evergreen sprig.
If you love decorating with simple, affordable materials, explore these Christmas decor ideas on a budget for more creative ways to make your home festive without overspending.
Hand-Sewn Felt Ornaments

Hand-sewn felt ornaments are beginner-friendly decorations that can be customized into stars, hearts, Christmas trees, mittens, or little stockings. Felt is easy to cut, holds its shape well, and usually does not require hemming around the edges.
DO:
- Cut two matching shapes for each stuffed ornament.
- Use embroidery thread in a contrasting color for visible decorative stitches.
- Add a small hanging loop before closing the final seam.
- Use a light amount of stuffing to keep the ornament soft but well-shaped.
DON’T:
- Pull the stitches so tightly that the felt puckers.
- Overfill small ornaments until the seams stretch.
- Add tiny loose embellishments where young children could reach them.
- Hang the finished decoration before checking that its loop is secure.
Try cream felt with cranberry stitching or forest green with natural-colored thread. Make a matching set for the tree, or attach individual ornaments to wrapped gifts for a thoughtful handmade finishing touch.
For more ways to decorate beyond traditional tree ornaments, discover these creative Christmas decor ideas without a tree for shelves, mantels, and other cozy corners.
Twine-Wrapped Candle Holders
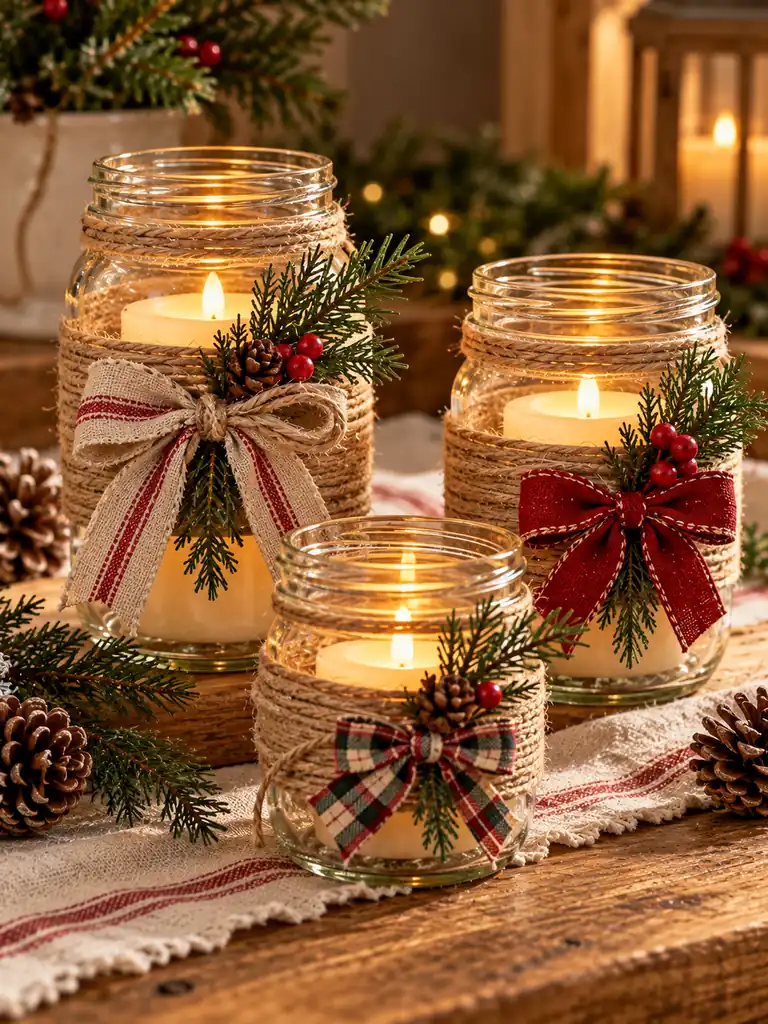
Twine-wrapped candle holders introduce rustic texture to a Christmas mantel, dining table, or sideboard. Start with a clean glass jar or a suitable candle holder, then wrap natural twine around the exterior, securing it neatly with an adhesive appropriate for the material.
Cost: Low when using clean jars and leftover twine.
Time: Approximately 15–30 minutes, depending on the size and wrapping pattern.
Materials: Glass jars, natural twine, scissors, and suitable craft adhesive.
Best For: Rustic Christmas tablescapes, shelves, and decorative groupings.
Finish the holder with a small fabric bow or a sprig of faux greenery attached to the outside. For safety, never place a burning candle inside a twine-wrapped jar or near other flammable materials. Use a battery-operated candle instead, and ensure the holder is stable on a level surface.
Handmade Clay Ring Garland

A handmade clay ring garland offers a minimalist alternative to traditional Christmas tinsel. Roll air-dry clay into thin, even coils, shape them into small rings, and join the ends carefully. Allow the rings to dry completely according to the clay manufacturer’s instructions before painting or assembling them.
For a natural finish, leave some rings in a soft ivory shade and paint others muted terracotta, warm brown, or forest green. A light matte finish helps the garland blend with wood, linen, and other understated holiday decorations.
Thread the finished rings onto sturdy cotton cord, spacing them evenly along the length. Hang the garland across a shelf, on a decorative branch, or above a mantel using secure hooks. Keep clay decorations dry and handle them gently to prevent cracking.
DIY Embroidered Hoop Art

DIY embroidered hoop art turns simple fabric and thread into a small piece of Christmas wall decor. Choose a wooden embroidery hoop, plain cotton or linen fabric, and a design that suits your skill level. Simple motifs such as evergreen branches, stars, tiny houses, or a single Christmas tree can look beautiful without complicated stitching.
Stretch the fabric evenly inside the hoop and lightly sketch the design with a removable fabric marker. Use basic backstitching for outlines and small straight stitches for branches or decorative details. A limited palette of forest green, cranberry red, and cream keeps the finished piece coordinated.
Once the embroidery is complete, trim the excess fabric and secure it neatly at the back. Display the hoop on a wall, lean it against a shelf, or create a small group of hoops in different sizes.
If you prefer a simpler seasonal look, these minimalist Christmas decor ideas offer more inspiration for decorating with natural textures and understated details.
Folded Paper Christmas Angels
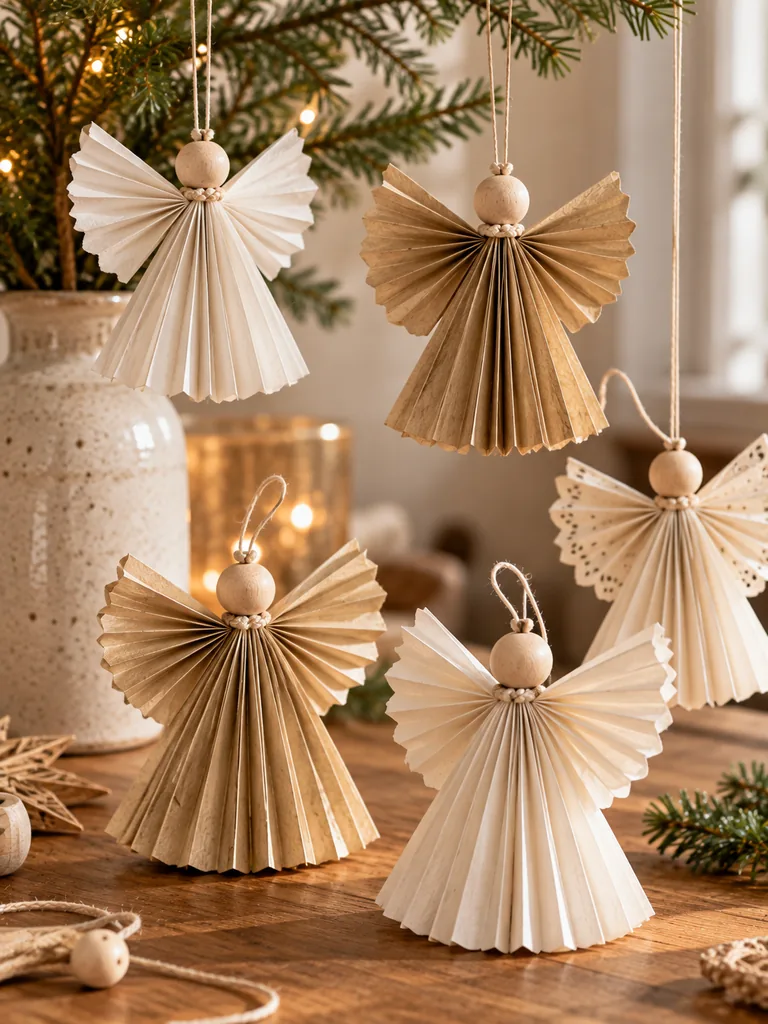
Folded paper Christmas angels are delicate decorations that work well on trees, windowsills, and holiday tables. Choose lightweight cardstock or decorative paper that folds cleanly without tearing. Cream, white, and muted gold papers create an elegant appearance, while patterned paper gives each angel a more playful look.
Quick Tip: Make a paper template before cutting several angels, especially if you want a matching set. Sharp, even folds help the wings and skirt open symmetrically, and a small paper circle or wooden bead can serve as the head.
Use a small amount of craft glue to secure the folded sections, and add a loop of thread if you want to hang the angel. You can also stand the finished decorations on a shelf or use them as handmade place-setting accents. Keep paper angels away from candles and heat sources.
Handmade Beaded Snowflakes
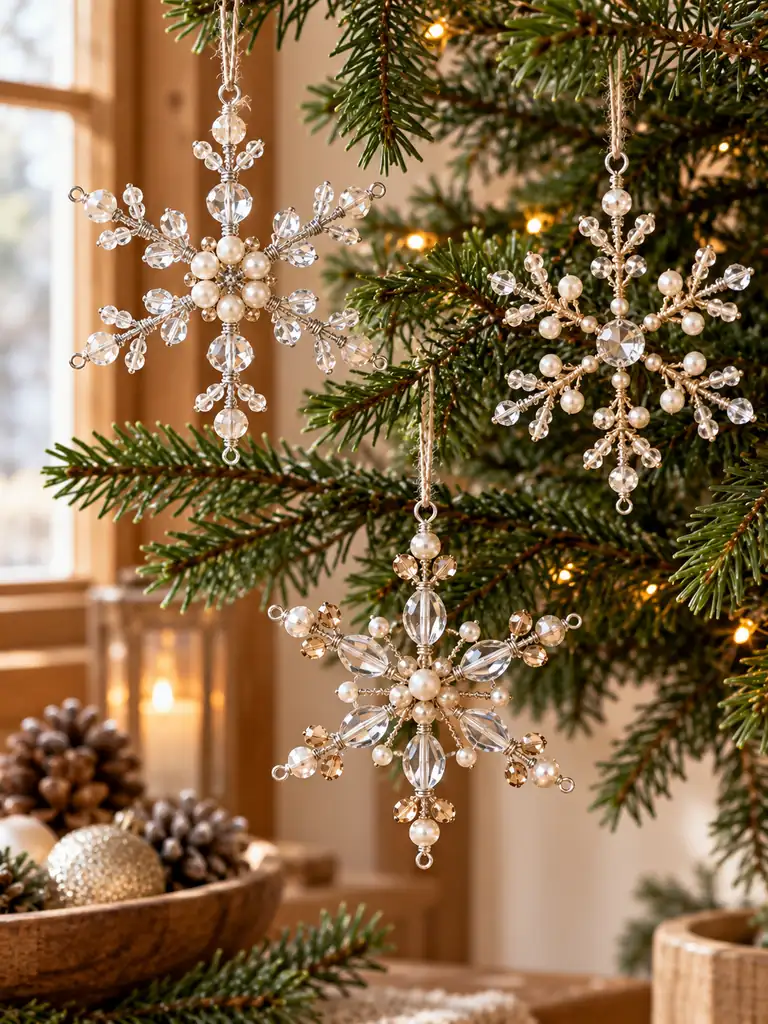
Handmade beaded snowflakes add a little sparkle to Christmas trees, windows, and decorative branches. Use craft wire or a snowflake-shaped frame with beads in clear, pearl white, silver, or soft champagne tones. Combining two or three bead sizes creates visual interest without making the design feel busy.
Before: Plain branches or neutral Christmas trees can sometimes lack the small reflective details that make a display feel festive. Large ornaments may also overwhelm a simple, understated decorating scheme.
After: Small beaded snowflakes introduce delicate shine while keeping the overall look light. Their open shapes allow light to pass through, making them especially attractive near windows or warm indoor lighting.
Arrange the beads symmetrically along each arm of the snowflake, securing the ends carefully so nothing slips off. Add a fine hanging loop and display the finished ornaments with lightweight decorations. Use suitable pliers when working with wire, and keep sharp ends covered.
DIY Quilted Christmas Stockings

DIY quilted Christmas stockings combine traditional holiday styling with the charm of handmade fabric. Use small pieces of cotton, linen, or quilting fabric in coordinating patterns, such as muted plaid, tiny stars, or solid seasonal colors. A simple stocking template helps keep both sides even.
- Select the fabric: Choose two coordinating outer fabrics and a soft lining.
- Prepare the pieces: Cut the stocking front, back, and lining using the same template.
- Add quilting details: Stitch simple parallel lines or a basic patchwork pattern before assembling the stocking.
- Sew the shape: Place the outer pieces together, sew around the edges, and leave the top open.
- Attach the lining and loop: Finish the top neatly and secure a sturdy hanging loop at the side seam.
Personalize the stocking with embroidered initials or a small felt star. Hang it from a secure hook or decorative display rail, and avoid placing heavy items inside unless the fabric and hanging point are strong enough.
Painted Pinecone Place Cards

Painted pinecone place cards bring natural materials to the Christmas table while helping guests find their seats. Collect clean, dry pinecones and choose a paint palette that complements your table linens, dinnerware, and centerpiece.
| Finish | How to Create It | Table Style |
|---|---|---|
| Snow-dusted | Lightly brush the tips with white paint | Traditional winter |
| Metallic | Apply small touches of champagne or gold paint | Elegant and festive |
| Natural | Leave the pinecone mostly unpainted | Rustic farmhouse |
| Cranberry accent | Paint a few tips in muted red | Warm and colorful |
Let the paint dry completely before placing the pinecones on the table. Attach a small folded card or a name tag with cotton twine, making sure the card remains easy to read. Use these decorations as individual place settings or arrange a few around the base of a centerpiece for a cohesive handmade look.
Handmade Fabric Bow Wreath
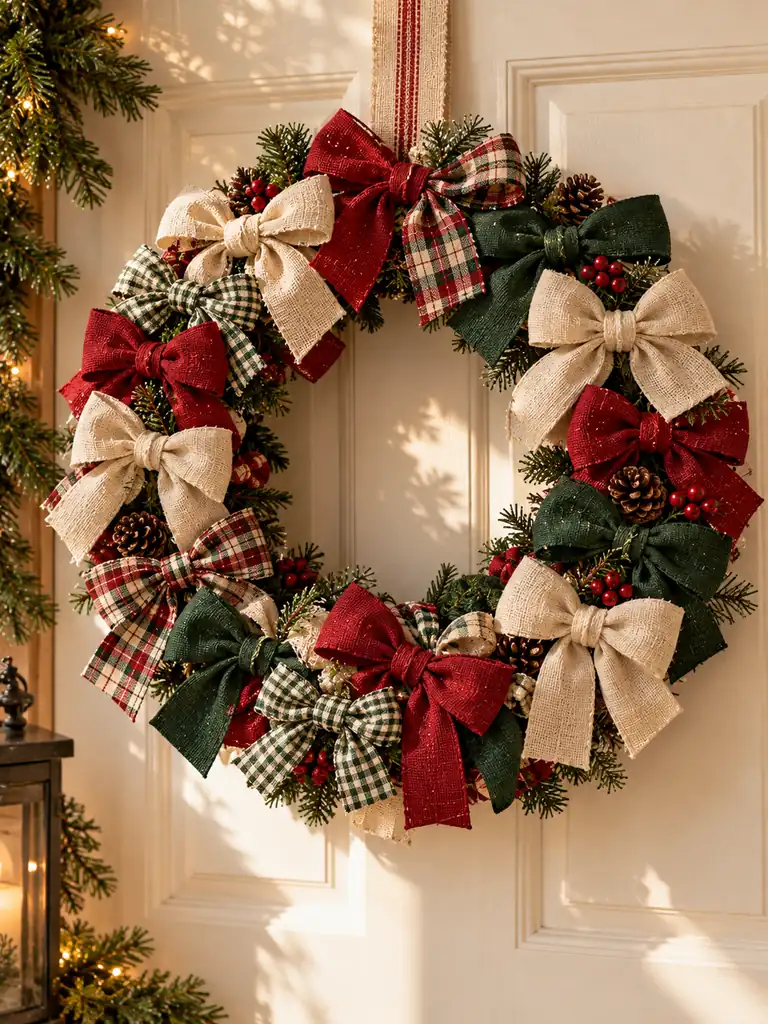
A handmade fabric bow wreath creates a soft, welcoming accent for a front door, interior wall, or mantel. Begin with a sturdy wreath form and strips of fabric in coordinating colors. Cotton, linen, and lightweight plaid fabrics are easy to tie into bows and provide a relaxed handmade finish.
DO:
- Choose two or three fabrics that work well together.
- Tie bows in similar sizes for a balanced overall shape.
- Attach each bow securely to the wreath form.
- Leave a little space between bows so the fabric patterns remain visible.
DON’T:
- Mix too many bold patterns in one small wreath.
- Use fabric that frays excessively unless you plan to finish the edges.
- Make the wreath so heavy that its hanging point becomes unstable.
- Place fabric close to open flames or hot lights.
Arrange the bows around the wreath form, adjusting their direction to create an even silhouette. Add a simple hanging ribbon and display the wreath where it will be protected from excessive moisture. A mix of cream, forest green, and cranberry red suits traditional Christmas decor beautifully.
DIY Macrame Star Hangers
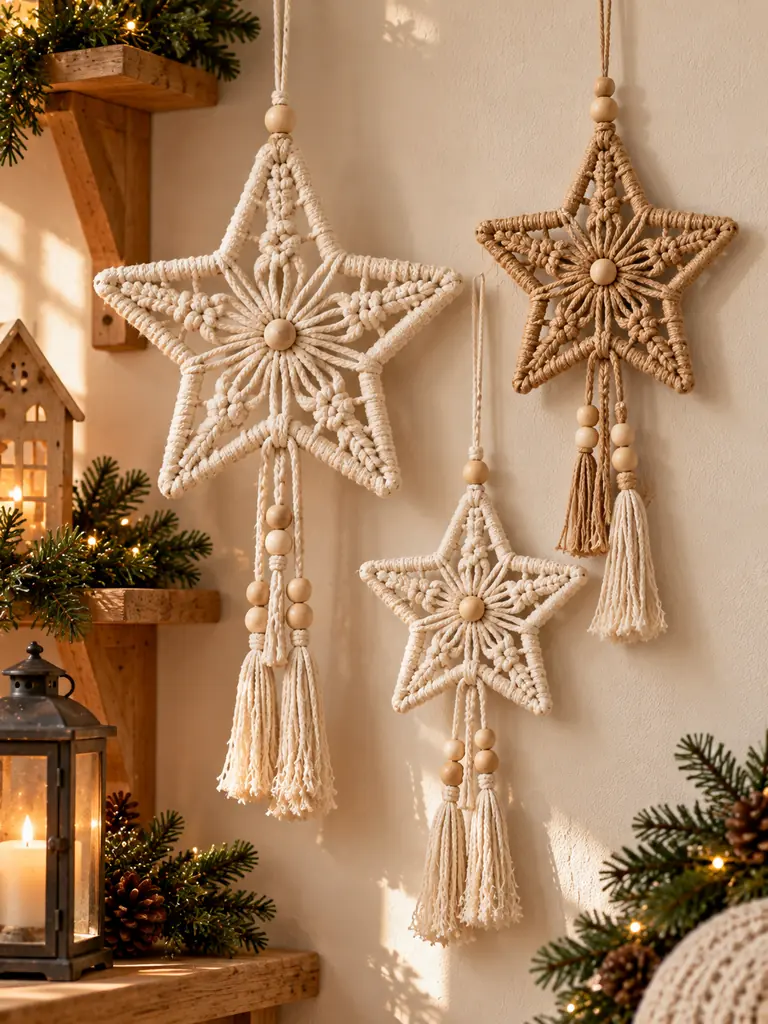
DIY macrame star hangers add natural fiber texture to Christmas trees, windows, and wall displays. Use cotton macrame cord and a lightweight star-shaped frame, or form the star from sturdy craft wire if you are comfortable shaping it. Simple knots and evenly wrapped cord create a neat, handmade finish.
Cost: Low to moderate, depending on the cord and frame.
Time: Around 30–60 minutes for a simple design.
Materials: Cotton cord, a star frame, scissors, and a measuring tape.
Best For: Neutral Christmas trees, cozy bedrooms, and rustic seasonal displays.
Wrap or knot the cord around the frame, keeping the tension consistent so the star retains its shape. Trim the ends carefully and add a small hanging loop. Natural cotton looks especially lovely with wood beads and greenery, while a narrow cranberry ribbon can introduce a subtle seasonal accent. Keep the finished hanger away from candles and other heat sources.
Hand-Poured Wax Ornaments
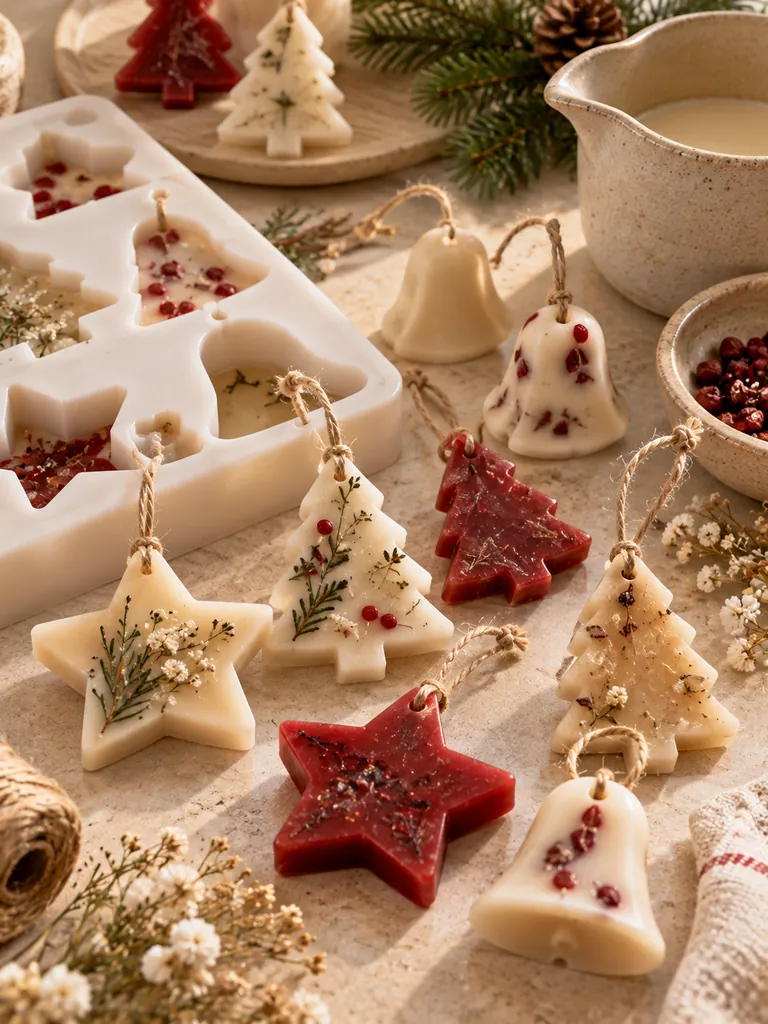
Hand-poured wax ornaments can add a soft, handmade touch to Christmas gift displays and decorative trays. Use a wax designed for molded ornaments, along with suitable molds and wicks only if the product is intended to become a candle. Follow the manufacturer’s instructions for melting, pouring, cooling, and handling the wax safely.
Choose simple shapes such as stars, trees, or small bells. Cream and muted red are classic options, while unscented wax keeps the decorations suitable for spaces where fragrance may be unwanted. If adding fragrance or color, use products specifically formulated for the wax type and intended application.
Allow each ornament to cool and harden completely before removing it from the mold. These pieces are best displayed on stable, heat-safe surfaces and should not be hung where they could fall or become exposed to direct heat. Never leave heated wax unattended.
Handmade Christmas Village Signs
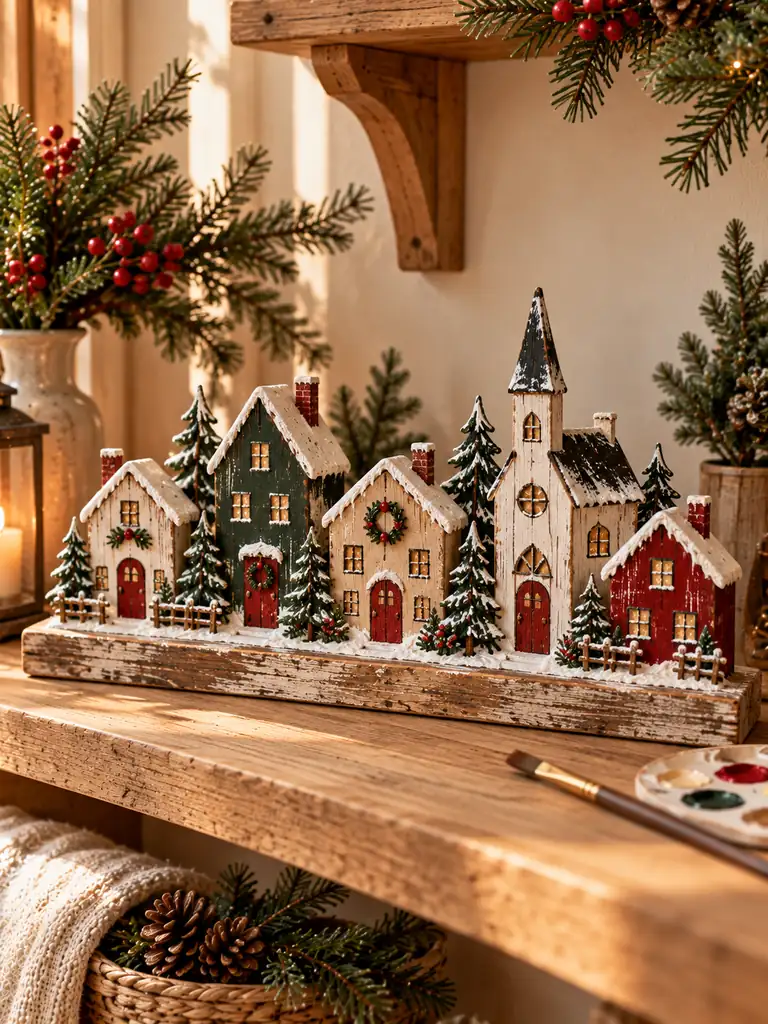
A handmade Christmas village sign can turn a simple wooden plaque into a charming seasonal accent for shelves, entryways, or mantel displays. Start with a smooth, unfinished wooden board and lightly sand the edges. Apply a neutral base coat, then sketch a small winter village scene using a pencil before painting.
Use warm ivory for snowy rooftops, muted brown for cottages, and cranberry red for doors or windows. A fine detail brush helps create crisp outlines, while a small amount of dry brushing adds a weathered finish. Once the paint is fully dry, apply a suitable protective sealer and display the sign on a stable surface.
DIY Needle-Felted Reindeer

Needle-felted reindeer bring a soft, sculptural accent to Christmas shelves, mantels, and holiday centerpieces. Use wool roving in warm brown and cream, shaping the fibers gradually with a felting needle over a proper felting mat. Begin with a rounded body and smaller head before adding the legs, ears, and antlers.
Cost: Low to moderate, depending on the wool and tools already available.
Time: Approximately 1–2 hours for a simple figure; detailed designs may take longer.
Materials: Wool roving, felting needles, a felting mat, and optional small amounts of darker wool for facial details.
Best For: Handmade gift displays, woodland-inspired decor, and small seasonal vignettes.
Work slowly and keep your fingers clear of the needle, which has sharp barbs. Beginners can start with a simple sitting reindeer before trying more detailed poses. Display the finished figure alongside wooden beads, faux evergreen branches, or a small fabric tree for a coordinated woodland Christmas arrangement.
Hand-Painted Ceramic Mugs

Hand-painted ceramic mugs make thoughtful handmade gifts and add seasonal charm to a kitchen shelf or hot chocolate station. Start with plain ceramic mugs that are compatible with the type of ceramic paint or marker you plan to use. Wash and dry the surface thoroughly so dust and grease do not interfere with the design.
Sketch small stars, holly leaves, snowflakes, or minimalist Christmas trees. Apply the paint according to the manufacturer’s instructions, allowing the recommended drying time and curing process. Choose a simple design for a clean finish, and repeat the same motif across several mugs for a coordinated gift set.
Before using a decorated mug for drinks, confirm that the product is suitable for food-contact surfaces and follow its care instructions. Until its food-contact safety is confirmed, treat the mug as decorative only. This is especially important if the design is placed near the rim or inside the cup.
DIY Braided Fabric Coasters
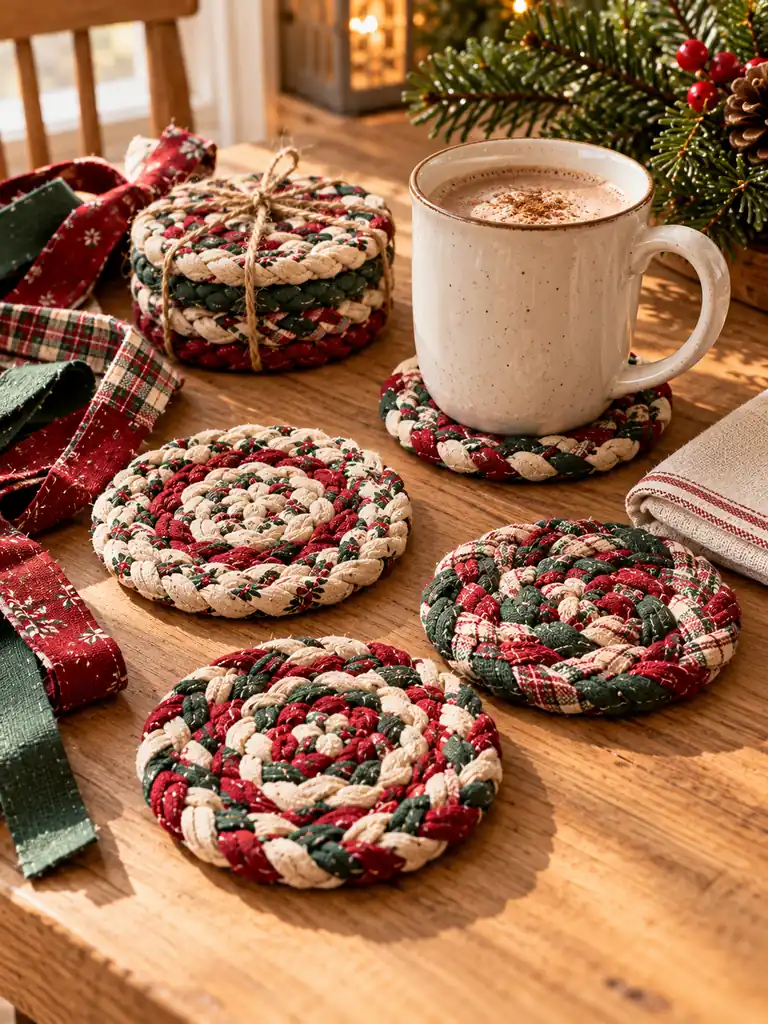
Braided fabric coasters turn leftover cotton strips into useful handmade accessories for holiday drinks. Cut three strips of similar width, braid them together, and coil the braid into a flat circle or oval. Secure the coil with small stitches as you work, then finish the end neatly underneath to prevent unraveling.
| Design Detail | Single-Fabric Coaster | Braided Fabric Coaster |
|---|---|---|
| Materials | One piece of cotton fabric | Three long fabric strips |
| Texture | Smooth and flat | Raised woven pattern |
| Construction | Cut and hem | Braid and coil |
| Appearance | Minimal and simple | Rustic and handmade |
| Best For | Modern table settings | Cozy farmhouse Christmas styling |
Choose fabric in cream, cranberry red, forest green, or muted plaid to match your holiday table. Cotton works well because it is easy to cut and stitch, while a consistent strip width helps create an even braid. Make a matching set for guests or use leftover scraps to create small coordinating trivets.
Handmade Paper Poinsettias
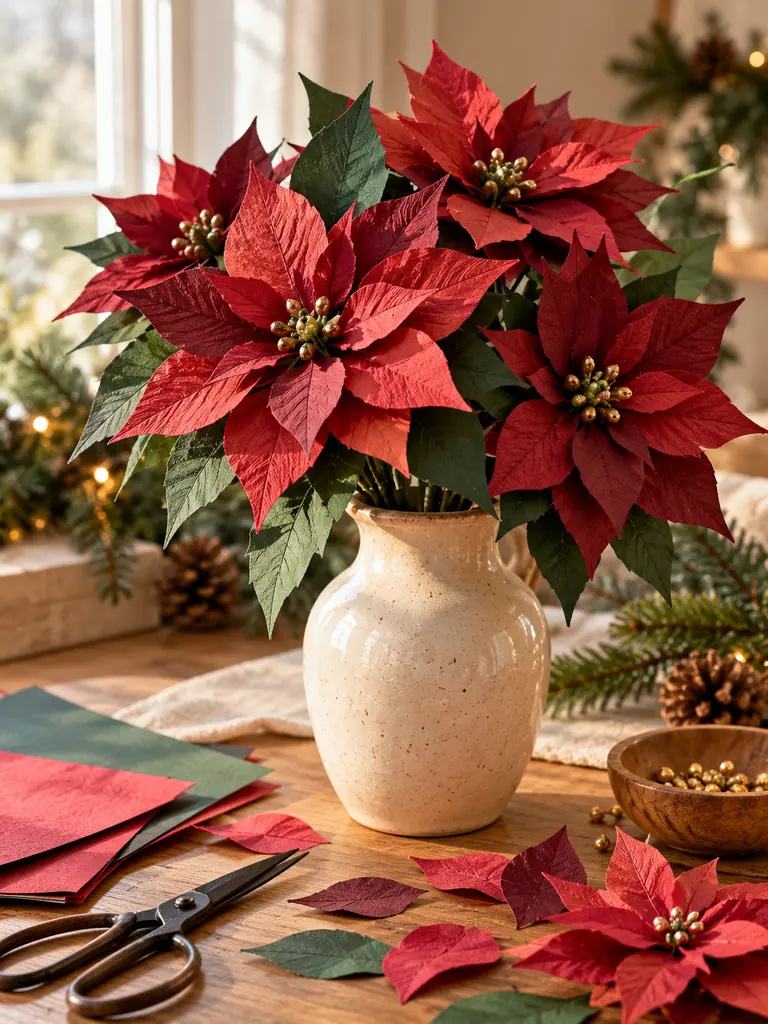
Handmade paper poinsettias offer a reusable alternative to fresh seasonal flowers and can be customized to match your Christmas palette. Use crepe paper or sturdy colored cardstock in cranberry red, deep burgundy, and forest green. Cut pointed petals in graduated sizes, then layer them to create a fuller flower shape.
Quick Tip: Shape each petal gently with your fingers before assembling the flower. Slight curves and varied petal sizes help the finished bloom look more natural than perfectly flat layers.
Attach the petals with a suitable craft adhesive, then add green paper leaves beneath them for contrast. A small cluster of paper circles or tiny beads can form the center. Display the finished blooms in a decorative vase, attach individual flowers to gift wrapping, or use them as accents on a holiday wreath. Keep paper flowers away from candles and hot light fixtures.
DIY Wooden Bead Snowmen
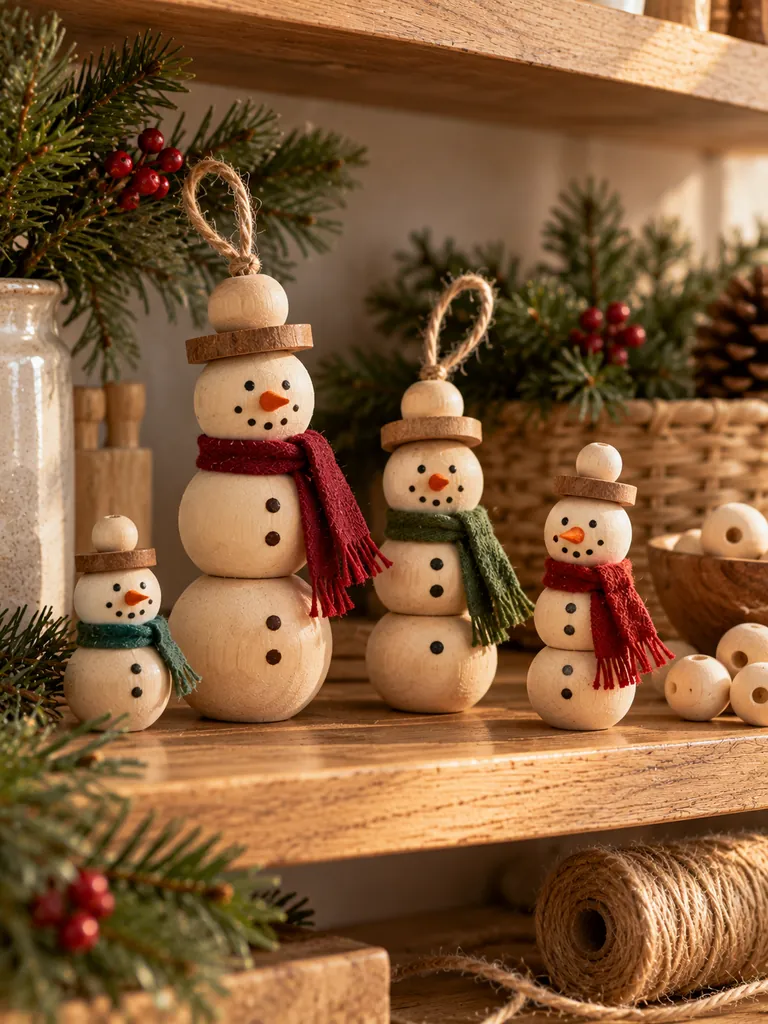
Wooden bead snowmen add a playful handmade accent to Christmas shelves, gift packages, and seasonal table displays. Choose unfinished wooden beads in two or three sizes, then stack them vertically using a suitable craft adhesive. Allow the adhesive to dry fully before adding facial details with a fine paintbrush or permanent craft marker.
Cut a narrow strip of cranberry fabric or felt for the scarf, and tie it loosely around the snowman’s neck. Add tiny black eyes and a small orange nose, keeping the details simple so the natural wood remains visible. You can also paint a few small buttons down the front for extra character.
Attach a loop of cotton cord if you want to hang the snowman as an ornament. Otherwise, display it on a shelf or place it beside a miniature evergreen tree. Make several figures in slightly different sizes to create a charming handmade Christmas vignette.
Conclusion
Handmade Christmas decorations bring something special to your home: personality, warmth, and the satisfaction of creating something yourself. From simple fabric crafts to charming wooden accents, these DIY Christmas Decor Ideas make it easier to decorate beautifully while using affordable, accessible materials. Start with a project that matches your time and skill level, then add more pieces as inspiration strikes. Even a few handmade details can make a room feel more welcoming and festive. Save this article to your Christmas decor board on Pinterest, try your favorite ideas, and share it with friends or family who love creative holiday projects. Let your handmade touches make this Christmas memorable!
1 thought on “23 Handmade DIY Christmas Decor Ideas With Cozy Charm”