
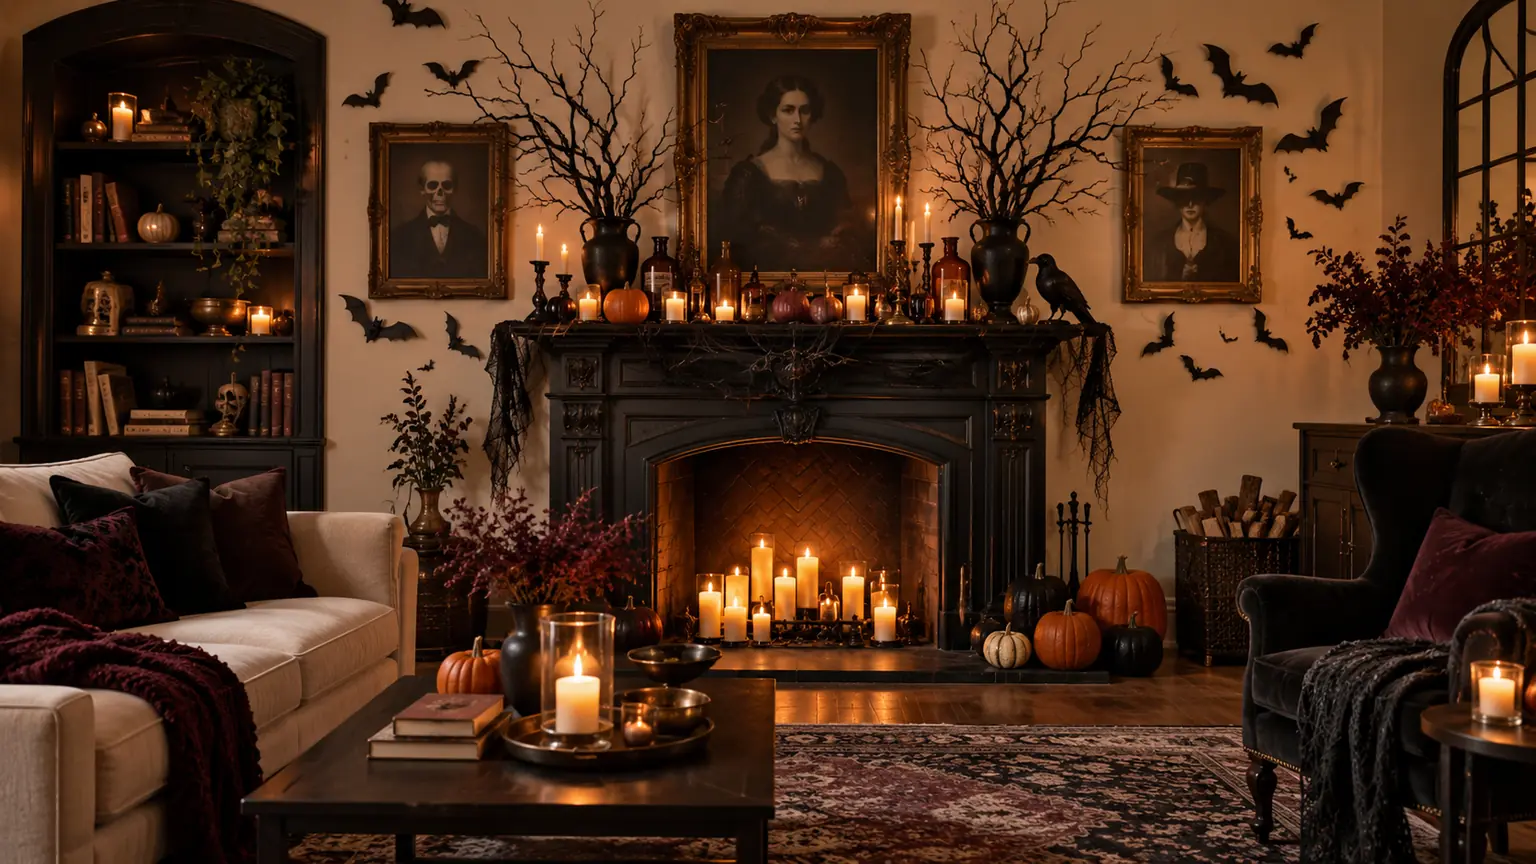
Your home can feel spooky, stylish, and ready for Halloween without covering every surface in decorations. These indoor Halloween decor ideas will help you create memorable displays using walls, shelves, windows, tables, and overlooked corners.
You will find playful projects, gothic arrangements, family-friendly accents, and practical safety tips for decorating rooms you still need to use every day. In my experience, the strongest Halloween interiors rely on one clear focal point rather than dozens of unrelated objects.
Whether you prefer floating witch hats, eerie portraits, glowing pumpkins, or subtle potion bottles, these ideas will help you choose decorations confidently, arrange them with purpose, and create an atmospheric home that remains comfortable and organized.
Table of Contents
Haunted Entry Console
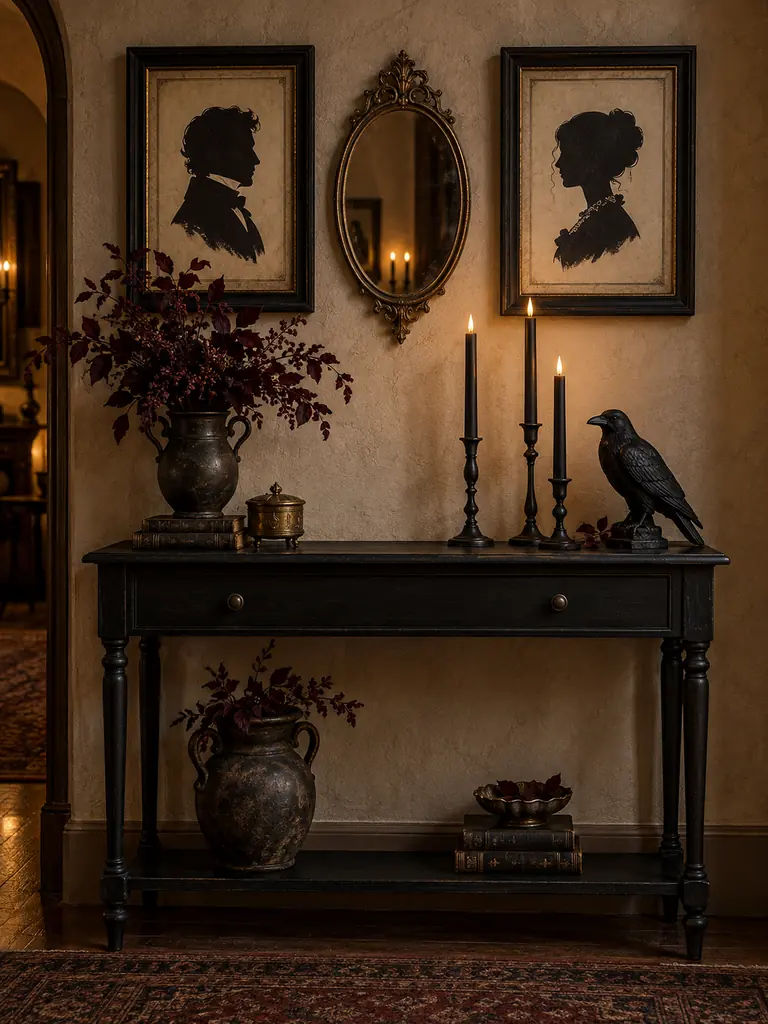
A well-styled entry console sets the Halloween mood before guests reach the main room. Start with one framed silhouette or antique-style mirror as the focal point, then arrange two flameless candles at different heights. A ceramic raven or miniature skull adds character without making the surface feel crowded.
Keep keys and everyday belongings inside a dark tray or closed drawer so the display remains practical. In my experience, an odd number of decorations creates a more natural arrangement. Leave part of the surface visible, especially if the console sits inside a narrow entrance.
Carry the spooky welcome beyond the entryway with this Halloween Porch Decorating Inspiration designed for doors, steps, railings, windows, and outdoor guest areas.
Floating Witch Hats
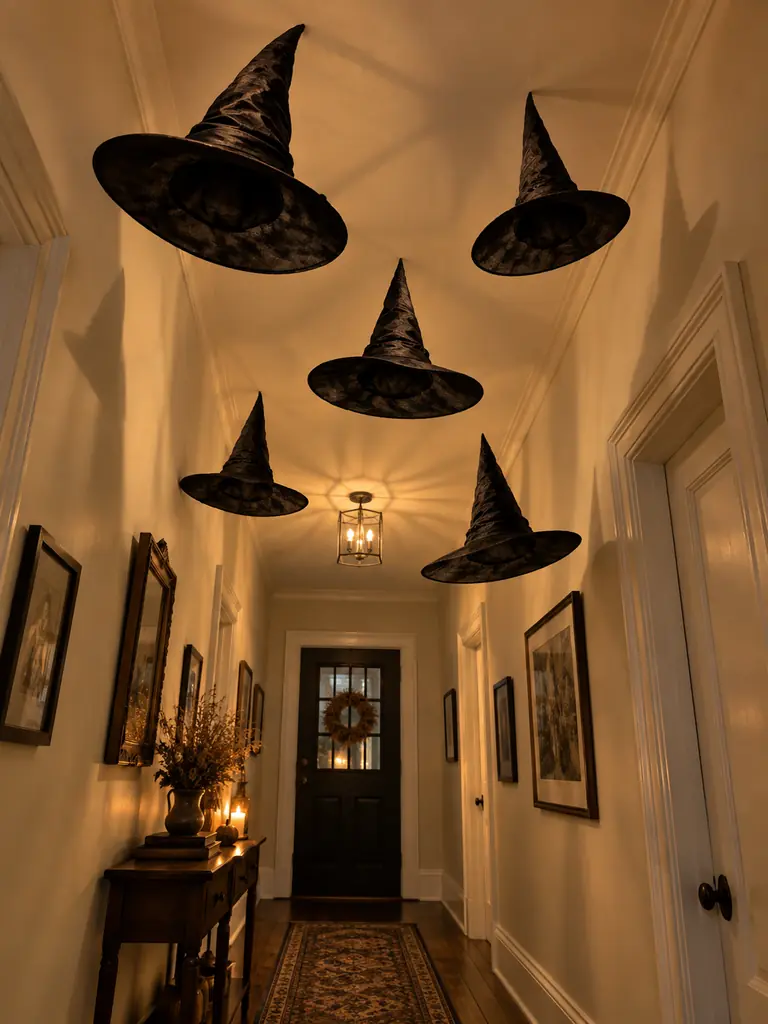
- Hang three, five, or seven lightweight hats to create a balanced overhead arrangement.
- Use clear fishing line so the hats appear to float without visible supports.
- Vary each height by 8 to 12 inches to prevent the display from looking flat.
- Secure every line to removable ceiling hooks rated for more than the hat’s weight.
- Keep hats away from ceiling fans, light fixtures, smoke detectors, and frequently opened doors.
Floating hats draw attention upward, making them useful indoor Halloween decor ideas for narrow hallways and small rooms. Test the lowest hat before finishing the arrangement so taller guests can walk underneath safely. For extra atmosphere, place a warm spotlight nearby and let the hat brims cast shifting shadows across the wall.
Crawling Wall Spiders
Quick Tip:
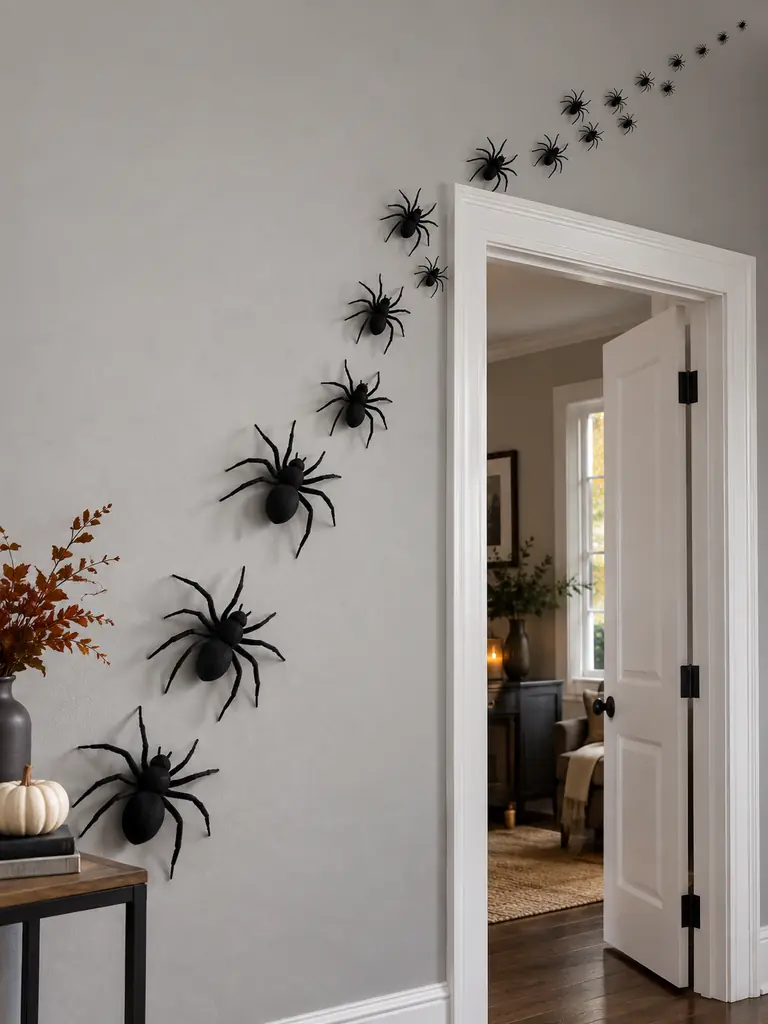
Build the spider trail from one concentrated cluster, then spread smaller spiders outward. This looks more intentional than placing identical decorations evenly across the entire wall.
Choose removable adhesive dots that are suitable for your paint finish, and test one inside a hidden corner first. Position the largest spiders near the doorway or baseboard, then turn each body in a slightly different direction. Keep the arrangement away from switches and handles so it remains convincing without interrupting daily use.
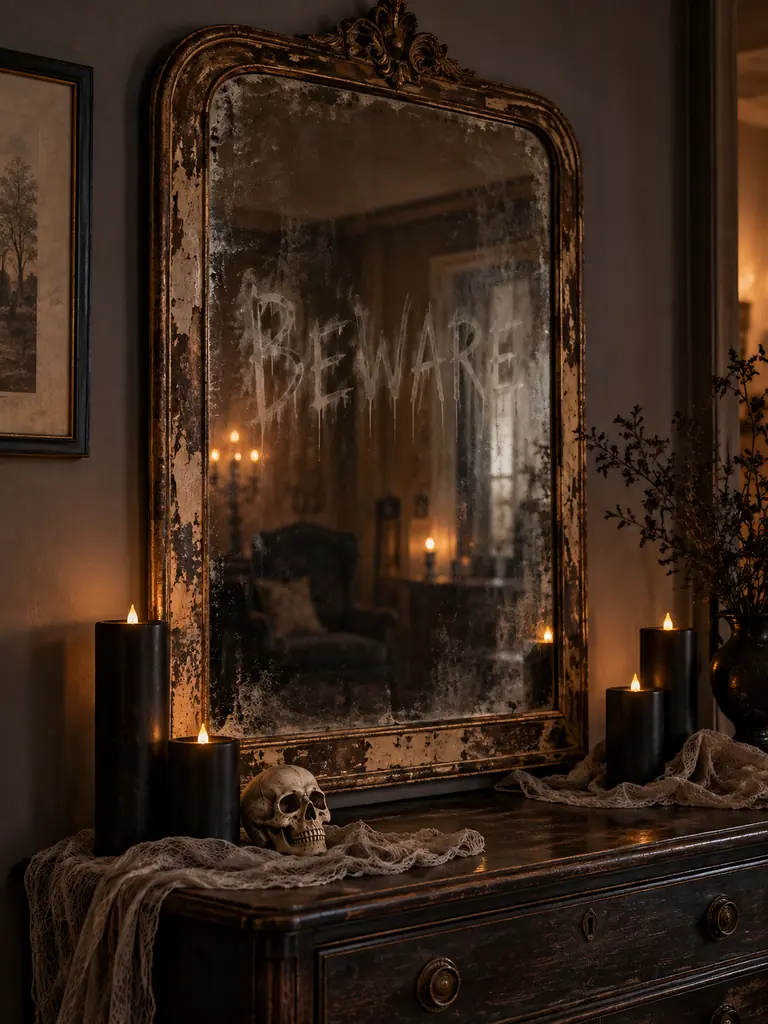
Ghostly Mirror Message
Before:
The mirror reflects the room but contributes little to the Halloween theme. Random stickers or thick paint may also make it look messy and become difficult to remove later.
After:
A pale message or frosted handprint turns the reflection into an eerie focal point. The decoration remains controlled, readable, and easy to remove after the season.
Write on clean glass with a washable window marker, removable decal, or diluted faux-frost spray made for temporary decorating. Keep the message short so it can be understood from across the room. Test the product in a lower corner first, and avoid permanent paint, glue, or materials that may scratch the mirror.
Shadowy Window Silhouettes
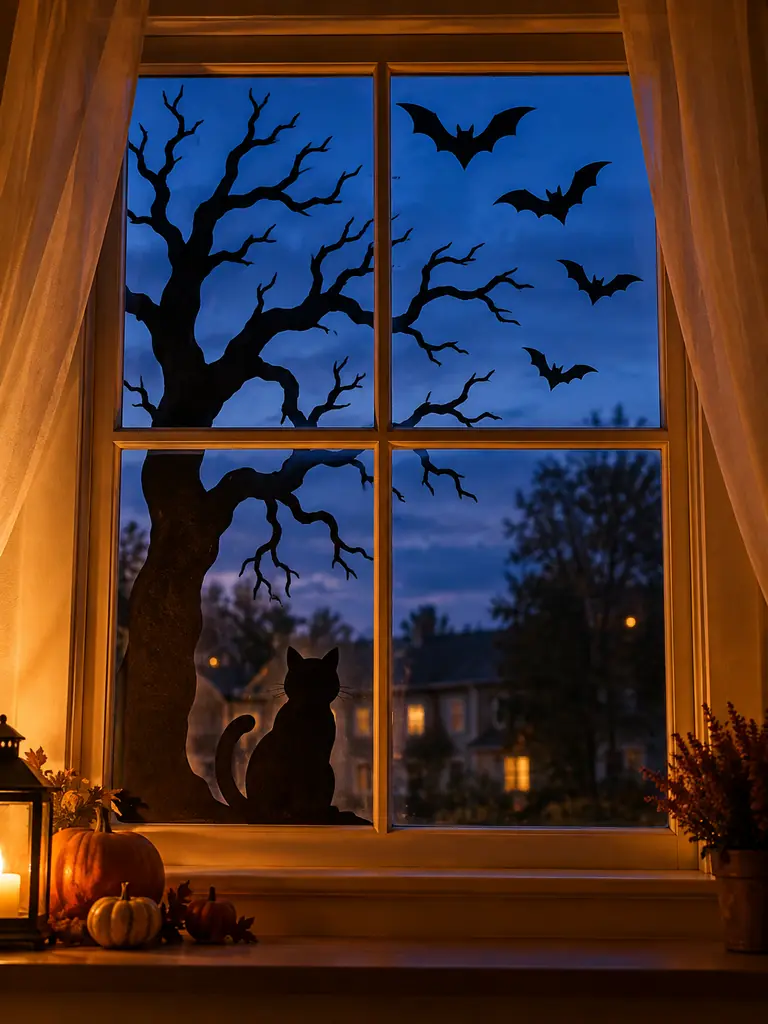
- Measure the visible glass area and choose one simple scene that fits within the frame.
- Draw or print the shapes, then cut them from matte black cardstock using sharp scissors.
- Attach each piece with small removable adhesive dots placed near the outer edges.
- Position a warm LED lamp behind the window to strengthen the silhouettes after sunset.
- Check the display from indoors and outdoors, then adjust any shapes hidden by the frame.
Bold cutouts create visual impact without using valuable floor or table space. Keep the lower portion less crowded if the window provides an important daytime view. For reusable decorations, store every shape flat between sheets of cardboard after Halloween, clearly labeled by window so next year’s setup takes only a few minutes.
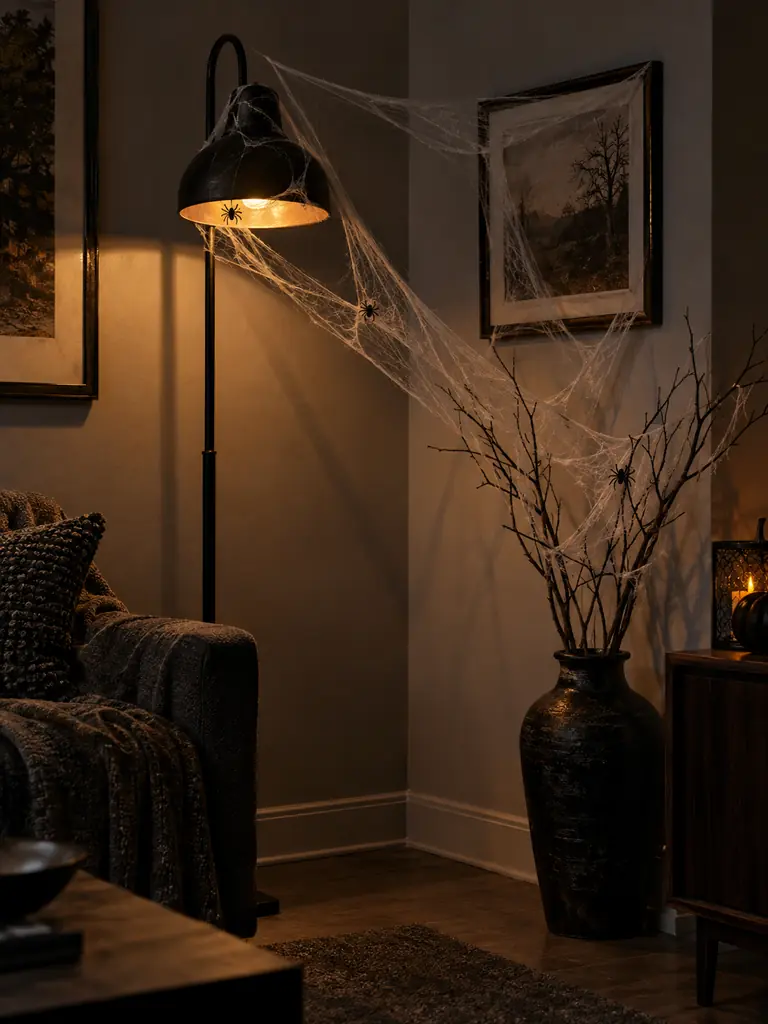
Cobweb Corner Display
| Crowded Approach | Controlled Approach |
|---|---|
| Thick webbing covers several walls | Thin strands define one chosen corner |
| Spiders appear on every surface | Three or four spiders create focused detail |
| Webs block lamps and switches | Clear access preserves safe daily use |
| Loose fibers hang near walkways | Secure edges remain above shoulder height |
Cobweb material looks more realistic when pulled into fine, uneven strands rather than left in thick cotton-like clumps. Anchor it to removable hooks, branches, or stable furniture edges. Keep fibers away from bulbs, heaters, vents, candles, pets, and small children. One carefully finished corner usually creates enough atmosphere for the room.
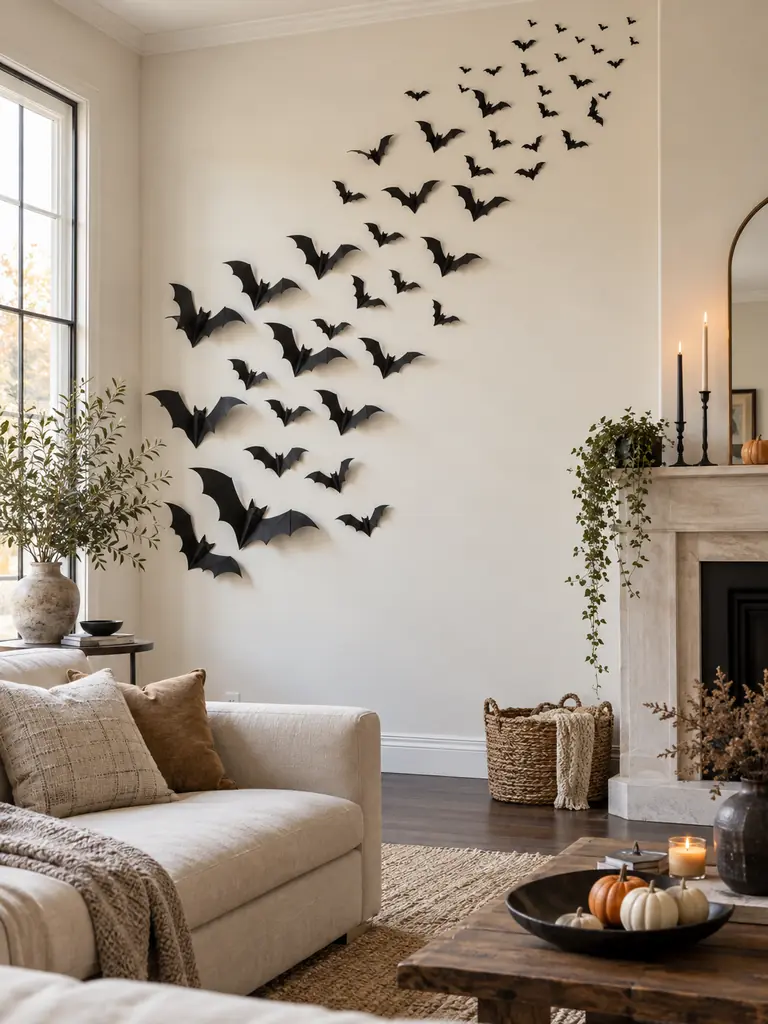
Bat Swarm Wall
Do:
- Cut or purchase bats in at least three different sizes for realistic depth.
- Fold each bat gently along its center so the wings lift away from the wall.
- Begin with a dense cluster near furniture, then narrow the trail toward the ceiling.
- Test removable adhesive on a hidden section before installing the full display.
Don’t:
- Arrange every bat in straight, evenly spaced rows.
- Cover vents, switches, framed artwork, or frequently touched wall areas.
- Use strong tape that could pull away paint during removal.
- Extend the swarm across several walls if the room already has busy decor.
A rising bat formation directs the eye upward and adds energy without occupying useful surfaces. Step back after attaching every five or six bats to review the overall direction. I’ve noticed that leaving irregular gaps makes the swarm appear more convincing, while tightly filling the entire wall often weakens the individual shapes.
Potion Bottle Collection

Cost: Low when made with cleaned bottles and printable labels
Time: About one hour for six to eight bottles
Skill Level: Beginner-friendly cutting, labeling, and styling
Best For: Shelves, mantels, kitchen corners, and glass cabinets
Wash recycled bottles thoroughly, remove old labels, and allow the interiors to dry before decorating. Fill sealed containers with tinted water, dried herbs, or colored salt, but label them clearly as decorative. Avoid using unknown substances, and keep every bottle away from children, pets, food preparation areas, and direct sunlight.
Haunted Bookshelf Layers
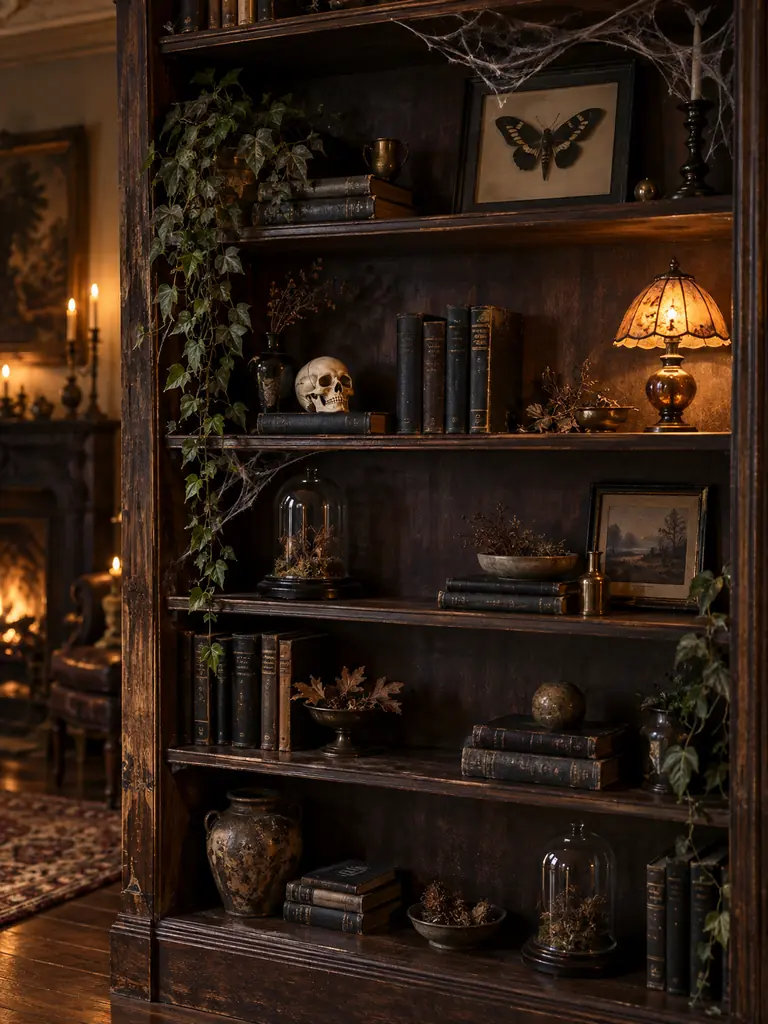
Bookshelves become stronger seasonal features when the existing contents remain part of the display. Turn several bright book spines inward or wrap them temporarily in black and kraft paper. Add one themed object per shelf, varying the placement between a miniature skull, framed specimen print, dark bottle, or small raven.
Preserve open space around each arrangement so the shelving still feels organized. Place taller items toward the back and smaller details near the front, without hiding books you use regularly. Thin cobweb strands can connect two shelves, but keep them clear of lamps and avoid covering the entire unit.
Spooky Mantel Scene
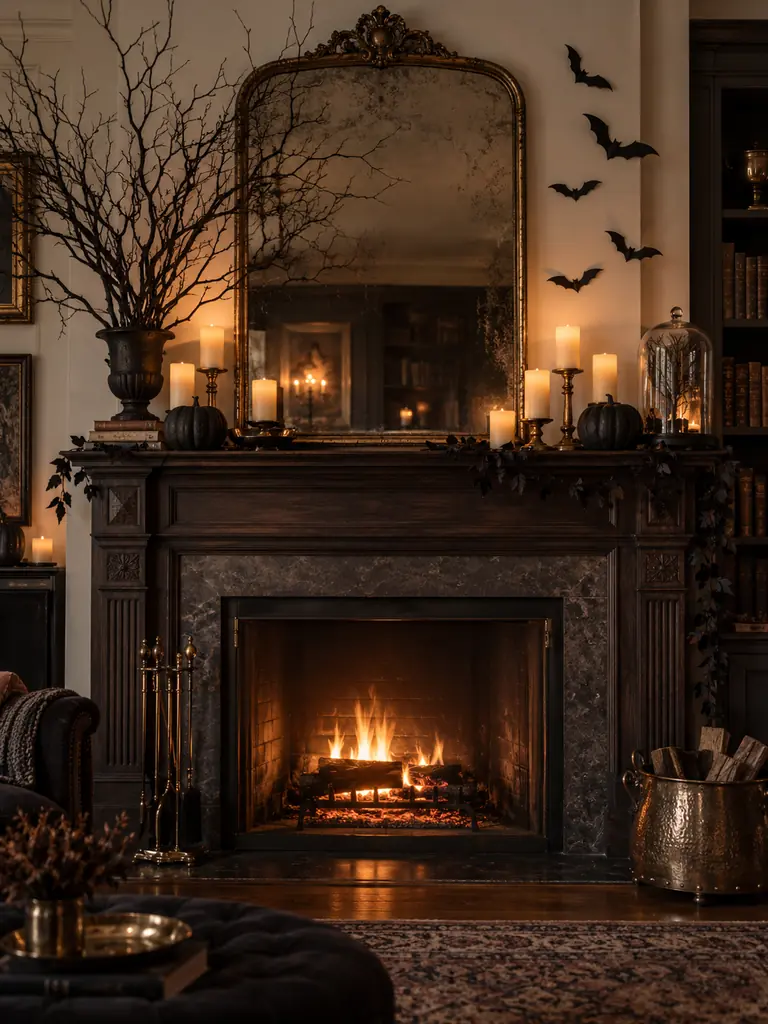
- Choose one large mirror, framed print, or wreath as the central focal point.
- Place tall branches or candleholders on one side to establish height.
- Balance the opposite side with two smaller pumpkins or stacked vintage books.
- Add a few paper bats above the mantel to connect the display with the wall.
- Keep loose fabric, paper, dried foliage, and decorations away from a working fireplace.
A mantel feels polished when objects vary in height but share a limited palette. Begin with the largest piece and build outward rather than filling every gap. Use flameless candles near combustible decorations, and leave enough open surface to make each item visible. The result should feel atmospheric, not overloaded.
For more seasonal fireplace and seating-area inspiration, explore these Inviting Fall Living Room Decor Ideas that bring warmth to shared spaces.
Candlelit Pumpkin Cluster
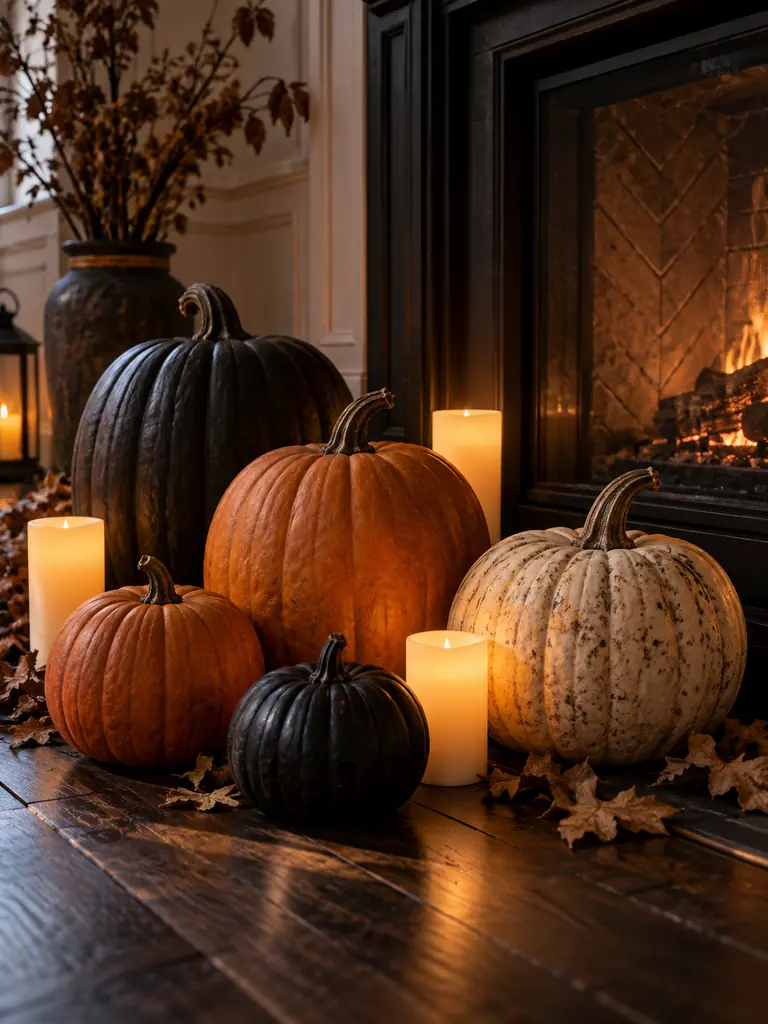
Quick Tip:
Group pumpkins in odd numbers and mix three sizes to create a natural arrangement. Place the tallest pumpkin toward the back, then fill lower gaps with compact LED candles.
Select pumpkins in two or three coordinated colors so the cluster feels connected to the room. Keep carved openings facing outward, and place battery-operated lights inside instead of real flames. A woven tray can contain smaller pieces on a table, while floor arrangements should remain clear of doors, curtains, heaters, and walking routes.
Skeleton Reading Corner
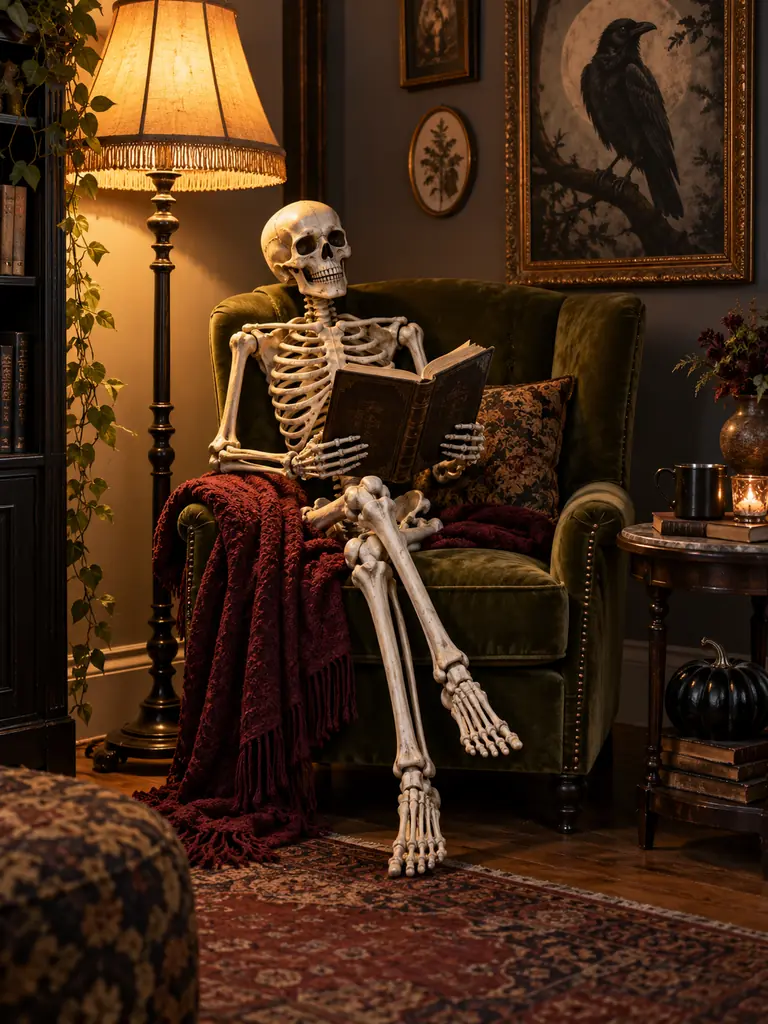
Before:
An unused chair sits quietly in the corner and adds little to the seasonal atmosphere. Random decorations placed around it can appear disconnected and consume valuable floor space.
After:
A seated skeleton creates one memorable scene using furniture already in the room. The book, lamp, and blanket make the setup feel intentional while keeping the surrounding area organized.
Position the skeleton securely so it cannot slide from the chair or fall when someone passes. Bend the arms around a lightweight book and keep the feet within the chair’s footprint. I’ve seen this work especially well when nearby colors match the existing room, allowing the humor to stand out without creating visual chaos.
For more comfortable seasonal styling around sofas, chairs, and fireplaces, explore these Cozy Halloween Living Room Decor Ideas designed for relaxed autumn evenings.
Gothic Table Centerpiece
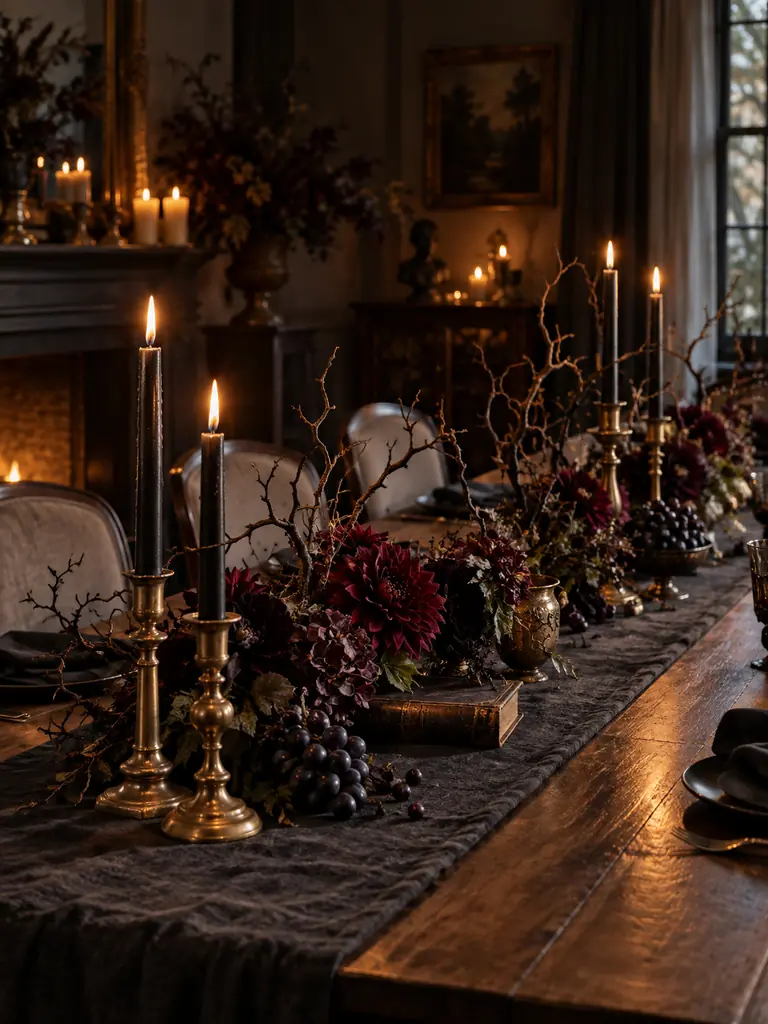
- Place a narrow charcoal or burgundy runner along the center of the table.
- Position three candleholders at different heights, using stable bases and flameless tapers.
- Arrange dark flowers and clipped branches between the candles without blocking sightlines.
- Add one or two vintage-style objects, such as an old book, brass key, or miniature frame.
- Check that serving dishes and place settings still fit comfortably around the display.
A successful centerpiece creates drama without interfering with conversation or meals. Keep most decorations below eye level and limit the arrangement to the center third of the table. In my experience, repeating one material, such as aged brass or black glass, helps separate objects look like one thoughtful Halloween composition.
Haunted Dining Settings
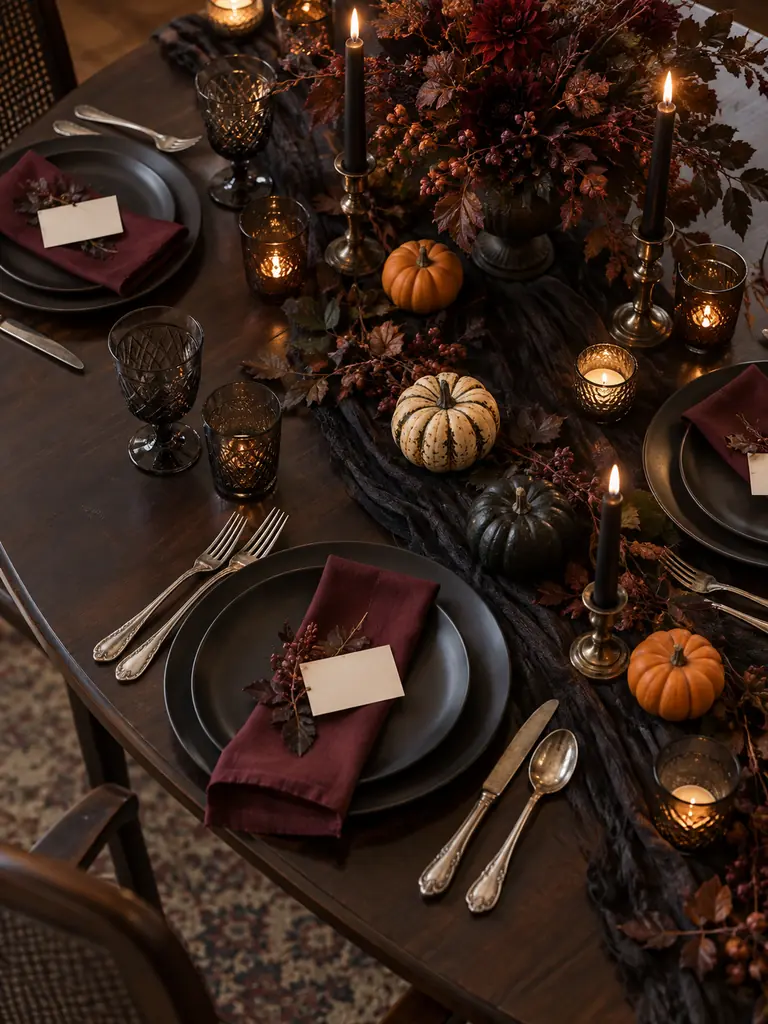
Image Description: Elegant Halloween dining table with matte black plates, folded burgundy napkins, cream name cards, miniature pumpkins, and aged silver flatware. Smoky glassware reflects soft candlelight across a dark wooden surface. Overhead photography reveals generous spacing, coordinated colors, and a refined seasonal setting designed for comfortable indoor dining.
| Overdecorated Setting | Balanced Setting |
|---|---|
| Several props cover each plate | One miniature pumpkin marks each place |
| Tall objects block conversation | Low accents preserve clear sightlines |
| Loose glitter reaches food | Clean reusable textiles add safe detail |
| Decorations crowd the glassware | Open spacing keeps every item accessible |
Begin with the dinnerware you already own, then add Halloween character through napkins, place cards, or one compact accent. Avoid placing decorative bones, artificial insects, or non-food-safe paint directly against meals. Give each guest enough elbow room, and remove any object that makes lifting a glass or passing a dish awkward.
For a more detailed dining setup, explore this Halloween Tablescape Guide covering place settings, centerpieces, lighting, guest comfort, and serving space.
Creepy Cabinet Display
Do:
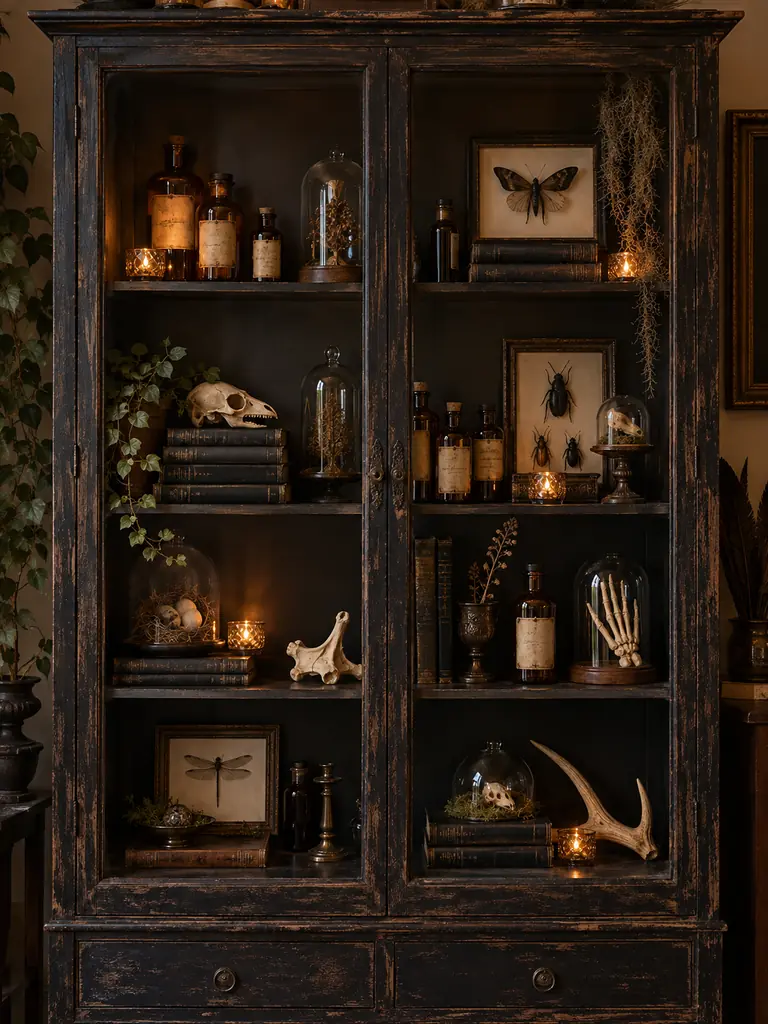
- Arrange the largest books and bottles toward the back of each shelf.
- Create small groups of three objects with different heights and shapes.
- Use low-heat battery lights to illuminate labels and reflective glass.
- Keep valuable or fragile pieces secured behind closed cabinet doors.
Don’t:
- Fill every shelf until individual objects disappear.
- Store decorative bottles beside real medicine, drinks, or food.
- Place heavy objects on weak glass shelves.
- Allow wires, fabric, or cobweb material to touch warm fixtures.
Treat the cabinet like a miniature exhibit rather than general storage. Repeat two or three materials, such as amber glass, aged paper, and faux bone, across separate shelves to connect the arrangement. Keep labels facing forward and clean the cabinet glass afterward, since fingerprints become especially visible under low directional lighting.
Glowing Ghost Lanterns
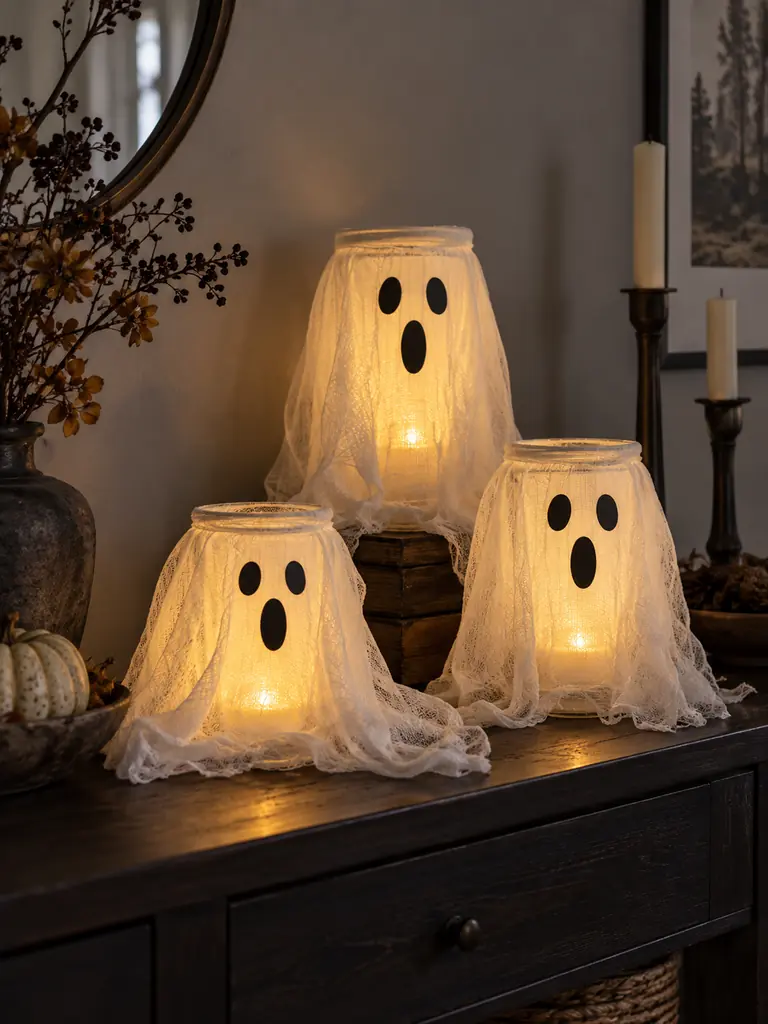
Cost: Low with reused jars and scrap fabric
Time: About 30 minutes for three lanterns
Skill Level: Beginner-friendly assembly
Best For: Consoles, shelves, windowsills, and covered indoor steps
Clean and dry each jar before adding a battery-operated light. Drape lightweight white fabric over the top, secure it below the rim, and attach felt facial features without covering the switch. Keep lanterns away from real flames, water, pets, and young children. Replace damaged batteries or frayed fabric immediately.
Mysterious Staircase Trail
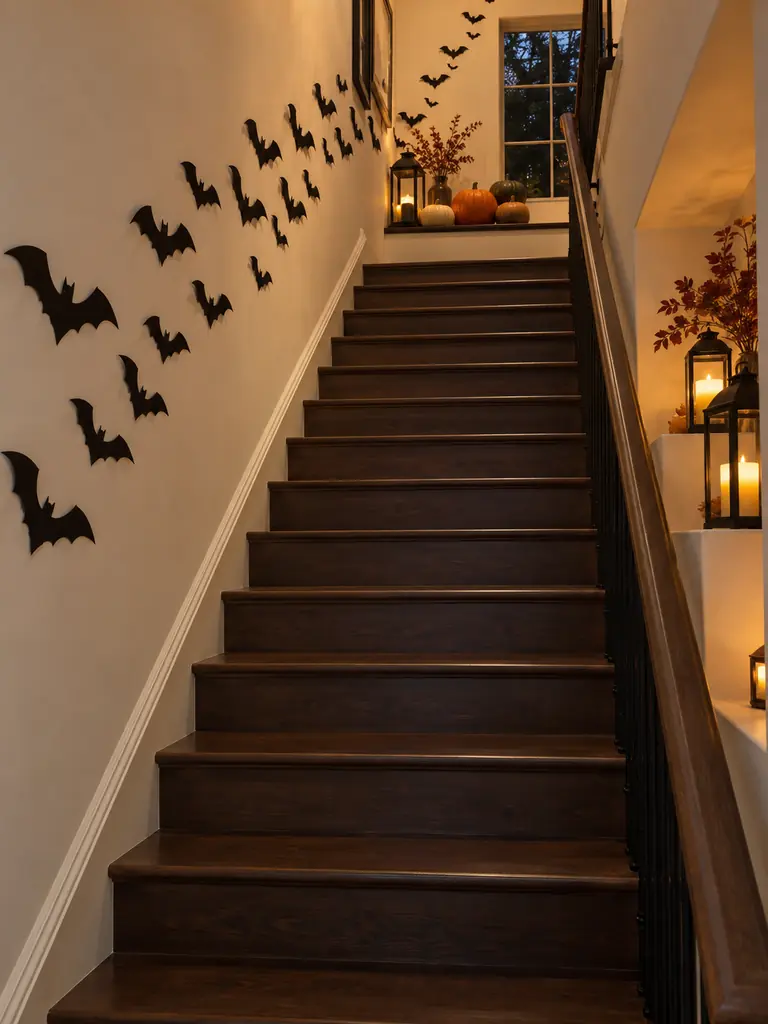
A staircase can connect Halloween displays on separate floors, but safety must guide every choice. Attach lightweight bats or framed portraits to the wall instead of placing loose objects on narrow steps. Decorate only spacious landings or deep corners that sit completely outside the normal walking route.
Use removable wall hooks and battery lanterns with enclosed bulbs. Keep handrails unobstructed, secure nearby cords, and test the route under both daytime and evening lighting. I’ve noticed that repeating one element from bottom to top creates stronger impact than filling each tread with unrelated decorations or pumpkins.
Black Lace Accents
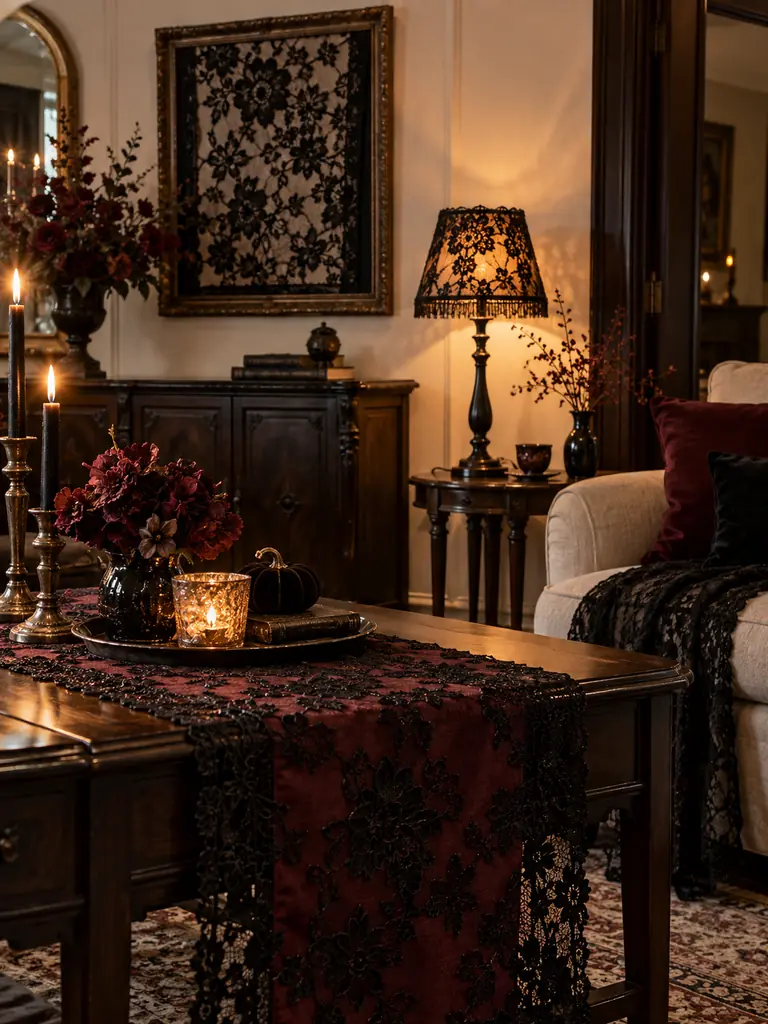
- Lay a narrow lace runner over a solid burgundy, plum, or rust-colored cloth.
- Frame a small lace remnant against cream paper for inexpensive seasonal wall art.
- Wrap lace loosely around a glass vase, then secure it with removable ribbon.
- Add a lightweight overlay to a cool LED lampshade without covering ventilation openings.
- Repeat the texture in only two or three places to keep the room balanced.
Black lace introduces pattern and shadow without requiring large Halloween props. Pair it with plain surfaces so the detail remains visible, and trim any frayed edges before styling. Avoid placing loose fabric near flames, heaters, cooking areas, or hot bulbs. After the season, fold each piece around tissue paper to prevent snagging.
Vintage Horror Portraits

Quick Tip:
Choose portraits with subtle unsettling details rather than graphic imagery. Slightly altered eyes, faded faces, or shadowy backgrounds create a stronger vintage effect and remain suitable for shared family spaces.
Print artwork on matte paper and place it inside thrifted frames painted black, bronze, or aged gold. Use removable picture strips rated for the full frame weight, and maintain consistent spacing between pieces. For the strongest arrangement, combine one larger portrait with two smaller prints rather than filling the entire wall with competing faces.
Spooky Kitchen Shelf
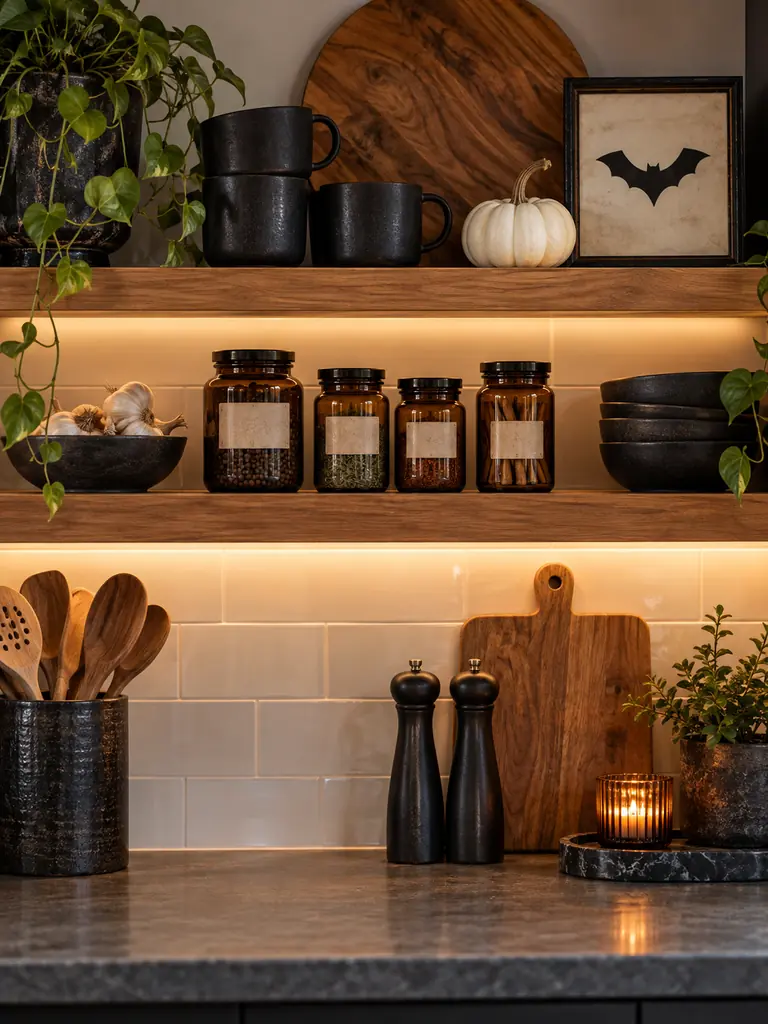
Before:
Seasonal objects compete with dishes, ingredients, and appliances on an already busy counter. Decorative bottles may become confused with real pantry items, while crowded surfaces make meal preparation harder.
After:
One shelf or contained tray holds a focused Halloween arrangement. Everyday tools remain accessible, food stays clearly labeled, and the kitchen gains seasonal character without losing valuable workspace.
Select one shelf away from heat and water, then combine useful pieces with two or three decorations. Keep real ingredients in their original containers or use accurate labels that cannot be mistaken for novelty potions. Wash themed mugs before use, and never allow fabric, paper, or dried foliage near burners and appliances.
Bathroom Potion Station
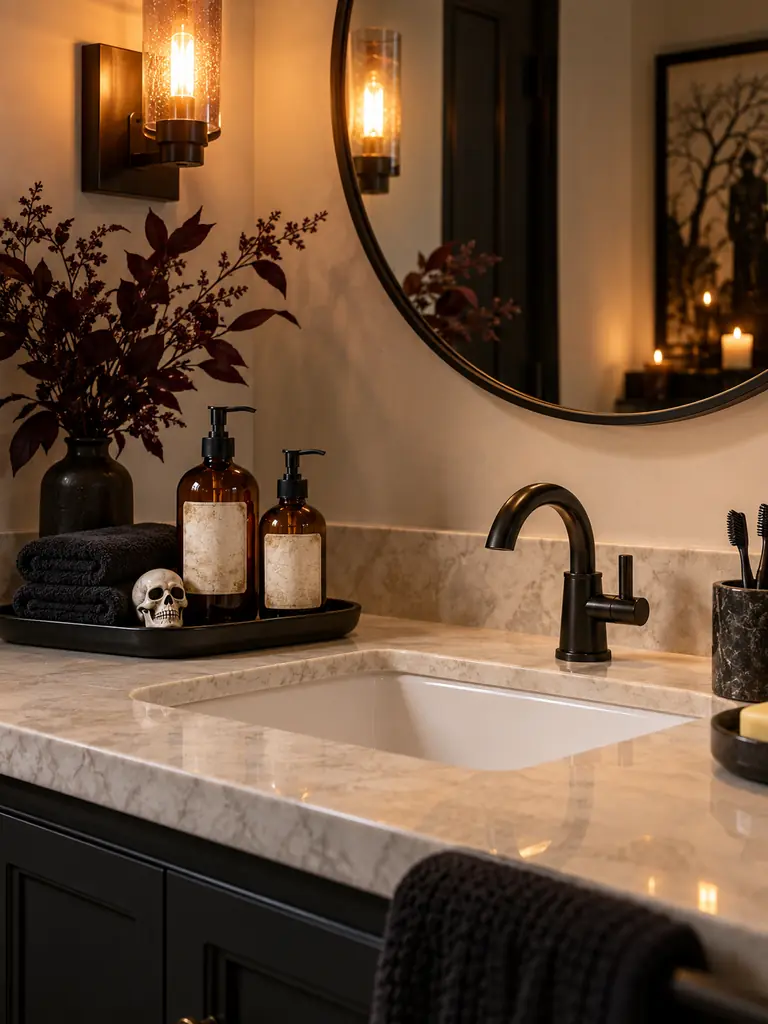
- Choose one waterproof tray that fits beside the sink without blocking daily toiletries.
- Transfer only suitable products into clean pump bottles, then label every container accurately.
- Fold one dark hand towel nearby and add a single compact decorative object.
- Keep medicines, cleaning products, and personal-care items in their normal secure storage.
- Remove anything that crowds the faucet, electrical outlets, or frequently used surfaces.
A bathroom display should remain hygienic, moisture-resistant, and easy to clean. Use waterproof labels and sealed containers, then wipe condensation from the tray regularly. Avoid filling decorative bottles with unknown mixtures or placing electrical lights near water. One controlled arrangement delivers the theme while preserving the room’s essential function.
Kid-Friendly Fright Zone
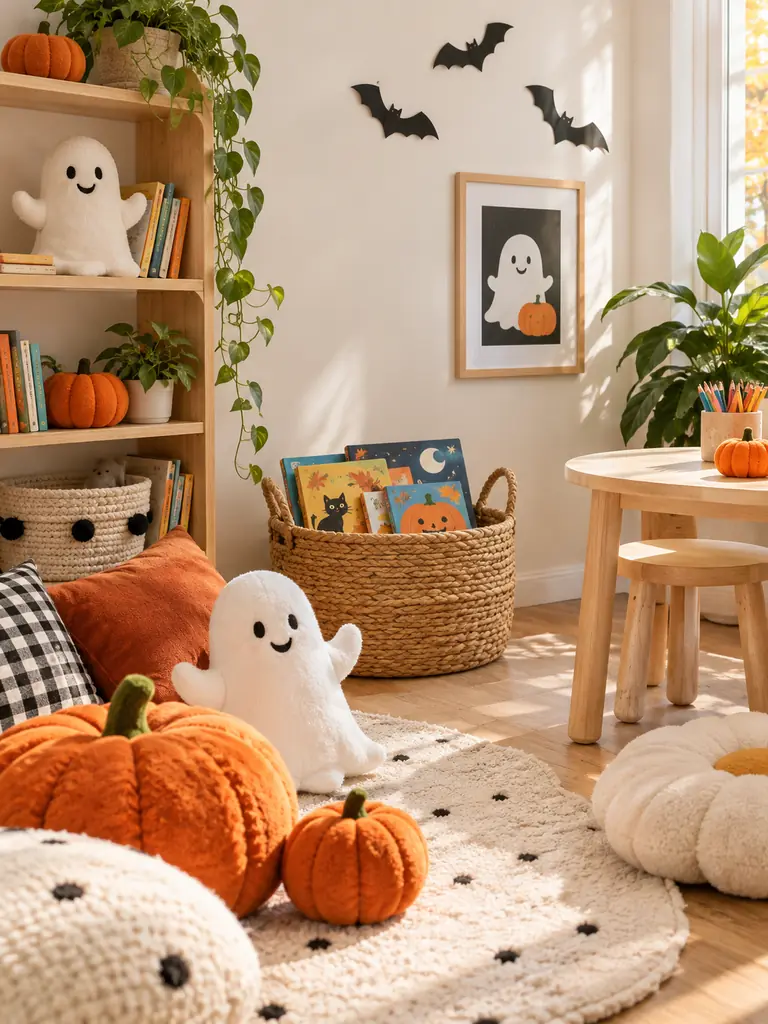
| Risky Setup | Safer Setup |
|---|---|
| Glass objects sit within easy reach | Soft felt and fabric decorations fill the display |
| Loose cords cross the floor | Battery lights remain secured inside closed lanterns |
| Tiny accessories create choking hazards | Oversized lightweight shapes provide visual interest |
| Graphic props frighten younger children | Friendly faces keep the mood playful |
Build the display at the child’s eye level using soft, washable, and lightweight materials. Secure wall pieces firmly, choose battery compartments that require tools to open, and avoid latex balloons around very young children. Invite kids to arrange felt shapes or color paper ghosts so the corner feels personal rather than overly frightening.
Haunted House Edit
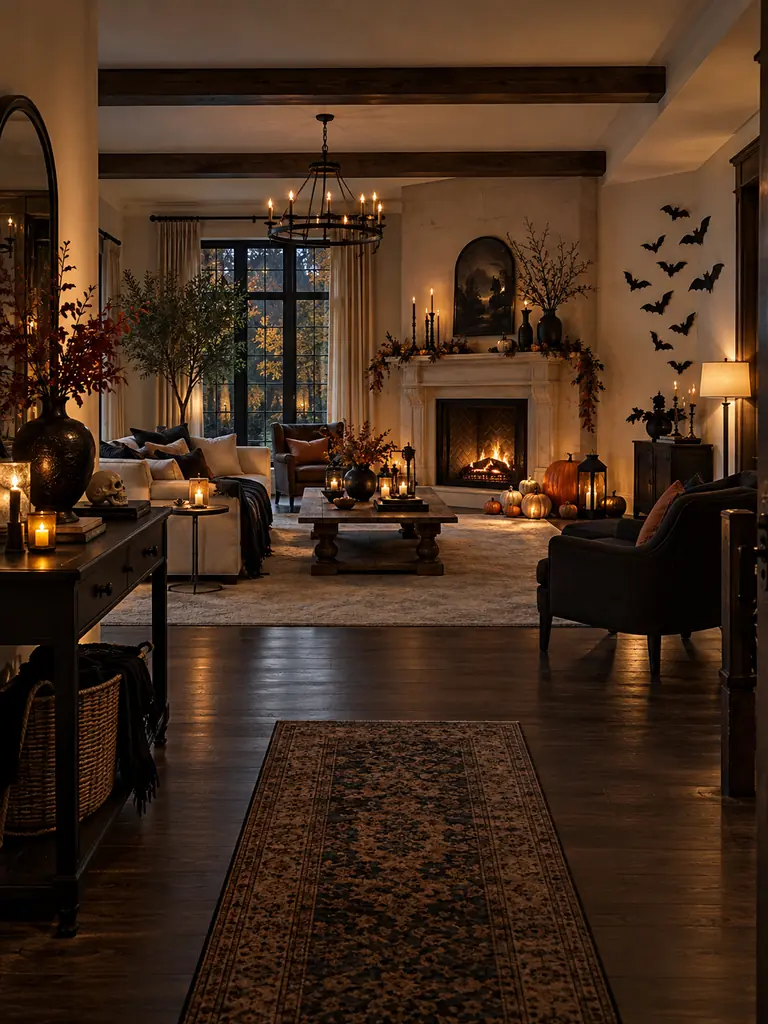
Do:
- Walk through every room and remove anything blocking doors, switches, vents, or pathways.
- Keep one main Halloween focal point in each decorated area.
- Repeat a limited palette and two or three materials throughout the home.
- Check that all removable adhesives, batteries, and hanging decorations remain secure.
Don’t:
- Repeat the same bats, pumpkins, and cobwebs on every available surface.
- Leave real candles unattended or close to paper, fabric, and dried foliage.
- Cover daily storage, seating, or work areas with decorative objects.
- Keep damaged lights, unstable props, or decorations that create trip hazards.
Stand at each doorway and note which feature attracts attention first. If several displays compete, simplify the smallest one or relocate it to an undecorated area. A careful final edit protects function, strengthens the visual theme, and makes cleaning easier. Keep only pieces that contribute clear atmosphere, balance, or practical enjoyment.
Conclusion
A memorable Halloween home does not require decorating every wall, shelf, and table. By choosing a few indoor Halloween decor ideas that suit your rooms, you can create spooky character while preserving safety, comfort, and everyday function. Start with one manageable display, such as a bat wall, pumpkin cluster, or eerie console, then build from there.
I’ve seen how small seasonal details can completely change a room’s mood. Save this post on Pinterest for future inspiration, try your favorite ideas at home, and share it with someone planning their own Halloween setup. Choose your first project and start decorating today.