

Beautiful Christmas decorations don’t have to come with expensive price tags. With a little creativity, everyday dollar store finds can become holiday decor that looks surprisingly high-end.
These dollar store christmas crafts are designed to help you decorate your home beautifully without stretching your holiday budget. From velvet ribbon trees and frosted glass vases to elegant ornaments and decorative gift accents, you’ll find plenty of simple projects that use affordable materials in creative ways. The best part? Many of these ideas are beginner-friendly and easy to customize with colors and textures that match your home. I’ve noticed that small details, such as coordinated ribbons, matte finishes, and natural materials, can make inexpensive supplies look much more refined. Whether you’re decorating a mantel, styling a shelf, or preparing thoughtful handmade gifts, these projects offer inspiration you can actually put into practice.
Table of Contents
Velvet Ribbon Christmas Trees
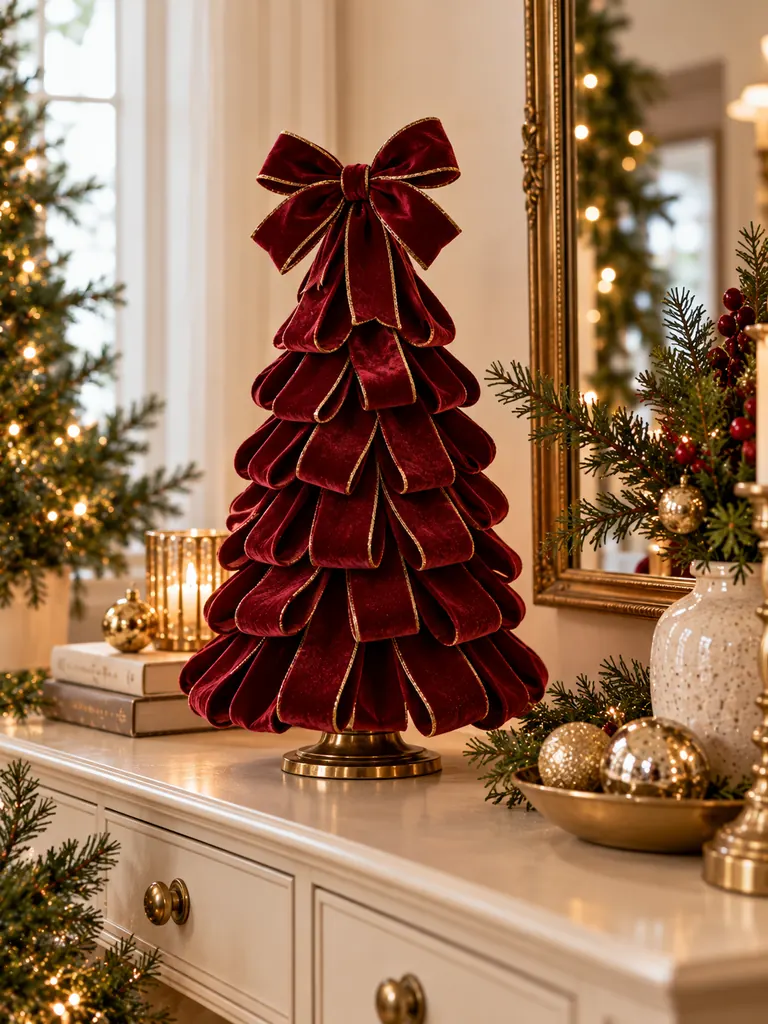
A little velvet can make an inexpensive craft look like something from a high-end holiday boutique. Start with a foam cone or cardboard cone and wrap it with narrow velvet ribbon, securing each layer with hot glue. Overlap the ribbon slightly to hide the base and create a softly textured tree.
Choose burgundy, forest green, champagne, or ivory for an elegant finish. Add a small pearl bead, metallic star, or delicate bow at the top. Display different heights together on a mantel or entryway table for a polished arrangement that costs very little.
To create a coordinated holiday look, explore more Christmas color scheme ideas for home before selecting your craft supplies.
Faux Ceramic Christmas Houses

Plain miniature houses can look surprisingly expensive when their original glossy finishes are replaced with a soft ceramic-inspired coating. Look for inexpensive wooden, plastic, or resin house decorations and give them a coordinated makeover.
- Choose a palette: Use warm white, ivory, beige, or muted stone.
- Prepare the surface: Clean each house and lightly sand wooden pieces if needed.
- Apply paint: Use matte acrylic or chalk paint in thin, even coats.
- Add texture: Dab a little baking soda into the paint for a subtle plaster-like finish.
- Style thoughtfully: Group three houses with varied heights for a miniature village.
The secret is consistency rather than complicated detailing. Keep the colors soft, avoid shiny finishes, and leave enough space between each piece. A simple arrangement on a wooden tray or bookshelf creates an understated holiday display with a boutique-inspired appearance.
Gold Leaf Ornament Makeovers

Quick Tip:
For a more refined finish, apply gold leaf to only one section of each ornament instead of covering the entire surface. Use a suitable adhesive size and a soft brush to press the metallic leaf gently into place.
Start with plain plastic or glass baubles in clear, white, or neutral shades. Lightly dust away loose gold flakes and finish with a compatible protective sealer if the product instructions recommend one.
These upgraded decorations bring subtle metallic detail to a Christmas tree, decorative bowl, or festive centerpiece. Mix several bauble sizes, but keep the gold finish consistent so the arrangement feels intentional rather than overly busy.
Beaded Wooden Star Ornaments

BEFORE: Plain wooden stars often look unfinished or too simple to stand out among traditional Christmas decorations. Their flat surfaces can also make an inexpensive ornament feel less detailed.
AFTER: Small wooden beads create a dimensional border that gives each star a handcrafted, boutique-style appearance. A soft neutral finish and satin hanging ribbon make the decorations look coordinated and thoughtfully designed.
To make them, attach tiny craft beads around the star’s edges using strong craft glue. Leave the center natural or apply a thin coat of ivory, champagne, or muted gold paint. Finish with a narrow ribbon loop. These ornaments look especially elegant when grouped on a natural Christmas tree or displayed on decorative branches.
Miniature Bottlebrush Tree Domes
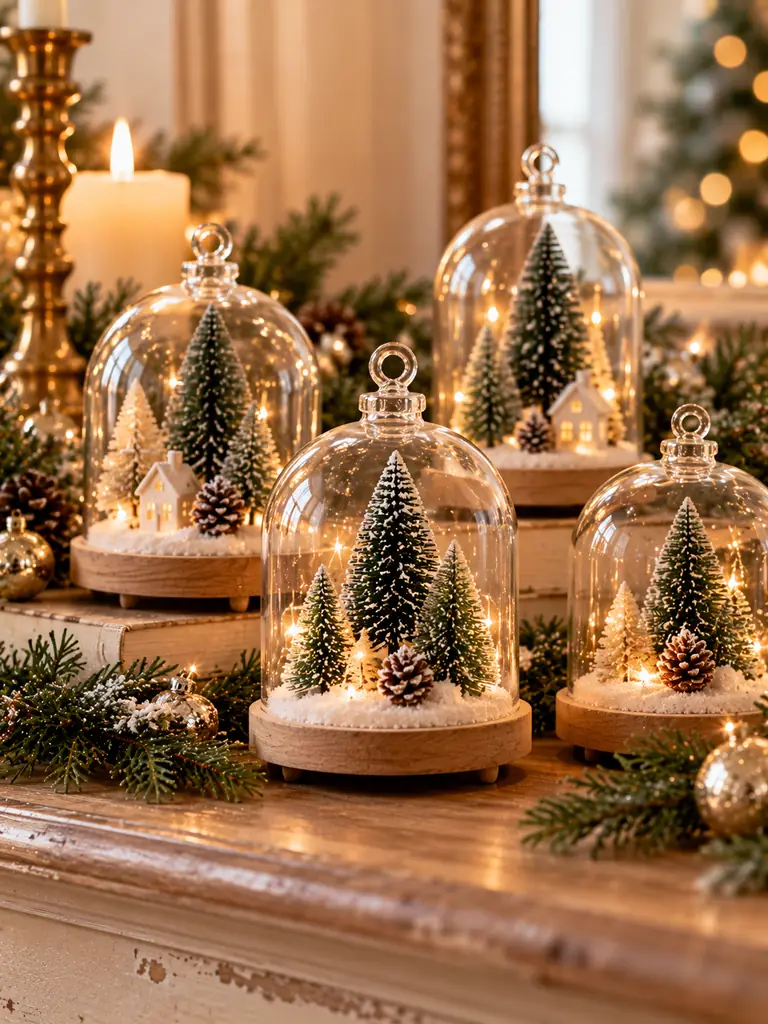
- Find the base: Choose small wooden discs, candle holders, or sturdy decorative bases from a dollar store.
- Select miniature trees: Pick bottlebrush trees in different heights, preferably in muted green or snowy white.
- Create the snowy ground: Spread a thin layer of faux snow or white craft material around each tree.
- Add the dome: Place a clear glass or plastic dome over the arrangement, making sure the tree fits comfortably.
- Finish the display: Add a tiny wooden star or a few miniature decorative details.
A clear dome turns simple miniature decorations into charming display pieces that resemble collectible holiday accessories. Arrange two or three together on a coffee table, shelf, or console. Keeping the details minimal helps the tiny trees remain the focal point.
Elegant Pearl Wreath Accents
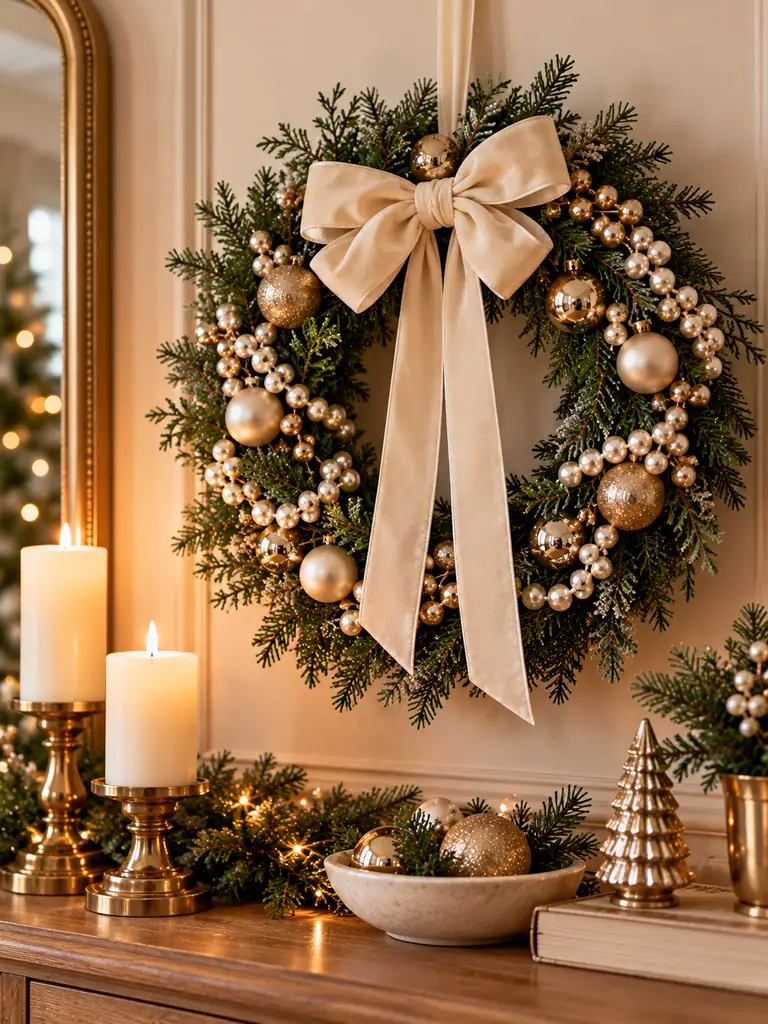
| Simple Decoration | Refined Upgrade |
|---|---|
| Plain green wreath | Add delicate pearl strands |
| Basic plastic bow | Use ivory or champagne ribbon |
| Bright plastic berries | Choose muted metallic accents |
| Visible wire ties | Conceal them beneath greenery |
A few pearl details can transform an inexpensive wreath without hiding its natural shape. Choose lightweight faux pearl garlands and weave them loosely through the greenery, allowing small sections to catch the light. Add a soft fabric bow near the bottom or side for balance. Avoid covering every branch; leaving some greenery visible keeps the finished decoration elegant rather than crowded.
Vintage Sheet Music Trees
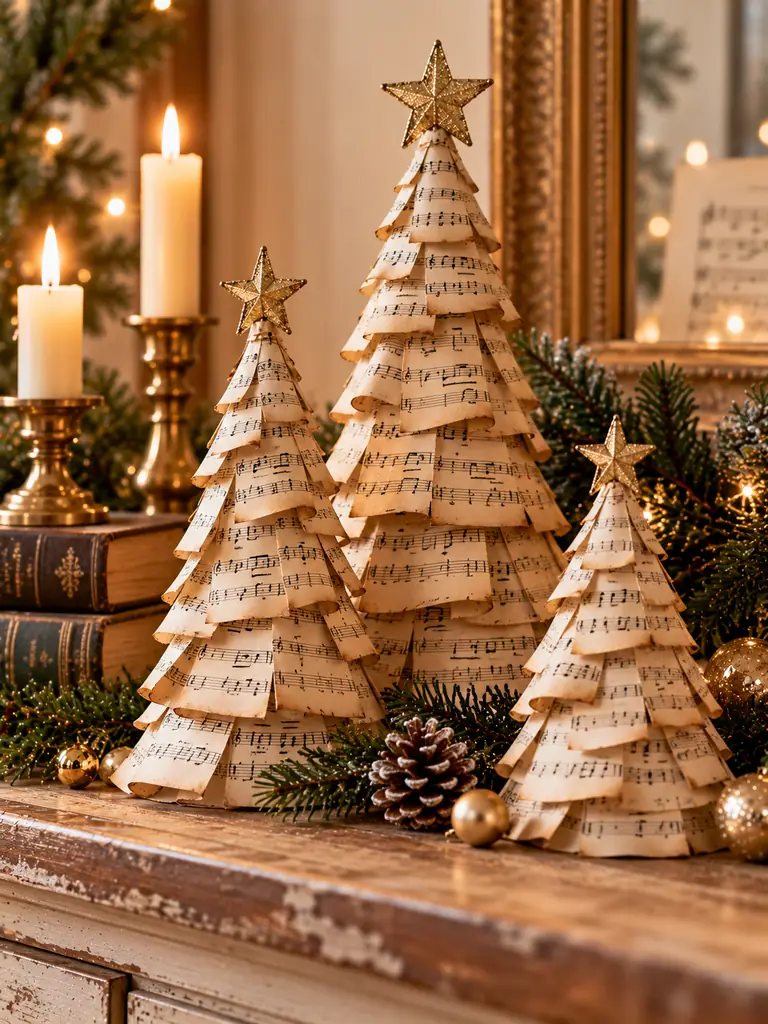
DO:
- Use cream or lightly aged sheet music prints for a vintage appearance.
- Cut paper into narrow strips before wrapping the cone.
- Overlap each layer slightly to create natural dimension.
- Finish with a small antique gold star or pearl detail.
DON’T:
- Use thick paper that creates bulky folds.
- Cover every layer with heavy glitter.
- Mix too many competing paper patterns.
- Leave rough cardboard edges visible at the base.
Old book pages or printed music sheets can turn simple foam cones into charming decorative trees. Secure the paper with small amounts of craft glue, then gently curl a few edges for texture. Display different heights together on a mantel or bookshelf for an elegant vintage-inspired Christmas arrangement.
Frosted Glass Christmas Vases
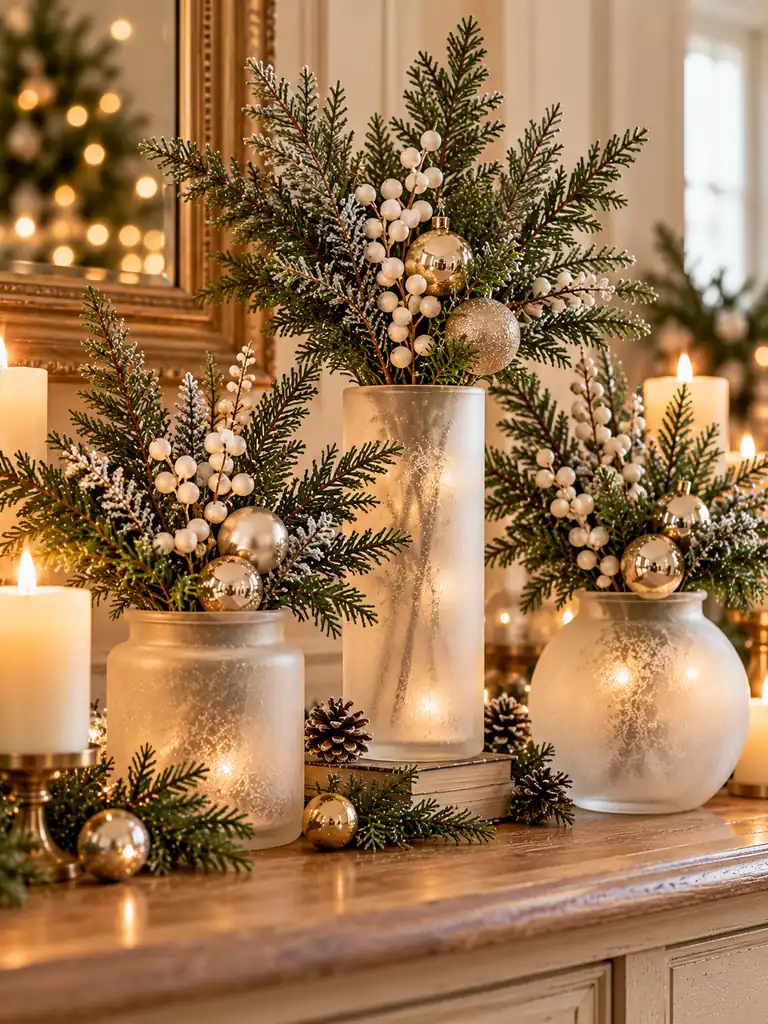
Cost: Low, especially when using basic glass vases.
Time: Approximately 30–45 minutes, plus drying time.
Skill Level: Beginner-friendly.
Best For: Entryway consoles, dining tables, shelves, and mantel displays.
A frosted finish gives ordinary glassware a soft winter appearance without requiring expensive decorative containers. Use a glass-safe frosting spray or a suitable translucent glass paint, following the manufacturer’s instructions carefully. Once completely dry, add a few natural branches or white decorative stems. Keep the arrangement airy so the frosted surface remains visible and gives the display its understated seasonal charm.
Decorative Gift Box Pedestals
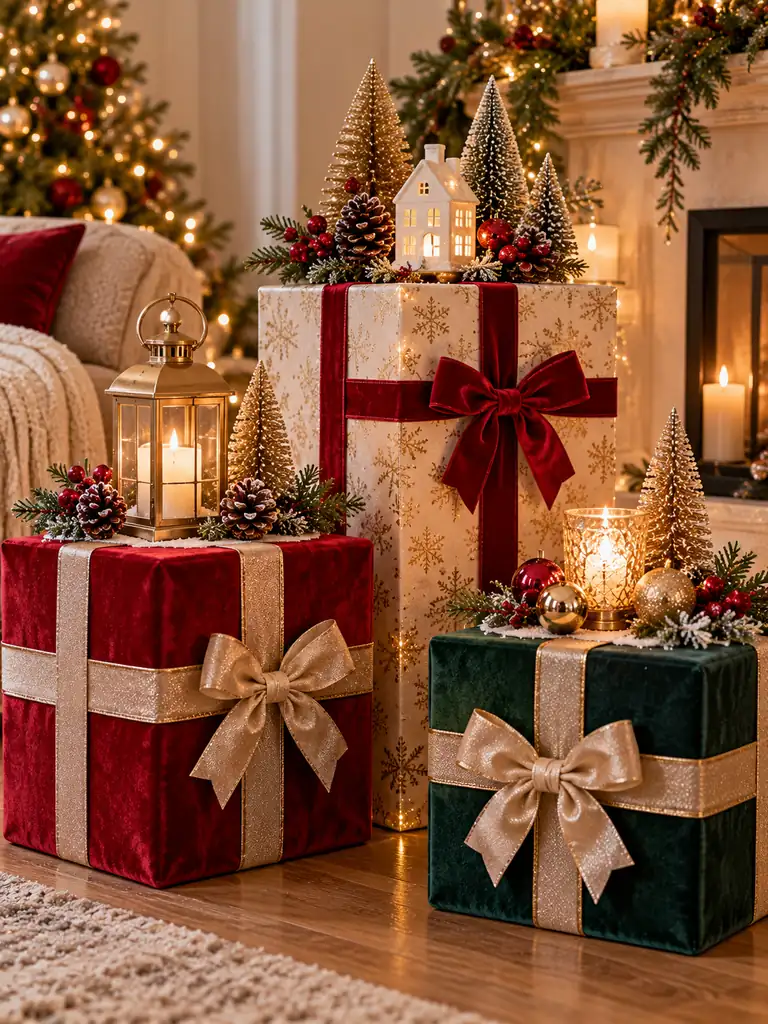
BEFORE: Ordinary empty gift boxes can look like leftover packaging when placed around a room. Different wrapping styles, loose ribbon ends, and uneven proportions often make the display feel cluttered.
AFTER: Coordinated boxes in graduated sizes create decorative platforms that add height and structure to a holiday arrangement. Matching paper and carefully shaped bows give them the appearance of expensive seasonal accessories.
Choose sturdy empty boxes, wrap them in two or three complementary colors, and finish each with a wide ribbon. Stack them securely or arrange them beside a small decorative tree. For a polished result, keep the largest box at the bottom and use consistent ribbon widths throughout the display.
These decorative boxes can also complement an elegant holiday dining setup. Explore more Christmas table decor ideas when styling your festive space.
Rustic Wood Slice Snowmen
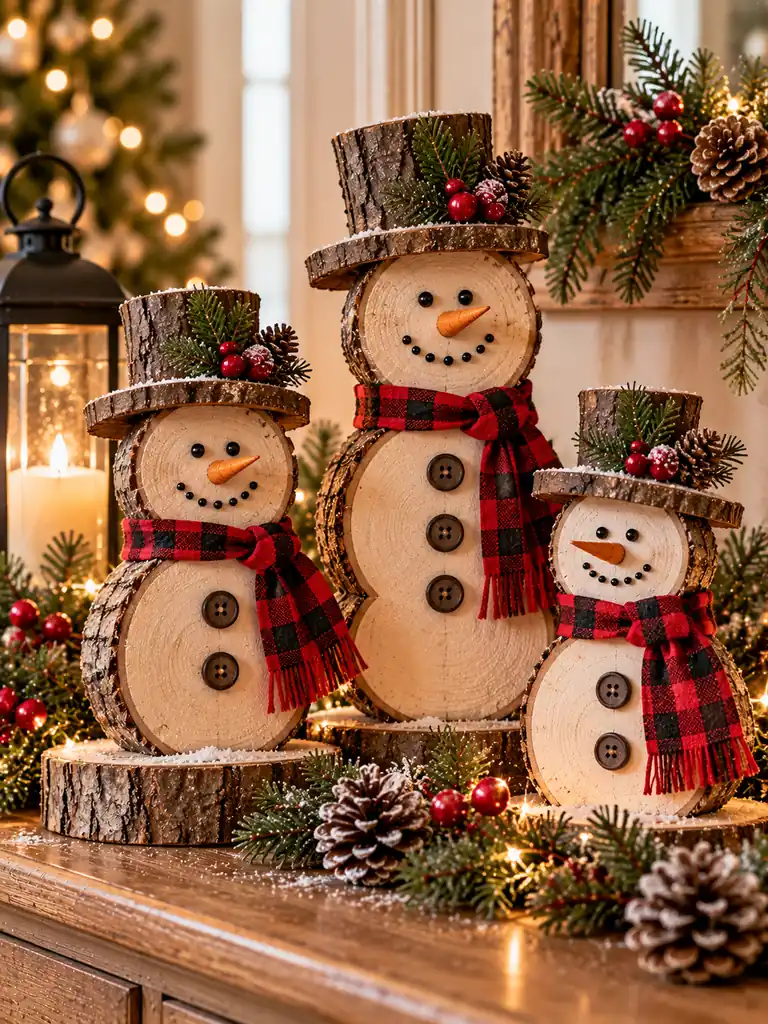
- Choose wood slices: Pick three round slices in different sizes for each snowman.
- Paint the faces: Apply white or ivory acrylic paint, leaving a little natural wood visible around the edges.
- Add facial details: Use black paint for the eyes and small dots for the mouth, then create an orange carrot-shaped nose.
- Attach the pieces: Stack the slices vertically and secure them with strong craft glue.
- Finish with scarves: Tie narrow fabric strips around the neck and add small buttons if desired.
Natural wood grain gives these decorations character, while simple painted features keep them charming rather than overly decorative. Use them as shelf accents, tabletop ornaments, or handmade gifts. For a coordinated display, repeat the same scarf colors across several snowmen.
Gold Dipped Pinecone Decor
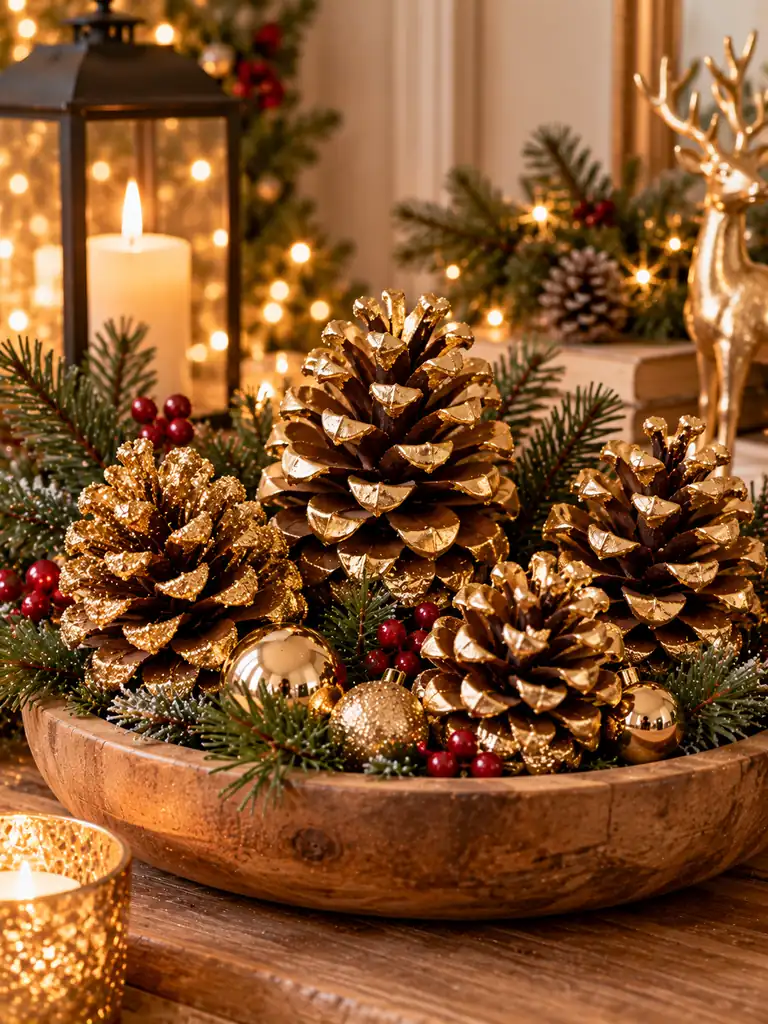
Quick Tip:
Brush metallic gold paint onto only the outer tips of the pinecone scales instead of coating the entire surface. This creates a subtle dipped effect while preserving the natural brown texture.
Choose clean, dry pinecones with open scales so the metallic finish reaches the visible edges. Apply paint with a small detail brush, allowing a little natural wood color to remain between the gold accents. Let each piece dry completely before arranging it.
Place the finished pinecones in a decorative bowl, scatter a few along a dining table runner, or use them as gift toppers. Mixing natural and metallic finishes gives inexpensive seasonal materials a more sophisticated look.
Faux Stone Christmas Bells
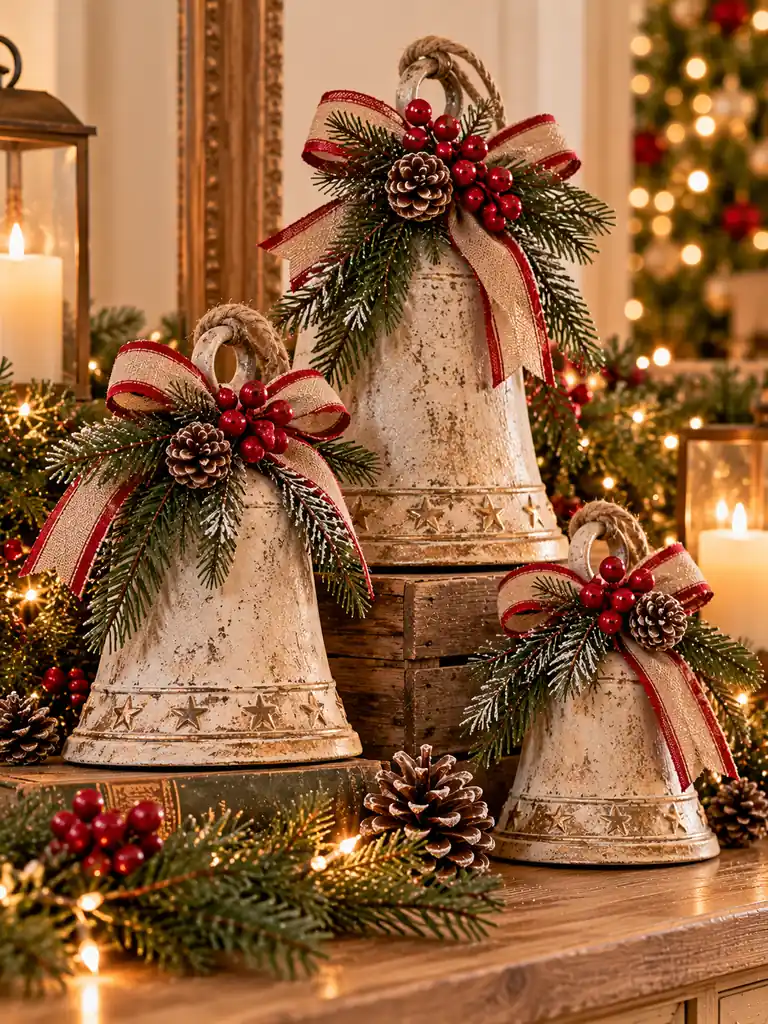
BEFORE: Bright plastic bells can look overly shiny and inexpensive, especially when their original colors clash with a neutral Christmas palette. Their lightweight appearance may also make them feel more like basic craft supplies than decorative accents.
AFTER: A matte stone-inspired coating gives the bells a softer, textured appearance that works beautifully with natural materials. Warm ivory and beige tones make them look like carefully selected boutique decorations.
Clean the bells thoroughly before applying a suitable matte craft paint. For gentle texture, use a small sponge to dab a slightly darker beige shade over the dry base coat. Add a jute loop or narrow velvet ribbon, then style them in a bowl or hang them from a decorative branch.
Mini Christmas Book Stacks
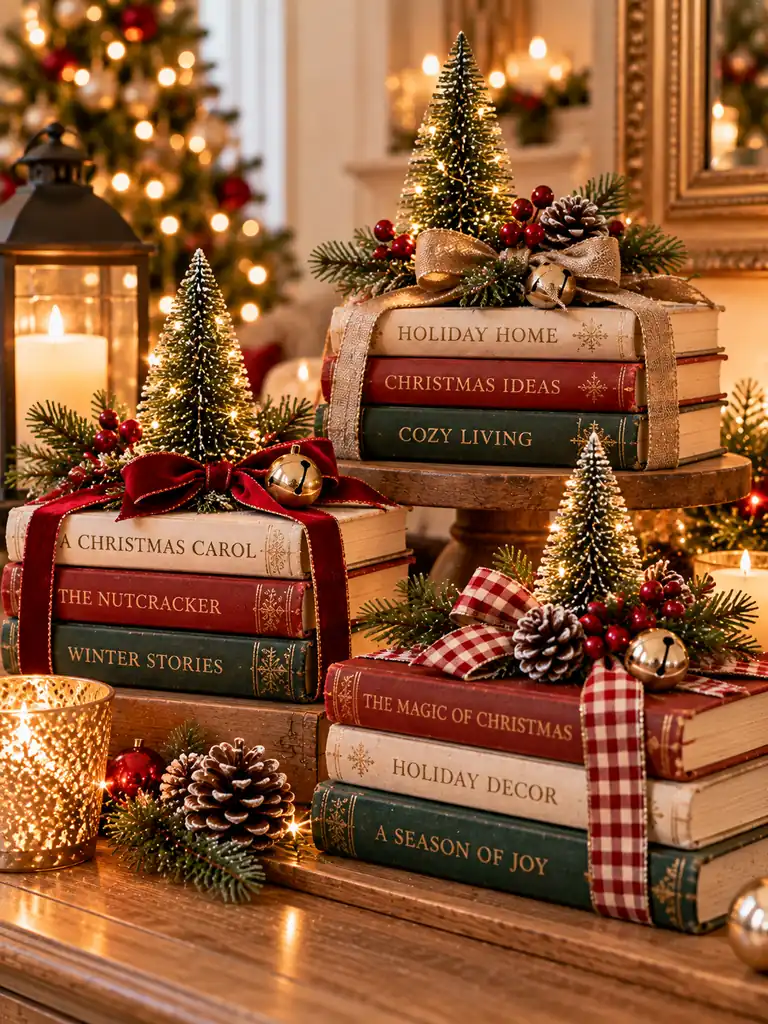
- Find small books: Choose inexpensive miniature books, small notebooks, or sturdy cardboard pieces.
- Create matching covers: Wrap them in textured paper or matte craft paper in coordinated Christmas colors.
- Add decorative spines: Attach narrow strips of gold cardstock or thin ribbon to imitate elegant bookbinding.
- Stack neatly: Arrange two or three pieces with slightly offset edges for a natural layered look.
- Finish with greenery: Place a tiny evergreen clipping or small decorative bow on top.
Mini book stacks add height and a collected, vintage feel to otherwise empty shelves and tabletops. Keep the covers simple and avoid bright printed designs. A combination of cream, muted green, and burgundy creates a warm holiday accent that looks thoughtfully styled.
Textured Neutral Stockings

| Basic Stocking | Elevated Stocking |
|---|---|
| Plain felt surface | Add textured fabric panels |
| Thin flat cuff | Attach a soft faux fur cuff |
| Bright plastic hanger | Use a velvet or satin ribbon loop |
| Mixed decoration styles | Keep embellishments coordinated |
Plain felt stockings can become more refined with carefully chosen fabric details. Add a strip of faux fur along the top, sew or glue on a textured fabric patch, and finish with a narrow hanging ribbon. Choose ivory, oatmeal, taupe, or muted sage to create a cohesive set. Keep embellishments lightweight and securely attached, especially if the stockings will hold small gifts.
DIY Mercury Glass Ornaments
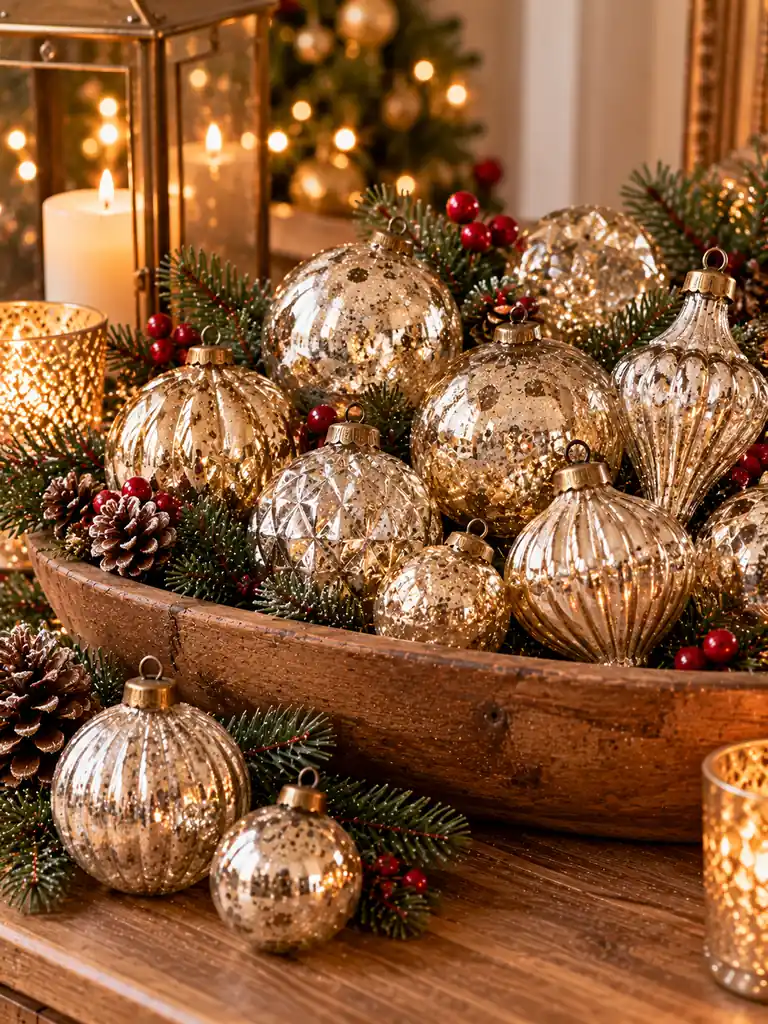
A little reflective detail can make basic clear ornaments resemble vintage holiday collectibles. Use a glass-safe mirror-effect spray or an appropriate ornament-making kit, following the product’s ventilation and safety instructions. Apply the finish in light, controlled layers to create an aged metallic appearance rather than a completely opaque coating.
Allow the ornaments to dry fully before handling, then display them in a decorative bowl or hang them on a tree with simple satin ribbon. Combining silver and champagne finishes creates depth, while keeping the surrounding decorations neutral lets the glass remain the main attraction.
Elegant Bow Wall Hangings
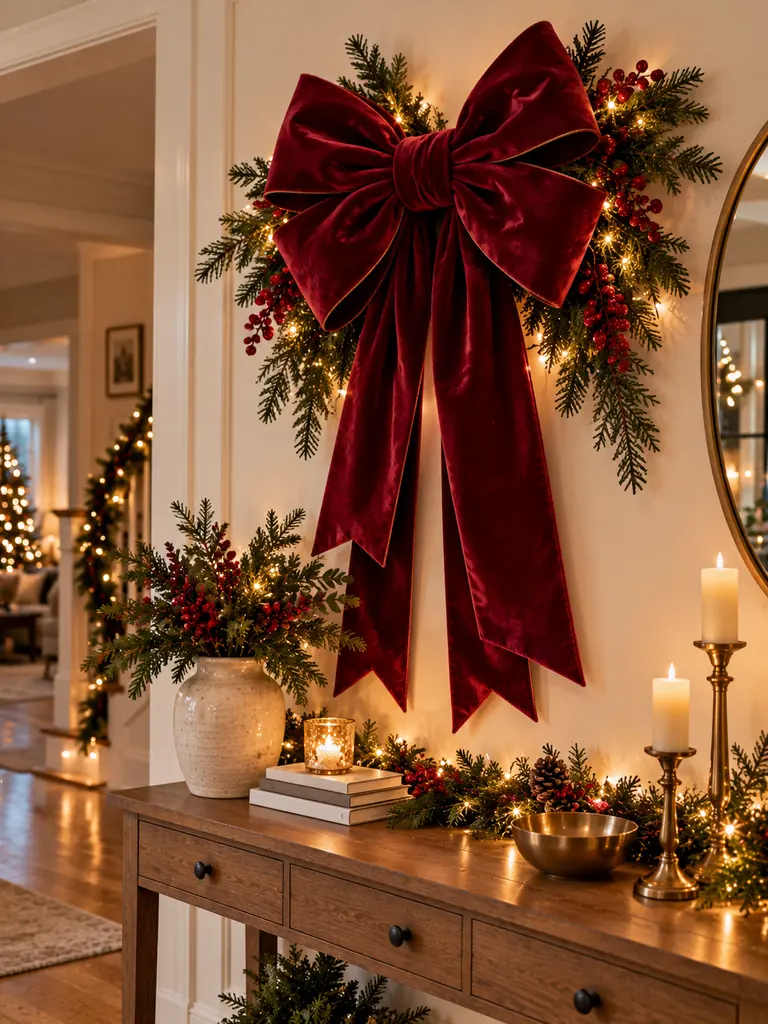
DO:
- Choose wide velvet, satin, or grosgrain ribbon for a fuller shape.
- Create balanced loops before securing the center tightly.
- Let the ribbon tails fall naturally at different lengths.
- Add a small pearl or metallic detail for a polished finish.
DON’T:
- Use thin ribbon that cannot hold its shape.
- Make the loops too tight or uneven.
- Combine several competing patterns and textures.
- Hang heavy embellishments from a weak adhesive hook.
A statement bow can turn a simple wall or doorway into a festive focal point without requiring a large decorative arrangement. Use a lightweight backing or secure wall hook, and shape the loops by hand before hanging. Deep red, forest green, or champagne velvet gives the finished piece a rich seasonal appearance.
Faux Marble Christmas Trays
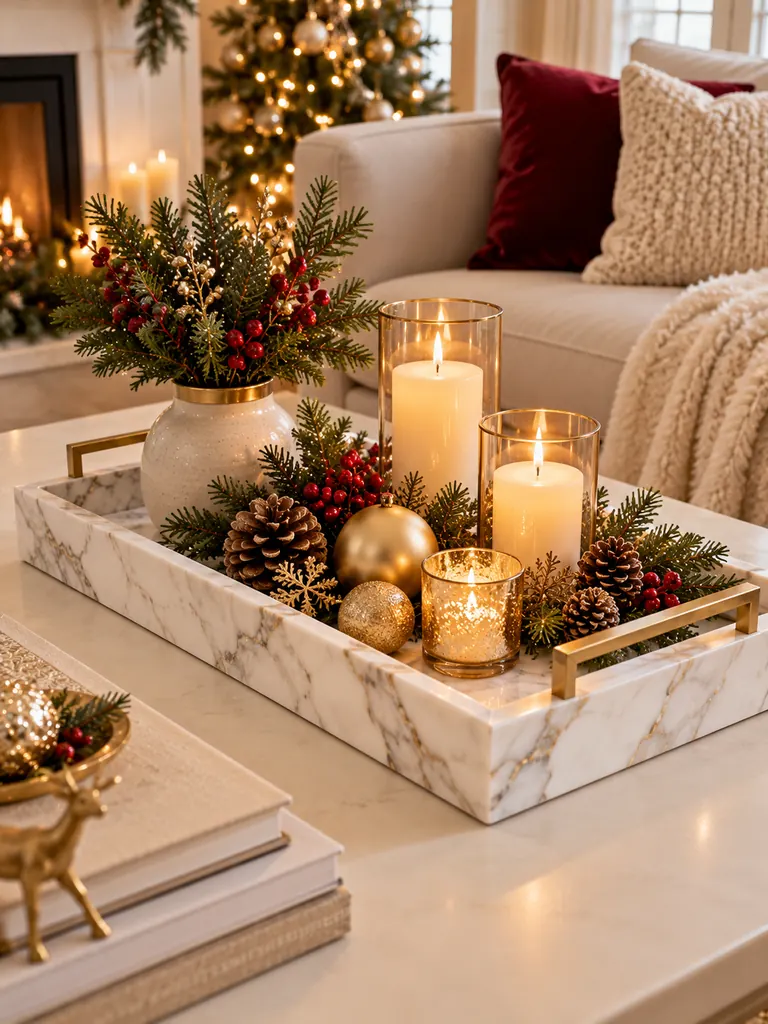
Quick Tip:
Use a marble-effect adhesive vinyl or a suitable faux-marble craft technique on a smooth, clean tray. Choose a pattern with fine, understated veins rather than dramatic dark lines for a more realistic stone appearance.
Dollar store trays made from plastic, wood, or lightweight metal can become elegant decorative bases with a simple surface makeover. Measure carefully before cutting the vinyl, then smooth it from the center outward to reduce bubbles. Trim the edges neatly for a clean finish.
Style the tray with a candle, a few metallic ornaments, and a small evergreen clipping. If the tray will hold drinks or food, use a properly food-safe surface instead of ordinary decorative vinyl.
Miniature Winter Cloche Displays
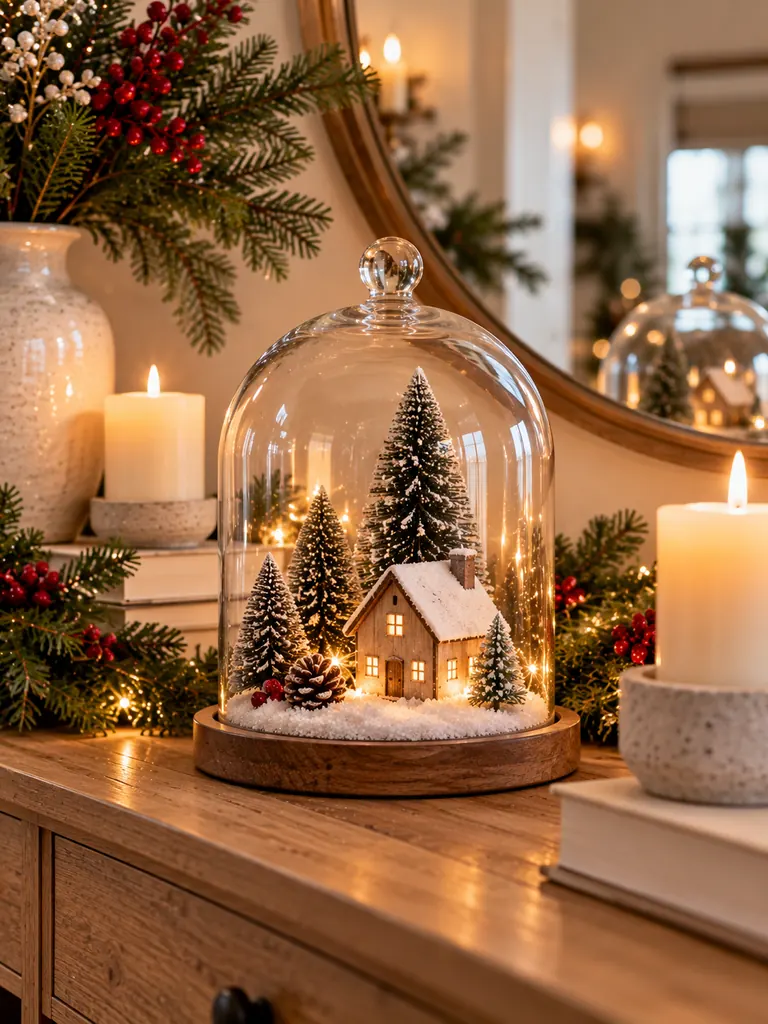
BEFORE: Small decorative objects displayed separately can appear scattered and lose their visual impact. A miniature tree, tiny house, or seasonal figurine may look like an ordinary craft-store purchase when it lacks a defined setting.
AFTER: A transparent cloche brings all the details together in one contained winter scene. The glass adds a delicate display-case effect, while the miniature arrangement feels more curated and collectible.
Use a clear glass dome or suitable transparent cover over a sturdy base. Arrange a miniature tree, tiny house, or small figurine on a thin layer of faux snow, securing lightweight pieces where needed. Keep the scene uncluttered so each detail remains visible. Place it on a shelf or side table away from edges where the glass could be knocked over.
Cinnamon Stick Star Decorations

Cost: Very low when using cinnamon sticks and twine from a dollar store.
Time: Around 20–30 minutes per small batch.
Skill Level: Beginner-friendly, with simple tying and gluing.
Best For: Christmas tree ornaments, gift wrapping, wall displays, and rustic tabletop arrangements.
Cinnamon sticks bring natural warmth and subtle texture to handmade holiday decorations. Arrange five sticks into a star shape, secure the joints with hot glue or strong twine, and add a small ribbon loop for hanging. Keep the design simple so the natural cinnamon color remains visible. These stars also make thoughtful gift toppers when attached to kraft paper wrapping.
Decorative Christmas Candle Holders

An ordinary glass candle holder can look far more expensive with a restrained decorative finish. Choose clear or frosted holders with simple shapes, then add a narrow metallic band, small pearl accents, or a delicate painted pattern around the base.
For a coordinated display, use three holders in different heights and repeat the same finish on each. Keep decorative materials away from the flame and heat, and use candles only in holders designed for them. Battery-operated candles are a practical alternative when the decorations include delicate embellishments.
Antique Style Christmas Frames
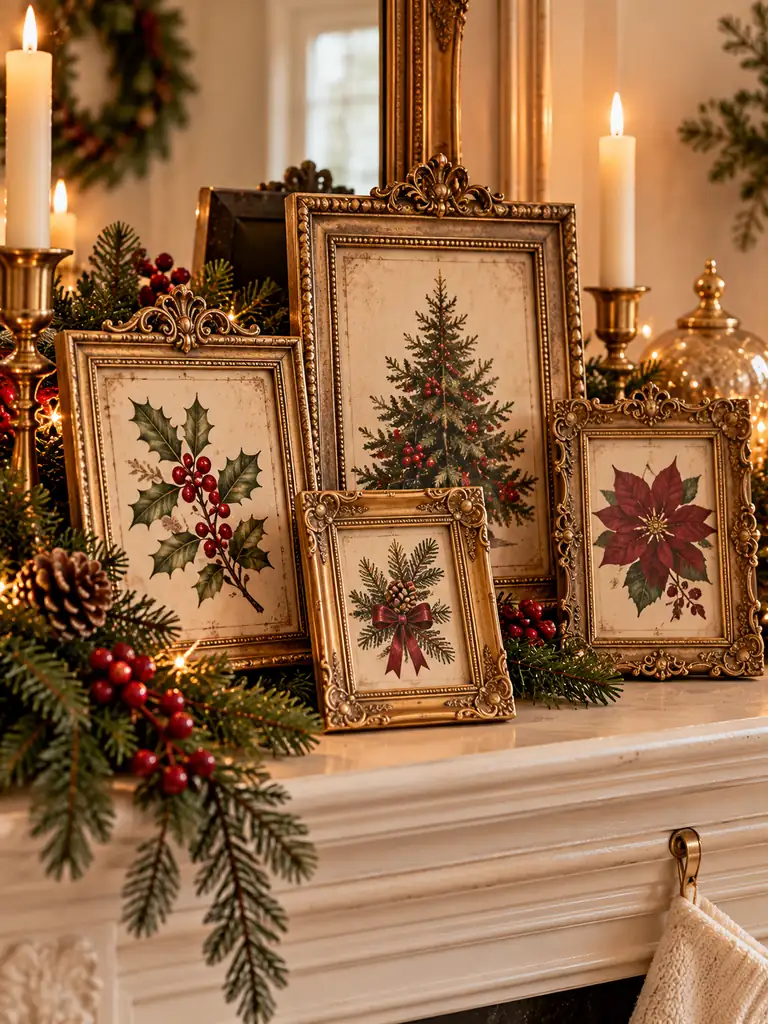
| Basic Frame | Antique-Inspired Upgrade |
|---|---|
| Shiny plastic finish | Apply matte antique gold paint |
| Plain modern edges | Add subtle raised detailing |
| Generic artwork | Insert vintage botanical prints |
| Separate scattered frames | Arrange in a balanced group |
Small inexpensive frames can become charming seasonal accents with a little paint and carefully selected artwork. Lightly brush antique gold or bronze paint over the frame, allowing darker areas to show through for a gently aged appearance. Add printable vintage-inspired winter illustrations or botanical designs, then arrange several frames together on a shelf. Keep the artwork within a consistent color palette for a collected, elegant look.
Faux Fur Christmas Trees

- Prepare the cones: Choose foam or sturdy cardboard cones in different sizes.
- Cut the fabric: Measure and cut ivory or oatmeal faux fur to fit each cone.
- Attach the covering: Use hot glue carefully, working in small sections to keep the fabric smooth.
- Hide the seams: Position the joined edges toward the back of each tree.
- Add subtle details: Attach a few pearl pins or tiny champagne ornaments without overcrowding the surface.
The soft texture makes these miniature trees feel more like boutique winter decorations than inexpensive craft projects. Keep the colors neutral and use different heights to create a layered arrangement. Place them on a mantel, entryway table, or bookshelf where their plush surfaces can stand out against wood and glass accents.
Pair these soft miniature trees with other Christmas bedroom decor ideas to create a cozy seasonal atmosphere.
Painted Wooden Nutcrackers
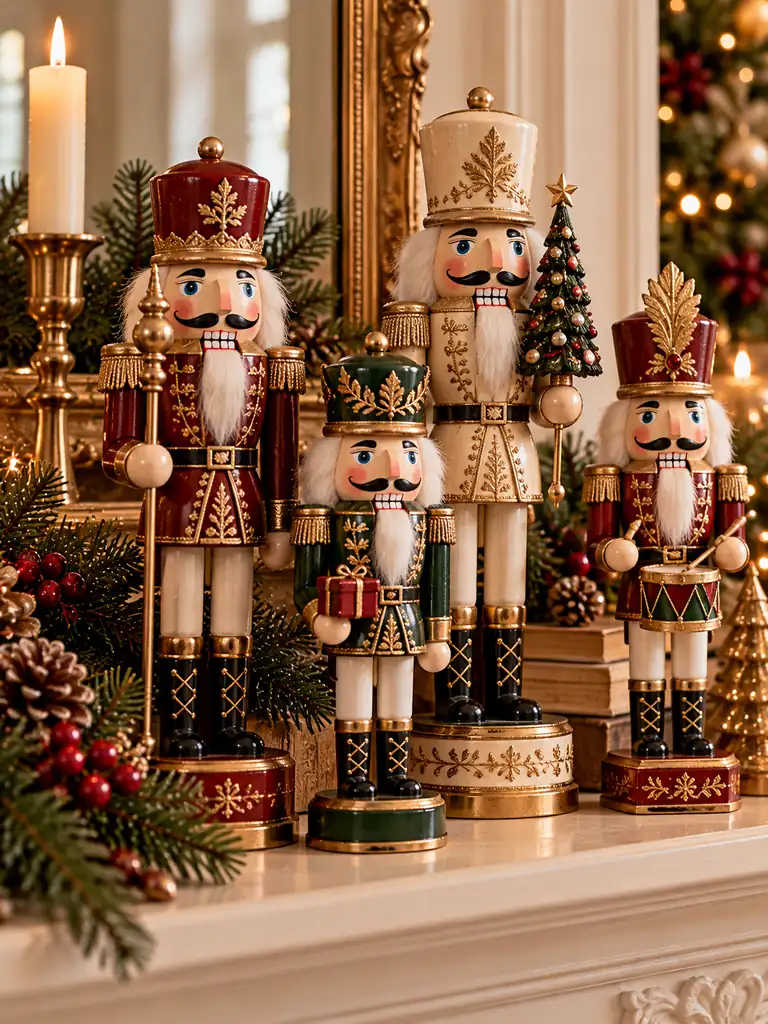
Old Way: Bright primary colors and glossy finishes can make inexpensive wooden nutcrackers look like basic seasonal decorations. Too many contrasting shades may also make a display feel visually busy.
Better Way: A limited palette of muted colors and subtle metallic details gives each figurine a more sophisticated appearance. Matte paint highlights the shape and carved details without creating an overly shiny finish.
Clean the wooden surface before painting, then apply thin coats of acrylic or chalk paint. Use a fine brush for the face, buttons, and small uniform details. Finish with restrained antique gold accents on the crown or jacket trim. Display a matching pair or group of three for a coordinated holiday vignette.
Dried Citrus Potpourri Jars
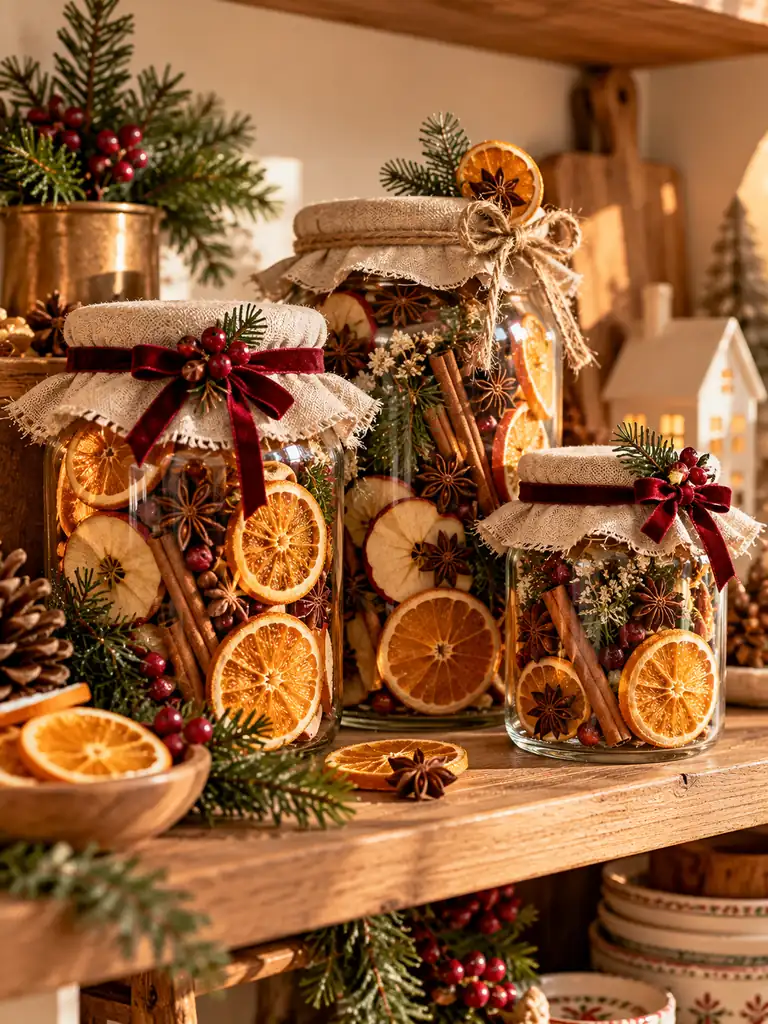
DO:
- Use completely dried orange and apple slices to reduce moisture.
- Combine citrus with cinnamon sticks, star anise, and whole cloves.
- Choose clear jars so the natural colors remain visible.
- Add a fabric lid cover and a simple ribbon for a finished look.
DON’T:
- Store fresh fruit inside sealed decorative jars.
- Add damp greenery that could develop mold.
- Overfill the jars until the ingredients look crowded.
- Use scented oils without checking their compatibility with the materials.
Layered dried ingredients create a decorative arrangement that looks like a carefully prepared holiday gift. Alternate orange slices with cinnamon and star anise so the different shapes remain visible through the glass. Add a small handmade tag for gifting. Keep the jars decorative rather than edible, and store them in a cool, dry place.
Luxury Look Christmas Gift Tags

Cost: Very low using cardstock, ribbon, and basic craft supplies.
Time: Around 20–30 minutes for a set of 10 tags.
Skill Level: Beginner-friendly.
Best For: Christmas presents, gift baskets, homemade treats, and holiday packaging.
Thoughtfully finished gift tags can make even simple wrapping paper look like premium boutique packaging. Cut thick cardstock into clean rectangles, circles, or traditional tag shapes, then punch a small hole near the top. Add a narrow velvet ribbon, a tiny gold detail, or a delicate border using a metallic marker.
Stick to two or three complementary colors, such as ivory, kraft brown, and champagne gold. Leave enough blank space for names so the tags remain practical as well as decorative. A coordinated set gives every gift a polished finishing touch.
Conclusion
Creating an elegant holiday home doesn’t require a big decorating budget. These Dollar Store Christmas Crafts show how simple supplies, thoughtful color choices, and a few creative touches can turn everyday materials into beautiful seasonal decorations. Start with one project that matches your style, then experiment with different textures and finishes as you go. Save this article on Pinterest so you can revisit your favorite ideas when you’re ready to craft. Share it with friends and family who love affordable Christmas decorating, too. A little creativity can make your holiday home feel extra special!